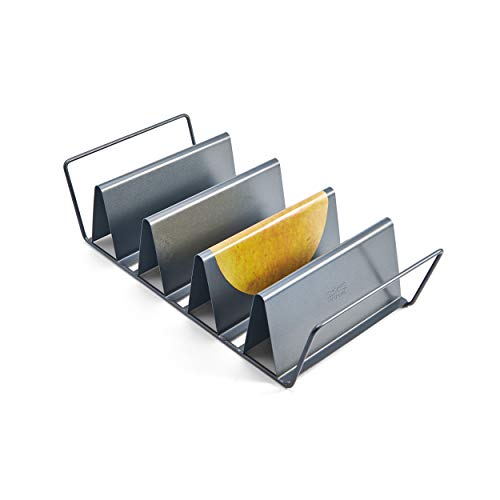
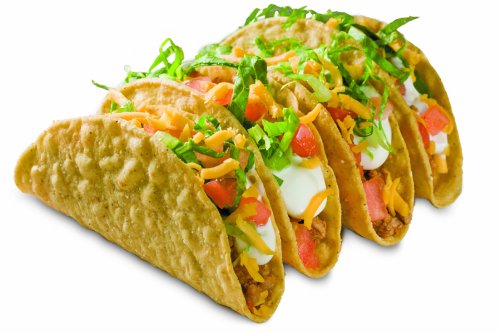
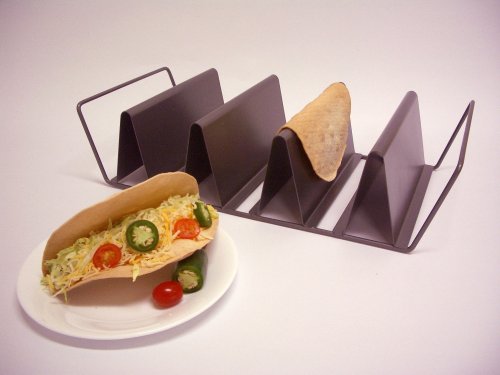
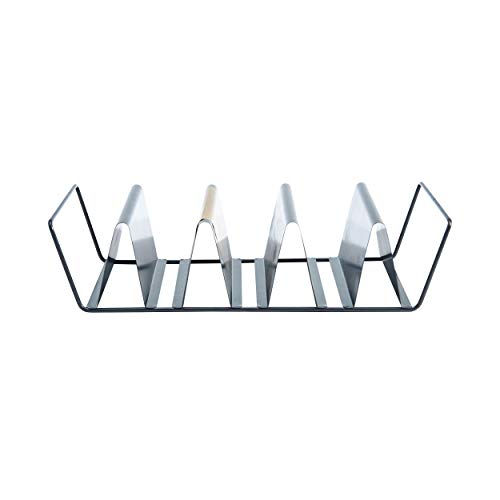
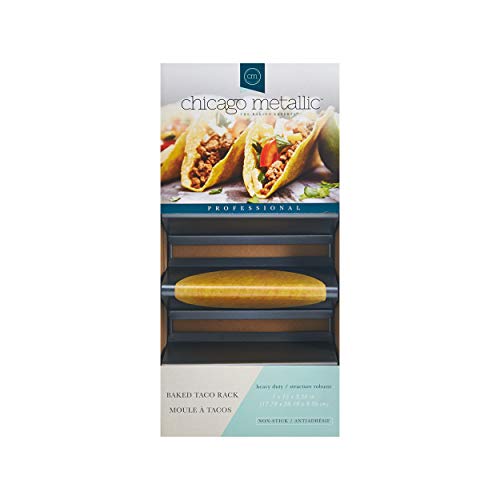
- CREATE THE PERFECT HARDSHELL TACOS: The Chicago Metallic Taco Rack can used to bake the perfect homemade corn or flour tortillas and can also be used to serve fresh made tacos.
- SUPERIOR HEAT CONDUCTION AND EVEN BAKING: This pan is made from heavy-weight aluminized steel for superior heat conduction and even baking.
- NON-STICK COATING: This taco rack is silicone based and has a non-stick coating for ease of baking and clean up.
- MEASUREMENTS: This taco rack can bake up to 4 shells at a time; measures at 15" x 7".
- DISHWASHER SAFE: This pan is dishwasher safe, however hand-washing is recommended to extend product life.
-
Information
-
Twitter
-
Pinterest
-
Youtube
-
Facebook
Bobby Degina
Love it for making keto taco shells!
I use mine as a form for making keto taco shells out of cheese. I bake the cheese in the oven on parchment, then transfer them to the rack on the counter to form the shells and cool. Works perfect!
Deanne Robichaud
Best taco shells ever!
I love this product! It took a couple tries to get it perfect though. I found that if I microwaved longer than directed, the tortillas folded better on the rack, which made all the difference. I use thirty seconds for thin tortillas. The bake time is right-on. Do take the time to read the directions. If you are looking for an easy and delicious way to cut down on oil, this is it. If you have a big family or if you are having a party, get two.
Sanam Shaikh
Easy to turn corn tortillas into taco shells!
I wanted this item to make taco shells from corn tortillas. They are very low in sodium and I really can't have the flour ones anymore due to their sodium count. Using the corn tortillas while they are room temperature works the best. I tear off two paper towels from the roll leaving them connected, soak them with water and wring out lightly. I then lay the paper towels out like an open book with one towel covering a small plate. I stack four yellow corn tortillas in the middle and flip the second paper towel over the tortilla stack, folding edges under the tortillas to form a sealed pocket. Steam in the microwave for 20 seconds or so. When you remove them from the steaming pouch, if they are not floppy enough to lay on the metal taco mold so that they cling to both sides of the metal with no gaps, then you need to steam them longer. Depends on your microwave and the temperature of the tortillas. If you pull the tortillas from the refrigerator and do not let them warm to room temp you are going to need to steam them twice as long. Once you figure out the number that works for you through trial and error you should be all good. I put these in a 375 degree oven for about 8 minutes with my oven. Basically once they start to get golden brown at the peak. I don't spray oil or anything. Delicious shells and so nice to be able to make what you want and not have stale shells lying around. Again, you must steam the tortillas to be floppy and lay perfectly on the mold. If they don't lay on the mold they will not stay on the mold and will fall into the oven. Proper steaming is the key.
Deana Williams
Option for variations in one baking.
A member of our family doesn't like coconut, so I was wanting to make half with and half without. I looked on Amazon and sure enough found a 'split decision'! Love it! Have a lot of ideas to make use of 2 pies in one.
Rick Omeasoo
I wasn't sure this was going to work so well ...
I wasn't sure this was going to work so well, but it really did! It was just the two of us for Thanksgiving, so I didn't want to make too many pies. Instead I used this, making half apple, half pumpkin. They were delicious!
Angela Akenson
Viva la Taco Rack
Since I like to cook Mexican and hate to use ready-made anything, I rarely used corn tortillas. I decided that to break that cycle, I'd have to find a way to bake a bunch of corn tortillas at one time, since it takes too long to produce them in any quantity when we have more than two people dining. I ordered two of these racks and it was the answer to my problem. After I have formed the tortillas, I spray the racks with a little cooking spray and bake them in the oven until they are crunchy. They come out hot and pliable enough not to shatter when you fill them. Sometimes, I add some sea salt when I bake them. I know other people simply hang them through the oven racks, but they seem to be a little to closed to fill easily. These racks are built very well and I'll use them for many, many years.
Nunik Milagros Bekasi
Perfect for Keto
We make our cheese shells for tacos and use this as a form. Cook the cheese in small mounds on parchment paper and cookie sheet then carefully lay them on form and let them cool. Then fill with your favorite taco fillings. The large size makes it easy.
JUlz QuiNonez
Perfect pie pan
Well made, heavy non-stick pie pan in a protective box. Has a separate divider so you can make two different flavored "half" pies at the same time, or take the divider out and use as a standard pie pan. What a great idea! Spouse wants an apple pie, but you want peach? Only have enough filling for half a pie? Don't want a ton of leftover pie? Use this pan! I made scalloped potatoes in it. Ate half, and froze other half for later.
Serenity Nicole
A MUST but!!
This pie dish is PERFECT for a small family. I like that I only need to use one pastry pie shell as I can fold it over to truly make half a pie!
Amyy Rattss
Great idea
Love this pan. Since there is just two of us, I can make 2 different pies and freeze one while eating the other one. Great idea for small household.