


- Designed for professional use, the Heavy Duty Circle Cutter will make clean cuts from 1-3/4 to 7-7/8 inch diameter
- The tempered steel body features marked graduations on the beam for fast measurement and application
- #55 Heavy Duty Circle cutter is designed with a 1/2 shank for drill press use only; Maximum safe speed is 500 RPM
- This round shank circle cutter is great for making smooth cuts through most materials, including wood, composite, sheet metal and more; Shank is 1/2 inch round
- All adjusments are made with a hex wrench which is included; Replacement blade is General Tools Model # 55 Blade, replacement drill is General Tools Model # 5/6/55 Drill
-
Information
-
Twitter
-
Pinterest
-
Youtube
-
Facebook
Steve Morrin
Well made tool.
Gets the job done. The only issue I have is that the smallest circle it can cut is still a little large for my needs...but i have no one to blame for that other than myself...the description clearly stated the smallest and largest circle/hole this tool can cut. As others have commented on, the way it "swings" while cutting a circle (chucked up in the drill press) can a little nerve racking. When cutting or drilling using other types of bits (drill bits, Forster bits, paddle bits, holesaws, etc...) the cutting edge of the bit generally rotates around its pivot/pilot hole point. On this cutter the cutting edge "revolves" around point/pivot. Basically all this is to say just hand rotate the chuck before turning the drill press on (to see the actual swing of the cutter tip and adjustment arm will travel)...this will be especially important the smaller you make your circles. Bottom line: its as safe to use as you make it.
Jeff Hart
Fantastic product, but plan ahead or you'll be sorry!
PRODUCT REVIEW: I used this to cut plastic rings (7 1/2" outside diameter, 6" inside diameter) out of 3/4" thick, heavy kitchen cutting boards to be used as surrounds for marine speakers. This required two cuts which sounds easy but I wish I had this advice in retrospect. Before I begin with the advice, let me say this circle cutter is EXCELLENT! It's HEAVY DUTY, SHARP, but does make an ungodly whirlwind of shavings from whatever your cutting so lay a big plastic tarp down before you start your first cut and be sure to limit your drill press to no more than 500 RPM. Now the cutting advice. IMPORTANT CUTTING TIPS: First, consider the width of the blade. When you're cutting OUTSIDE a circle-shaped line be sure to ADD the blade width to the width of this cutter. When you're cutting INSIDE a circle-shaped line, be sure to SUBTRACT the width of the blade from the circle you want to cut. If you forget this or do this backwards then your circle will be 1/4" larger (or smaller) than you intended. Second, select your cutting method and consider carefully whether your cutting RINGS or CIRCLES. You'll be able to cut a perfect RING with this tool but if you're cutting CIRCLES you'll have to choose between having small holes in the middle of your work product or a slight lip on the outside edge of your circle. WHY DO I NEED TO CHOOSE - I JUST WANT TO CUT A SIMPLE CIRCLE?! The reason you cannot have a perfect circle cut is because it's impossible to secure both the INSIDE and the OUTSIDE of a circle at the same time using this type of tool and a drill press. If you just secure a work piece from outside the circle and try to cut all the way through you will find your circle breaks from the work product when you are just about through to the other side and the circle will SPIN WITH THE DRILL blade. You'll also have a GIANT LIP on the outer edge of your work product and you'll be scratching your head trying to figure out what went wrong. So select from one of these methods (I prefer method B for circles and you MUST use method B when cutting rings): CIRCLES: Method A: Secure your work product from OUTSIDE the circle and simply cut 1/2 way through one side, flip it, then cut 1/2 way through the other side. PROS: Easiest method to use, will not leave holes in your finished circle CONS: This will result in a small but distinct "seam" in the middle of your work product. Your outer edge will also be slightly rounded. It's simply impossible to perfectly match your cuts after you flip your work piece so your seam size will vary. Method B: Drill 3 screws through the center of your work product (spaced in a small triangle pattern) and into a piece of wood about 1/2 inch thick (secure your work piece from OUTSIDE the circle too). Begin slowly cutting the outer ring and cut ALL THE WAY THOUGH the work product until you're into the underlying wood. PROS: You'll have a nice, clean, flat outer edge on your circle CONS: You'll have 3 small screw holes in the center of your circle that you'll need to fill. WARNING: Don't forget to back what your cutting with a 1/2" piece of wood and make sure your 3 screws go all the way THROUGH the work product into the wood behind it securely. RINGS: Cutting Rings is the same as circles, but you *MUST* use method B. Also be sure to cut the OUTER ring first and then progress to the smaller INNER ring or you'll have to scrap it and start with a new piece. PROS: Perfect rings, both inner and outer edges CONS: Hope those tips are helpful to someone...
Crystal Morris
I've only made one test cut and it worked fine. The main reason I'm reviewing is that before ...
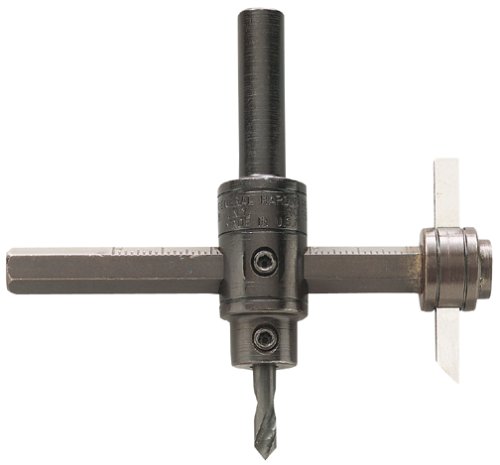
I've only made one test cut and it worked fine. The main reason I'm reviewing is that before ordering I was concerned about the potential for the main set screw to loosen during use and fling the entire cutter arm away at considerable velocity. However, there is a stop at the far end of the arm which isn't visible in the product pictures, so my concern was unfounded.
Kara McKinney
CONSIDERING THE LOW COST, THIS IS "PERFECT"!!
I needed a "one-time use" tool, to cut about 6-7 holes ranging from 2-1/2" to 3-3/4" diameter on clear 1X6 pine. Out of the box, I eyeballed in a radius of 1-3/4" to get a finished hole diameter of 3-1/2". The actual diameter that I got after drilling, was about 0.020 thousands of an inch over my 3-1/2" needs. For those of you that aren't familiar with decimals....... 0.020" is a wee bit smaller than one half of 1/16" of an inch. Well within my needs! In decimals, 1/16" = 0.0625, and one half of a 1/16" [aka: 1/32"] = 0.03125.........so, 0.020 is "dammmmm gud!" Needless to say: use a drill press, use a scrap piece of wood under your drilling surface [your project], clamp securely w/2 clamps, and by all means......run the drill speed NO FASTER THAN 300 RPM. Also, press down on your surface verrrrry slowly, and gently. For example, it took about 6-7 minutes for me to drill thru that 3/4" thick pine [soft wood]. The bit didn't: smoke, get all that hot, and for your trouble of going slowly, you end up with a very smooth cut surface, and very light dusting from the cuttings. Push too hard, and too fast....will get you in trouble. Jus' take your time!!
Bunny Bugg
Great tool and should last forever
I got this because I had an issue with a Freud hole saw that I got here on Amazon (and they made it good). Decided to look around for something else and bought this. I'm glad I did. This is a solid, heavy product that should last a long time. I’m using it to cut Plexiglas on my drill press. I’ve also used it to cut some plywood and it works fine for that too, but be prepared for some smoke. :-D This is a slow-speed cutter with a max safe speed of 600 RPM, and you DO NOT want to use this on a hand drill. It will get away from you and hurt you or someone. So anyway, it’s good overall and I’ve been pleased. It adjusts by loosening an Allen screw and moving the cutter tool in and out of the bit. It tightens securely, and you can also reverse the cutter tip – as I did – for cutting circles instead of using it as a hole saw. Works just fine. The cutter is just a piece of tool steel sharpened with a cutting profile. That’s great because it means I can resharpen with my CBN wheels, and this thing will probably last forever. I almost gave it 3 marks because the scale on the tool is off, but then I remembered that I reversed the cutter. If you do the same, remember that the scale will be off by the thickness of the tool.
JUlz QuiNonez
very nice hole cutting tool
First the obvious. This is not to be used with a hand held drill although I am sure there will be those who either miss that or will attempt it anyway. If you are ok with a crappy hole that takes an hour to drill but much less time to remove most of the flesh from your hands, then give it a shot. In a drill press, as it is supposed to be used it is a great hole cutter. Setting the drill press at 350 rpm and first starting on the back of the piece and then continuing after three quarters of the way through on the front, I could not be happier. I drilled a 4" hole for a dust port for a router table through 3/4" melamine and I was done and attaching the back of project in two minutes. The drill bit and the blade are both replaceable as well as can be resharpened when needed. Allen screws make adjustment a piece of cake. Read the directions and... did I say don't try this cutter with a hand powered drill?
Seth Wall
General Tool 4 7/8 Circle Cutter
OK, real quick; I’ve got over 23 years as a first class job-shop, journeyman and production machinist and in that time I had owned several versions, (light & heavy duty), of General’s circle cutters. Often, (when the time and the job permitted), we’d make many of the tools that fell in the “circle cutter category” such as screw extractor’s, fly cutters, etc. The ‘actual’ Tool Specs: Further down, I note that several of the dimensions regarding this tool are conflicting with specification references listed at the bottom of Amazon ad page. I explain this in more detail after the basic review, (“Amazon ad spec conflict”). So these are the ACTUAL measurements I took directly from the tool I received: Chucking shank dia: .373 (3/8) Cross bar Dia.: .437 (7/16) Cross Bar OAL: 3.032 (3 1/32) Main body dia. (max): .747 (3/4) Main body OAL (including pilot drill): 3.460 (59/128) (w/o pilot drill): 2.345 (11/32) Pilot drill dia.: .25 (1/4) Pilot drill OAL: 1.504 (1 ½) HS Tool Steel cutter: .187 x .177 (3/16 square) HS Tool Steel OAL: 2.325 (2 21/64) *These measurements are subject to variations from tool to tool dependent on the post-process working tolerances. However, the working tolerance differences would be negligible. Construction: The Crossbar has a flat-bottom, 5/32 wide, groove milled along its length to permit a good , tightening surface for the set screw when making cutting diameter adjustments. Unfortunately, this groove can, and will affect the tool steel’s cutting approach angle and if milled incorrectly and without holding tight tolerances, it can influence the cutting tools approach to be ‘ahead of the centerline of the tools drill point centerline. In wood, this may not be such a big deal, but if cutting metal, the tool will be subjected to massive chatter problems, heat and wear. If you don’t know what you’re actually dealing with, it could even cause the tool to kick back and/or break. ALWAYS WEAR safety glasses when using this tool. (really, you should wear safety glasses when running any kind of power tool, period.). Performance: Most circle cutters of this kind really should be used on a drill press or milling machine. Someone who is experienced with the circle cutter and a hand drill can certainly get what they want from a circle cutter of this kind. However, if you’re planning to cut the material you’re not familiar with, such as mild steels, using a circle cutter and a hand drill can be very difficult if not dangerous. If it’s at all possible, use a drill press even if it means having to remove the part from its location in order to put it on a drill press table. Also, refer to the machinist handbook for your speeds and feeds, (cutting surface footage), if you plan to cut steel or iron and haven’t an advanced knowledge or experience with that material. Frankly, for most uses such as cutting holes in plywood so that a cable can be passed through it, or cutting out round disk shapes from common woods and plastics, this tool will do very well. But Circle cutters come in many different quality levels and of course, if you plan to do a lot of repetitive work such as sheet-metal cutting, (and no punch press is available), you really need to get a much higher quality cutter than this. Rich Amazon ad spec conflict: The General’s light duty version really isn’t much different than their ‘heavy duty’ model. However, their Amazon Ad regarding the tool’s specs are conflicting with themselves, (Product Description section titles listed near the bottom of the Ad page). Example: “From the Manufacturer”: “…This tool has replaceable 3/16" high speed steel bit and replaceable 11/64" pilot drill…”. Then “Product Description”: “…Replaceable 3/16" High Speed Steel Bit & Replaceable 11/16" Pilot Drill…”. An 11/64 drill diameter is .172”, (rounded to the nearest of 3 places after the decimal). A 11/16 drill diameter is a whopping .687”! We’re talking about a difference of 33/64, (.515”), between the two! Typically, a circle cutter tool is used to cut a hole, thereby eliminating any concern for the tool’s pilot drill diameter. But there can be many instances when the specifications of the pilot drill diameter can be, and is, important. Circle cutters like this one can be used to cut out blanks where the OD of the blank is the target dimension. In my case, I needed the circle cutter to make a 2 ½ inch OD by 2 1/8 inch ID x .060 thick ring from a flat piece of PTFE material. But what if I needed the ID to be no larger than 3/16 of an inch? Despite the conflicting specs, I bought the tool anyway because as I said, I’m familiar with General and their tool’s basic design and dimensions and I knew that the tool would work for the project I planned. Still, it bothered me that they dropped the ball on such a potentially important dimension specification, and that it wasn’t the only example.
Brad Ailani Bradshaw
A bit scary but worked well
I needed to cut some nice round holes of a weird diameter in a plastic tub, for some ducting. This did the trick. It isn't balanced, and as the instructions say, you must absolutely put this in a sturdy drill press or you'll very likely injure yourself. Solid clamping will also be important. This makes it rather challenging to use it on large objects, because they have to fit in the drill press, along with the clamps. It depends what you want to do but I'd only recommend this solution if you have access to a large drill press.
Gurung Aru
A handy tool for cutting holes in most materials
If you need to cut smooth, consistent holes in most non-ferrous, non-ceramic materials, this is the tool to use. It's extremely well built, with a durable design, and it cuts cleanly and easily. The hole diameter is easily adjusted and the cutting tip is replaceable. Note: As others have mentioned, only one side of the cut is clean and fairly smooth. This means that you can cut out a disc with a clean edge but leave a rough-edged hole in the material, or cut a clean edged hole and have a disc with a rough edge, but you can't get clean edges on both the hole and the disc of cut out material.
Qazitahseenshafique Mahesar
Great cutter with helpful information you can use.
I few things to help others with this really good circle cutter. The allen wrench that comes with it is metric. So unless you have metric wrenches. SAE will not fit. Another thing is the blade will need to be resharpened after a period of hard use. The router plate I was cutting a hole in was made of a phenolic material. I found that keeping a small container of water to dip the cutter in extended the time between sharpenings Replacement blades are available, but I found (if you are able to grind your edges) 1/4 key stock from McMaster-Carr........ 8630 Alloy Steel Machine Key Stock Oversized, 1/4" x 1/4", 12" Long .... part # 99020A425 at a cost of $1.92 was the best way of replacing the blade. You can get at least four blades out of a 12" length. You will have to grind them to shape using the old blade as a reference. Best to order several 12" lengths because shipping is higher than the part. Update: Since the key stock was inexpensive I bought several different types to see which kept it's sharpness longest. Here is my opinion on which seemed the best. The Alloy Steel Machine was the least expensive at $1.92 for a 12" piece. It appears to be closer to the what the original cutter in holding up to wear. The Spring Steel Machine Stock part # 98535A150 at a cost of $3.23 for a 12" length and a Rockwell min hardness of B-91, in my opinion is worth the cost in a replacement.. Holds it edge longer, but still like any other steel. You have to keep water close by to keep them cool while cutting. The Stainless Steel Key Stock 98493A136 at a cost of $4.91 for a 12" length may be the hardest to grind to shape even though they don't give a min. .ardness for it. I just made a bit out of it and used it on the last disc I made. It held the edge great, but I only used it for a short time to finish a cut, and haven't used it since. I use a belt sander upside down in the top of a 5 gal. bucket as a base to finish shaping my bits shapes. To polish them to a extremely sharp edge I use stainless steel compound on a tight cotton stitched disk on a buffing grinder. The last buffing part isn't necessary to get an edge sharp enough to make a cutting edge since a sanding belt of even 120 grit on belt sander will give you the edge you have on the original blade. I finish off now with a 400 grit on the belt sander, but only had the 120 grit on hand in the beginning and it did just fine. I will try and download some pics later on when I get a chance to help understand the process I used. Rachels Dad