


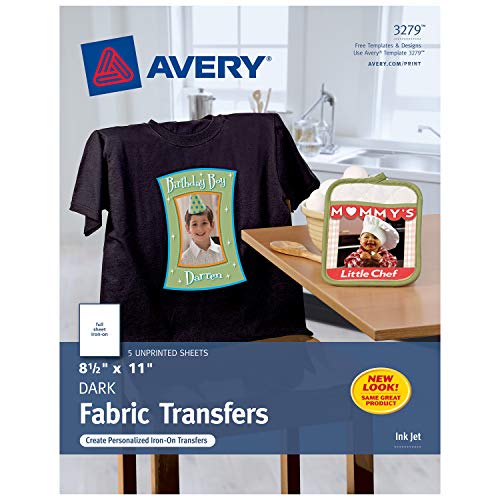
- Designed for use on dark colored 100% cotton blend fabrics
- Easily customize these t-shirt transfers with free holiday templates and designs at avery.com/transfers
- Long-lasting color with no cracking
- Create iron-on transfers using an ordinary clothes iron and your ink jet printer
- Personalize and print store-bought quality T-shirts for any occasion including Halloween, Thanksgiving and Christmas
-
Information
-
Twitter
-
Pinterest
-
Youtube
-
Facebook
Crystal Morris
Great product! A few tips...
So, I was very worried after reading some of the reviews, but I'm very pleased to say that I used these transfers to make a tee-shirt as well as a baby onesie and they both came out beautifully on the first try. Here are a few pointers that might help you along the way: - If you have sweaty hands, wear gloves! I'm 8 months pregnant and sweaty as can be (pregnancy is gross), and it'll ruin the image so be sure to wear gloves to avoid fingerprints on your fresh design. - The backing is TOUGH to remove! So before you fully cut out your design, use the white/unused part of the page to get a corner started to separate the backing from the image- then pull enough away so some of your design is separated from the backing- it's not sticky on the bottom or anything, so there's no risk to separating the backing early. - Press firmly and longer than the recommended time - I did a minute or two more for each pattern, until I felt confident that it was piping hot and every inch had been sufficiently covered. I kept the iron moving the whole time though, I don't know if settling it in one spot would fry the image, so I wouldn't recommend it. - Get those corners! At my first pass, both designs had the tiniest corner popping up, so I simply put the tracing paper back over it and hit those corners again and they were fine. Overall I was massively pleased with the quality of these transfers and I'd use them again in a heartbeat. It was actually so easy, I'm already thinking of all the neat things I could do with the remaining pages...
Arslan Chaudhary
Saved A Project Online T Shirt Printers Could Not Handle
Problem: third grader wanted to do a piano/singing tribute to Bowie, and online printers would not print the design sought due to copy right, though we had modified some of the graphics. Their position was understood. Then I discovered the Avery transfer paper. I bought both the dark and the light color transfer papers not knowing which the little guy would prefer at the end. Here is the upshot, working with both the light and dark paper: • Wash and dryer dry your t shirt/fabric first. A shrunk fabric works best • the more time you spend prepping and the closer you follow the instructions the better your end product • don't be afraid of force (pushing down) and heat • Trimming the extra paper on the light paper minimizing areas that will be clear but somewhat glossy • Trimming the extra areas on the dark paper avoids transferring the color white to the fabric • Through trial and error I figured out it is better to avoid sharp corners to make them round, reducing the risk of corners peeling off • The side of the paper you print on is the white side for both dark and light paper, so make sure you know how to load the paper in your inkjet printer • Your final print area can be larger than a sheet as you can cut images/words from the paper and space them or use them elsewhere on the shirt (for instance, arm badges can be printed in a corner of the same sheet) Trick: • To avoid damage to the reverse side graphics, if you do a front/back design, use a large cutting board or a piece of flat wood slide it in the t-shirt that way the wood sits between the front and back. This also solves the issue of both sides of the t-shirt not being perfectly flat/ironed before you start Light Color Paper: • You need to print in reverse as the image is reflected back on the fabric. I used Powerpoint and flipped the images and writing and avoided the online Avery tool for doing so • As mentioned before, you don't have to cut very precisely as you only leave behind gloss/clear where you don't trim Dark Color Paper: • You DO NOT need to print in reverse • You need peel of the printed paper BEFORE initiating transfer with an iron -I wasted one sheet not bing careful • The portion you don't trim transfer as white and you can create a border, rough or smooth, as I did with the front of the dark t shirt • Peeling the transfer portion from the t shirt before ironing is difficult....I used tweezers and eventually I managed to peel off the backing • You use an included parchment paper over the peeled paper to press the image onto the fabric Final Impressions: • Don't expect professional grade printing • Recognize these are not permanent and are intended for fun and event needs • Mistakes and rough edges on my work is my own haste getting in the way This met my needs, to have a front/back t-shirt design on both dark and white t-shirts, using the appropriate paper for each color. **** UPDATE ***** Both the white and black t shirts have been washed about 15 times each by now. And, they still look very nice.
Jordan LovesteslaforEva Guy
Best Iron On Transfer Paper
I will be honest, I was completely skeptical when I first got it. Then when I printed out the image in the highest print quality, I was even more skeptical. The print looked faded and colorless. But... As soon as I put the iron to the pattern (over the tissue paper, of course), the colors popped, the pattern adhered very quickly and better than heat transfer vinyl. Incredibly impressed. I use heat transfer vinyls to make custom shirts and totes ALL THE TIME, and this was 10 times easier and longer lasting. Will repurchase over and over again! Printed with an HP Envy inkjet and cut out with a Silhouette Portrait cutting machine.
Senad Mustafovski
Great for lettering
Awesome. I did not print on the shirts, but rather laser-cut them to use as "jersey-style" lettering. Instead of an iron, I heat-pressed them for just under 30 seconds. They turned out awesome! After several washes, there is zero deterioration or peeling. :)
Bobby Degina
10 Stars.
This works GREAT ! If you want to customize your own t-shirt or clothing, this product by Avery will definitely do the trick. All you need is a Color Ink Jet Printer and an Iron. And obviously a Computer. Once you purchase this Heat Transfer paper, you go to Avery's Site for the Template design you want, upload your photo onto the template and print it out. It is best if you already have Adobe installed on your Computer too since the Avery site will more or less insist you save the file in PDF format. When you insert the paper in the tray, insert upside down like you would a glossy. The instructions are very simple to follow. After you've printed onto the transfer sheet, cut around it, getting rid of what you don't want ironed onto your project. Then separate the back of the transfer paper from the decal itself. lay the decal onto the project clothing. Then lay the thin sheet of document paper on top of the decal or transfer paper. Using a hot, but dry iron, iron it for several minutes. Making sure you iron it on a hard surface. Not an ironing board. I used a big wood cutting board. It came out perfect my first try. And honestly that's unusual. So that's how easy this is to do. You can customize just about anything you can print out. I'm very pleased with this product and wouldn't hesitate recommending it to anyone. You can see HOW To video's on YouTube also before you give it a go. My picture below is what I made and ironed on a t-shirt.
Lakeshia Davis
DO NOT MIRROR IMAGE TO PRINT- READ THIS FIRST!
These transfers are excellent BUT READ THIS REVIEW AND INSTRUCTIONS !!! I destroyed many Shirts and transfers before I figured out that dark T-shirt transfer images don’t have to be reversed and you have to place a sheet of the included special paper in front of the iron. Therefore use the photo paper setting on your printer... DO NOT USE THE IRON ON TRANSER SETTING BC IT MAY MIRROR IMAGE THE final. I recommend testing the image on a plain piece of paper first then putting your T-shirt on and placing the paper on your shirt to test if image size is perfect. I do 2 T shirt images per page bc one 8.5x11 is too big. My photo of 4 shirts only took 2 transfers (especially if for a small or kids not XXL). ALSO TAKE THE PAPER BACKING OFF THE TRANSFER BEFORE IRONING! Put the T-shirt on look in the mirror and place it centered and mark with chalk or tape. Also I used a porcelain floor with a pillow case on top. Then I put the T-shirt face up with the image with the backing peeled off face up. Then you put the special paper on top and iron on high for only 1-2 minutes. Set a timer. Then I RECOMMEND HAND WASHING AND HANG TO DRY . Best of luck and have fun!
Katie-Lynn Arter
My favorite iron-on transfers
These are really great transfers. I bought the white shirt transfers ans the dark too and I prefer the dark. These come out with brighter colors. The way you transfer these require a couple more steps than the white shirt transfers but they come out brighter and nicer. One thing to pay attention to, whatever you print will have white on the background, such as I printed out someone's name and all around the back of the name was white because I left it that way. I didn't mind this, but you might. You can see this in the picture I posted. The picture I posted does not do the brightness and the color of the picture justice. It came out beautifully. These are quiet a bit more expensive but I think that if I use shirt transfers in the future I will use these, for sure.
Qazitahseenshafique Mahesar
Definitely a good buy!
I too was weary of using this as I make vinyl heat pressed shirts and usually avoid ink jet transfers. I have to say I have amazing results. Keep in mind that I have not washed the items yet as they were services for other people. I also use a heat press, so I don't have to worry about pressure. For those interested here are some tips I can provide for great results. *always print the BEST quality but make sure you list your paper as a matte product. It lays the ink accordingly. *I realize this is a reach for the common user but if you have any die cut machine that will, use it to trim! I used the "print then cut" function on mine and it eliminated all the white space for me. This can be done by hand with an exacto pen for similar effect. *if you followed instructions perfectly and your graphic is still slightly sticking to the paper, use a BRAYER. I pressed my shirts a few times and some spots still sticking. I grabbed a brayer I have and smoothed over the paper then gave a final press. I then smoothed it with the brayer again right after, then peeled. No problem! *I prewashed the garment and skipped fabric softener. *I preheated my garment to make sure all moisture was removed. Those were the only noteworthy parts of my process and experience. Hope this helps others!
Anna Dove Frankos
Very pleased!
When I first started reading the instructions I found them a bit confusing, especially when they indicated that I did not have to reverse the picture/writing. Mostly my confusion was associated with the fact I had to separate the back from the print which was tricky and lay it out with the printed side up and the tissue on top. I have a heat press so I had to call Avery and get instructions for temp/time etc. which they gave me. So I did as the instructions indicated on a "trial" T-shirt I had purchased for that purpose and not expecting things to turn out right. I'm still not quite sure how this worked but it did and beautifully. Somehow, even though the printed side is up, it went through and adhered to the T-shirt correctly and the colors were bright and clear. So, you don't have to reverse the print via your computer or printer...just create, print and press. I can't say how everything works with an iron, but with my heat press at 320 degrees for about 37 seconds w/medium pressure..it was perfect. I was printing on a black, pre-shrunk woman's cotton T-shirt.
Charlotte Arp
worked well, no damage after washing
I followed the instructions (prewashed shirt; ironed on a table, not an ironing board; cut the outline in curves as much as possible) and the image transferred on perfectly. It has been worn already and went through a full wash/dry cycle with no cracking, fading, or peeling. No idea how it will hold up over time, but I am very pleased with its performance so far. Cheaper t-shirt transfers have cracked after the very first wash on me before. I got the dark t-shirt transfer even though I was using it on a white t-shirt, because it was slightly higher rated than the light t-shirt one and I had read that the colors were more intense. The colors did look very vibrant. Be aware that you will have a white border/background anywhere your image is not printed. The transfer will have a sort of flexible plastic feel to it, it does not dye the fabric itself but still sits on top, which is typical for this type of printable transfer.