
- Easy to use
- Easy clean up with soap and water
- Perfect for kids
- Even dry this glue washes out of clothes
- Water based-non-toxic
-
Information
-
Twitter
-
Pinterest
-
Youtube
-
Facebook
Lakeshia Davis
Five Stars
Love mod podge is a great product for all different ideas and crafts. My son has recently used mod podge to redo goose decoys that are over twenty to thirty years old. He reprinted them and used this over top of it to help protect the paint when they are sat in the field or even the water while hunting. It worked prefect and he did a amazing job in doing it. He is teen and for the job he did I couldn't have done better. I was very impressed with it. Will try to see if I can post pictures of it once all are done and dried. I will be a mod podge buyer for life that's for sure. Have never come across a product they make that doesn't preform to exactly what I had hoped for. Usually it's over what I had hoped for. As a artist and crafter I can not complain about a single thing about this company or products. Also I will be back to buy more we use them in all different art projects we do. I owe quite a few of different ones and still have a few others I want also. Highly recommend these products.
Pankaj Kumar
Dries Completely Clear and Bonds Well
Container is a nice size for the hand to fit around. Easy to open and reopen. Has a light unfavorable scent at first. Easy to apply with stipple brush or foam sponges. Cleans up easily while still wet. Cleans up with a bit of elbow grease after dried. Washed out of material completely after getting some on a hand towel. Dried completely clear over, custom ink text, scrapbook paper transfer, raised media and embellishments (see attached image). Worked well with scrapbook paper to wood DIY project. Have used this brand for years and will use it for years to come. Have recommended to friends and family for years and will continue to do so.
Elizabeth Navarro
Awesome deal on a great product
I bought the 16 oz, which seems like a huge amount, but I actually use a lot on my projects, especially the sealing layers. I am very pleased that the container comes sealed, so it stays fresh until I'm ready to use that bottle. I've included a picture of a coaster I made with wooden buttons that I sealed with a very thick layer of matte Mod Podge. I love the natural look of the matte formula. It also seems less sticky than the glossy, when all is said and done. (Of course, you can use an acrylic sealer, I understand, to get rid of any tackiness, but I haven't tried that yet). I'm new to the Mod Podge scene and I am really loving how well the product performs and the versatility. It is very forgiving (hard to make mistakes) and a whole lot of fun. I have a new obsession!
Cheryl Warren
Five Stars
Love mod podge is a great product for all different ideas and crafts. My son has recently used mod podge to redo goose decoys that are over twenty to thirty years old. He reprinted them and used this over top of it to help protect the paint when they are sat in the field or even the water while hunting. It worked prefect and he did a amazing job in doing it. He is teen and for the job he did I couldn't have done better. I was very impressed with it. Will try to see if I can post pictures of it once all are done and dried. I will be a mod podge buyer for life that's for sure. Have never come across a product they make that doesn't preform to exactly what I had hoped for. Usually it's over what I had hoped for. As a artist and crafter I can not complain about a single thing about this company or products. Also I will be back to buy more we use them in all different art projects we do. I owe quite a few of different ones and still have a few others I want also. Highly recommend these products.
Géraldine Poulin
Great for Fake Canvas
Used this to make Fake Canvas. They ended up looking a lot like the Mounted Photos you get from Walmart for $30+. I used it with Elmer's Foam Boards, 20 x 30 Inches, 1/2-Inch Thick, Black/Black, 10-Count (951300). First I glued the photo onto the board with the Mod Podge then using a roller went back over the photo to give it texture. In the photo you can see them hanging on the wall in my bedroom.
Mayodele Mosuro
Perfect for saving finished puzzles to frame
I use this as a puzzle saver. It is perfect for that. This comes in different sheens, but I like the matte version for puzzles I intend to frame. This product is a bit thick, and will leave brush marks in the surface; however, I have found that diluting it to a more liquid consistency creates a smoother surface. I put parchment paper (kitchen variety) under the completed puzzle and "paint" the surface with Mod Podge. Once it is dry (it is white and dries clear), I do another coat. After a total of three dried coats, I flip the puzzle over and do the the back. The multiple coats will seal the puzzle piece seams in front and prevent leak through when you do the back. It looks great and creates a frameable piece of art. The Mod Podge dries perfectly clear and does not yellow. It is great stuff. Don't worry if it looks like some puzzle pieces absorb too much moisture with the first coat, and darken at the edges. When the glue dries, the puzzle pieces do too and the dark edges go away.
Emellyam Lynne
Easy to achieve great results
I used this Mod Podge to help grandchildren with special decoupaged gifts for their parents. Toddler babies made finger paint coasters and a five year old decorated glass candle holders with tissue--both were easy projects with Mod Podge and fairly quick. Obviously, I did a lot of the work for the babies, gluing their paintings onto tiles and covering them with 5 layers of Mod Podge. The five year old managed her project with much less help. One caveat: I think many projects would be most successful if followed up with a clear acrylic sealer (Mod Podge has one)--just to give them extra protection. This does require you to allow the Mod Podge to "mature" for 30 days or so, which requires some planning. I'm so happy with the results (as are the giftee parents) that the extra wait time was definitely worth it. Since these projects were finished so easily, I've also Mod Podged a pillbox and a soap dispenser, and am poking around to find other things to decorate. Lots of fun!
Tammy O'Brien
Awesome Stuff!
Pat Huang
Good Stuff
I just recently learned about Mod Podge and I love it! I was tasked with trying to come up with a cute idea for my daughters gymnastics team. They got new warm-ups and red glitter back packs this year and we wanted some cute matching shoes. We originally thought about bows, but after watching a few videos and searching the web I decided to try to add glitter to some slide ins. Well I must say they came out great!! The shoes were on clearance for $3, I bought some Mod Podge, red glitter and presto - I'm the new Mom hero! Everyone loves them and just in time for our meet on Saturday!! How I did it: Used sandpaper to lightly sand the area of the shoe that I planned to glitter Placed the shoe on news paper Used a brush to put on a thick layer of Mod Podge Sprinkle the glitter onto the shoe and the Mod Podge Let sit for 5 minutes Tap the excess glitter off of the shoe Add another layer of Mod Podge to seal and keep the glitter in place Let the shoe dry over night
Jessica Turnage
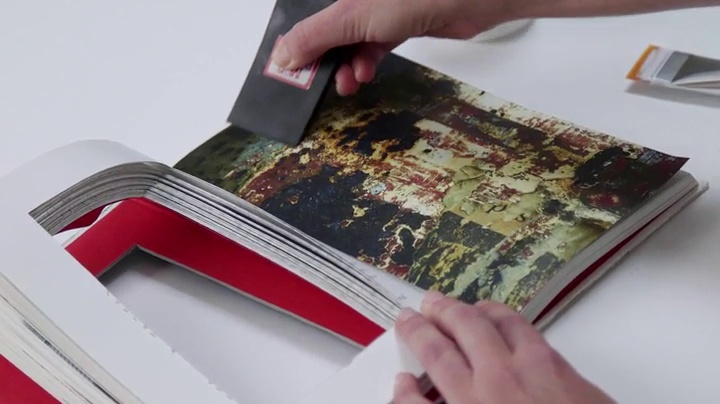
Goes on white, dries clear. Is water based and easy to use.
Everything worked out fine on my puzzle. I sloshed the material on with a paintbrush and used a plastic scraper (from the Dollar store) to smooth. Beforehand, make sure you run your scraper lightly over a piece of sandpaper to knock off any tiny edges to prevent streaks. Used wax paper under puzzle which worked out good. Try to lay out the wax paper beyond the edges of the puzzle to pick up any scraped off material. Have paper towels and water available to clean up any mess afterwards before it dries. Coated the front side once and using the paintbrush only, did the back side once. My puzzle looks beautiful. The matted finish of this product looks very good.