- Manufactured in Mexico
- Easy to use
- Highly durable
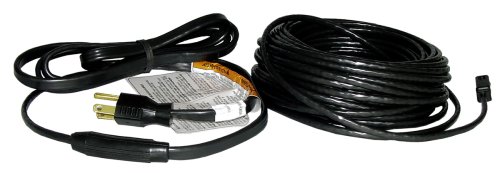
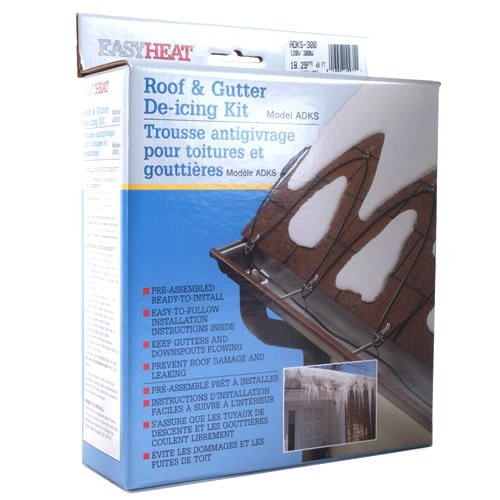
- Easy Heat ADKS de-icing kit keeps roof edges, gutters, and downspouts ice-free
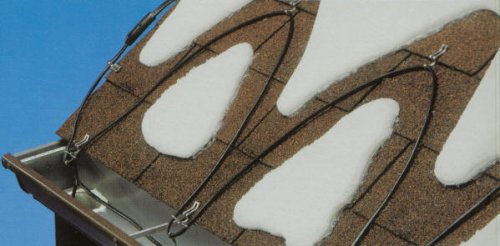
- De-icing kit provides uninterrupted path for melting water
- Versatile design adapts to most roof and gutter configurations
- Includes 6 clips and 2 mounting screws
-
Information
-
Twitter
-
Pinterest
-
Youtube
-
Facebook
Antoinette April Chase
Winter Must Have
I live at 7800 feet in the mountains of Colorado. This bad baby is a must have for our long winters and heavy snow-load. I wish I would have found them sooner! I have a few of these. Some are permanently placed (easily done with the clips included in the kit if you have a shingled roof) and some I keep free floating to wrap around the icebergs that form on some parts of my roof. For the permenent placements I focus on the valleys of my roof and the edges of a steeply sloping roof that I cannot walk on without fear of falling. Be aware of the lines when using a roof rake. For the icebergs, I wrap the cord around the bottoms until the heat from the cord cuts the ice away from the roof then I use pure man power to roll the boulder off the roof. One recent winter we had 6 feet in one night so don't think that I have been neglecting my roof and thus the boulders :) One caveat... they hog the energy so our electric bill skyrockets in the winter. I use the temperture plugs that turn on at 32 degrees and off at 45 degrees to cut down on the power bill. This means... get a size that will work for your space. Don't get a big one just because you would like to have some extra line on hand... the bigger it is the more costly they are to use. Also, test them every year, its not good to have a big snow and realize that one of them isnt working. Be gentle with the cables, no snatching or pulling.
Su San
Easy to install and works well
I purchased an additional one of these for the rear of my house. I had one cable each in both the front and rear gutters to prevent ice from building up, and they worked. However, the last winter in New England dumped so much snow that I decided to install the cables on the roof as well, to prevent any ice from building up there. Installation was easy. I have about a 31 foot/10 meter roofline, with an overhang of about 9 inches/25 cm. I clipped the cable three shingles up from the edge of the roof as the instructions say. Some tips on the installation: 1) I would wait until at least midmorning when the sun has been shining on the roof for an hour or two before you install this. I realize that it is hotter and less comfortable to work in, but if you give the shingles time to heat up they are more pliable and easier to work with. That way they don't tear when you are putting the clips on. 2) While you are waiting for the roof to heat up, spread the cable on the ground in direct sunlight. This will help to alleviate some of the natural coil of the cable. 3) When you are putting the cable through the downspout, it helps to tie a small stone to the end of the cable to give it some weight. That way it goes through the downspout easily. Eventually the weight of the cable will pull it through the downspout, but initially I had to use a weight. 4) Remove the warning label on the end of the cable that says 'Do Not Remove'. This label has nothing useful on it that a normal person shouldn't already know, and it gets caught up when feeding it through the downspout. That's it, it was pretty easy to install. My roofline is 31 ft/10 meters long, and it took about 2 hours to install the cable along the roof. That includes having to reposition the ladder several times since my roof is fairly high. I probably should have gone 4 shingles up instead of 3, but I think it will still work fine, based on how well the one in the gutter worked last year.
Harsh Mishra
Easy install- let's see if this cable is in for the long haul
Very easy installation. Product is well priced. Here are some tips I can offer to make sure your install goes smoothly: 1) make sure you plan out your configuration before ordering. This will make sure you order the correct length and will give you a road map when doing the actual installation. 2) make sure you use s putty knife or something similar to not only lift shingles for the clips but also to push the clips onto the shingle. This will prevent the tips of your fingers from getting raw by the end of the install. 3) uncoil the cable by turning the coil with both hands and laying the cable on the ground. Do not use one hand to unwind the cable while holding the coil with the other. This will make sure that the cable doesn't get twisted before you begin the install (and prevents a lot of frustration).
Димитър Райков
I bought this thing to get rid of the ice dams that were building up on our roof and so far so good let me just tell you completely happy
I'm going to go ahead and give this thing 5 stars it's already starting to snow here in Idaho. I bought this thing to get rid of the ice dams that were building up on our roof and so far so good let me just tell you completely happy. The only thing I didn't like about it was the clips that they send with you to clip things down to the shingle roof they don't work worth a damn I had to use you hook Staples and I tapped over the top of the wire to hold it down to the roof. If you do buy this product remember that like I said it doesn't exactly lock onto the shingle like it's supposed to you're going to have to go out and go get some of U hook nails
John Doyle
My 9 year old helped. Easy to do and it works!
Very easy to install. In fact my 9 year old daughter helped me up on the roof clip in the wires. I live in a high altitude portion of NEPA and I have a north facing valley on my roof that has given me a lot of trouble and water damage from ice damming up. Installed 200 feet of deicing cable along the metal flashing above the gutter, one line inside the gutter and two runs up and down the valley (I have copper flashing in the valley). There is no icing at all this year!!! Yup, I got my first electric bill since I turned on the easy heat and yes it did bump up my cost but for the 2-3 months I need to keep this on it's well worth it. The photo of the area just above the gutter is awesome. I think the flashing for the special no leaf gutter system enhances the efficiency which helps. It does look like one loop got pulled down a bit and a portion of the inside gutter wire popped out. That's a two minute fix. What you can barely see is the valley going up the right side is clear 6-8 inches up both sides. A small snow bridge is at the bottom but no ice has formed. This used to be a 3-4X a winter unpleasant 4 hour project that could easily have damaged the shingles as I would have to use a chisel and hammer to remove the 4-6 inch thick ice wall. Not to mention going out in 20 degree weather to work on this. I actually go out of my way to look out this window and appreciate a product that works.
Kim Losky
I did not run these like recommended along the roof in a up and down ...
Used these to deice gutters and downspouts this winter and the result is phenomenal! No more frozen downspouts and even melts the snow in and around the gutters. I did not run these like recommended along the roof in a up and down pattern, I just put them in the gutters and ran into the downspouts to the outlets. They are permanently installed and all I need to do is plug them in when it snows. Very happy.
Aroha Samuels
Easy Installation and VERY effective IF you take the time to install it right!
I put up a 160 foot run of this cabling last fall after dealing with a series of brutal heavy snow winters in New England which had caused me significant problems with ice dams and frozen gutters. Not knowing how effective they would be - I thought a test on my "nightmare" section of roof over my deck (which hardly ever gets sunshine in winter) would be worth trying. The installation was a breeze (and I am not a particularly handy guy) though I was careful to follow the instructions carefully. Key things to note are: * Measure twice - buy cable length once. They give great instructions on how to measure your roof - it's not just the length, but requires extra cabling for the ups and downs, as well as downspouts and gutters themselves. So take the 10 minutes to measure before buying. * Plan for where you are going to plug it in - Lay it out mentally ahead of time, because after clipping it all into place, wouldn't you feel dumb if you find yourself with the plug on the far side of the house from where you wanted it? * Put the clips in first - I did this, and then looping the cables into them was SUPER easy. Trying to put the clips in at the same time as putting the cable into them is a bit clunky and just inviting bundles of tangled cord. * Avoid an extension cord - They tell you this in the instructions - but if you have to use one, don't use your typical orange extension cord from Home Depot. Get a super heavy 10 gauge one to avoid overheating and minimal resistance. I installed mine on a nice warm fall day, and it went up in about 1.5 hour (which is about 30 minutes longer than it should have taken - I was being very very slow and careful). Our following winter was a doozy - at one point I had easily 3 feet of snow and ice on my roof - everywhere EXCEPT where the melt cable was. At the beginning of each snow fall, I turned it on, and left it on for 24 hours after the snow. It worked like a charm, with my gutters clear, no ice dams, and a happy me. While my electricity bill went up, it wasn't horrible and WELL worth the problem-free experience. I just installed another 160' run on another section of my roof that had problems and am looking forward to an even better winter this year.
Misty Rene Freudenberg
Works great and now I'm worry free about snow and ice on my roof
I was a little worried about this heat cable from some of the reviews but it works great. I have a roof with only a slight grade and had a lot of issues last winter (2015) with the heavy snow and lots of icing in northern NH. I had water leaking inside through the eves and a real mess. I bought the 200 ft. set and it was very easy to put down following the simple pattern shown in the instructions. There were more than enough clips and hooks to do the pattern I did covering 3/4's of the entire roof. They work great. I had them on before the snow fell and it kept the snow off. It snowed when it wasn't really forecast and I didn't have it plugged in. I plugged it in and within an hour the snow was all melted around the cable and then the clear area expanded from there. The water runs right off the roof and though it isn't as bad of winter as last year, I've had no water issues this year. It works so well I have no doubt it was handle all weather, which it has handle temps almost 20 below zero. The cable was not fragile at all and very simple to install. The only thing I needed to add was an extension cord to my outside outlet to plug it in.
Sieku Chiri Sambu
works great
I have had one of these de-icing cables on the front of my house for a few years and it worked great so I decided to add a few more around the house. I have never had a problem with ice dams but this seems like a pretty cheap precaution especially up here in NH. They provide you with plenty of clips to attached to the shingles and the process is very easy and is a DIY project if you don't mind being on a ladder. It only took me about 30 min. to install the cable. Just make sure you buy the correct length cable, the way to figure that is through some pre-planning. Take a look at the area you are planning to install the cable and take some measurements. You should have approx 2 foot loops about 16" apart, so if you have a 30 length of roof you want to cover your already at 60 ft., you also need to figure in extra cable for a double run in the gutter (if you have one) so if you add the 30 ft. gutter x 2 that's another 60 ft. Then add the downspout, let's just say that another 15 ft. x 2 (need a double run for best results) that's another 30ft. So in total you would need a 150 ft. cable for a 30ft. length of roof with a gutter and a downspout.
Yolanda Renee Small
When installed correctly - A Simple and Relatively Inexpensive Solution
Our house was built in 1949 by a crazy person. There are so many weird areas between the first and second floor that we actually had one entire portion of the roof rebuilt just to prevent leaking two years ago. Our builder told us the only way to completely solve our ice dam problems would be to remove the second floor of the house entirely and rebuild. Instead we had a new roof installed, we had almost the entire roof covered in Grace Watershield and as a trial we put Easy Heat down the gutters on the backside of the house where the ice was the very worst. The first part of our winter was mild with 50 degree temperatures and hardly any rain, but lately it has been brutally cold with -40 degrees and two feet of snow on average and we have not had any ice accumulate. Zero ice. Usually at this point in the winter we would have two feet of ice in the gutters. Our garage, where we did not install Easy Heat has mild ice build up from the recent snow (photo attached) and the back where we have Easy Heat has water running out the downspout (photo). Some tips from the extensive amount of research that I did before we installed this product. First, we had an electrician come out and install a special outlet for this project. It was only about $100 and it has made the whole thing so much easier. Second, we did not install the tape in the loops on the roof like the instructions say. I did weeks of reading and YouTube watching and finally decided that simply running the cable once down the bottom of the gutter then attaching it to the metal posts on the top of the gutter was sufficient - that is two rows down each gutter - back and forth. (Remember we used to have enormous ice dams that leaked into our house and destroyed the ceilings in five rooms.) We made sure to run the cable all the way down the downspout in a double thickness (with the special metal clips between) so the water would have a place to drain. (This also allows for easy roof raking, which my husband has done multiple times without worrying about hurting the wires because they are inside the gutters and not on top of the roof.) Third, we took the time to install it properly and use extra clips so that no wires would touch along the way (we used a crazy amount of clips). Fourth and most importantly, we turn the cable on BEFORE it starts snowing and we leave it on until it stops. Our neighbors have the same heat tape on their roof except they have the loop pattern, only. Right now they have ice hanging off their gutters with nice empty patches of snow melted off their roof where the cable has done its job, but because they don't have cable in the gutters the water doesn't have anywhere to go so it simply freezes again. Placing the cable inside the gutters and all the way down the downspout is the true solution to this horribly annoying problem. We purchased extra cable when it was on sale last year and in the fall we will be installing it on the garage so next winter we won't have the ice and snow build up on the front of the house.