


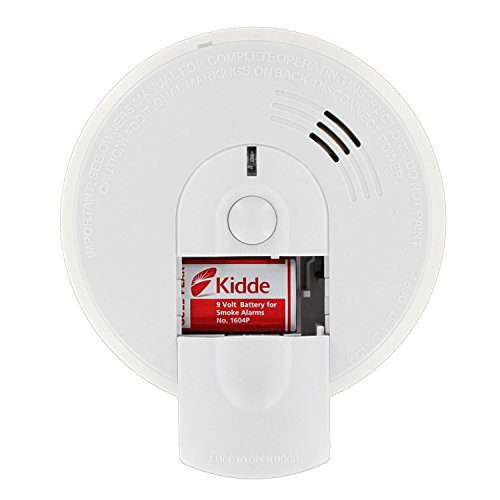
- Front Load Battery Compartment for easy battery replacement
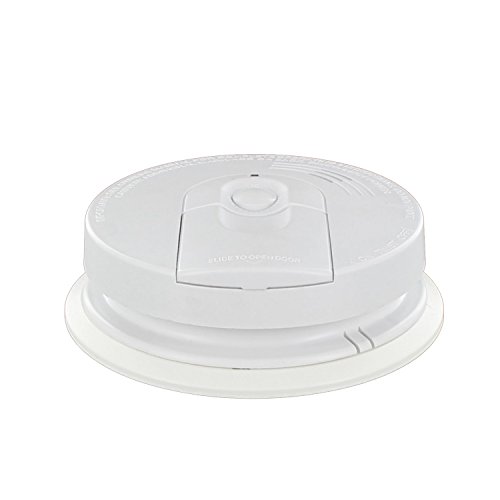
- Hush alarm control button silences nuisance alarms
- 9-Volt battery backup provides protection during power outages
- Pre-stripped wiring harness with easy-off cap ensures quick installation
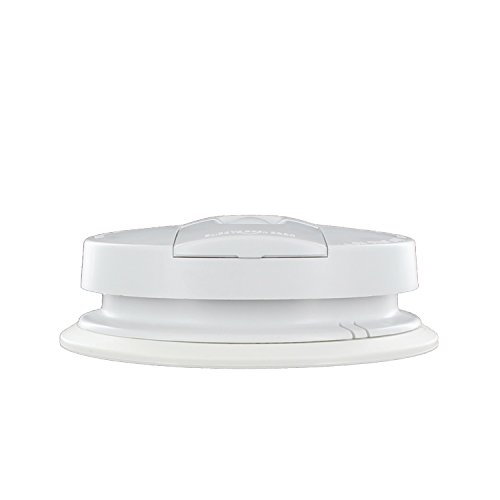
- 360° mounting bracket allows mounting from any angle
- Red LED flashes until reset for quick, clear identification of initiating smoke alarm in interconnected system
- Visible low battery indicator helps locate chirping unit
- Front loading battery door makes battery changing simple, power link tab makes installation faster
- False alarm control quiets unwanted alarms for up to 8 minutes
- Interconnects with other compatible Firex smoke alarms and heat alarms
-
Information
-
Twitter
-
Pinterest
-
Youtube
-
Facebook
Fagbohun Kazeem Olawale
Interconnects fine
Love the battery in front idea! Updated installation ring works fine (if you use adapter make sure you have space for it to go up into the ceiling. I used the Quick Connect Adapter (KA-B and KA-F) to replace existing mixed alarm system. As expected, once all ten ion, photoelectric and co detectors were Kidde branded the interconnected alarm feature worked. As an added feature the Kidde KN-COP-IC CO detector displays "Fire" during test. Although you do not need the Adapters if you don't mind rewiring I decided to purchase six of these as I could rewire 8 alarms (2 BRK 5919, 6 Firex various) more quickly and personally decided the approximately $25 cost was worth the time saving as some of these alarms were placed on both high and cathedral ceilings -- your mileage will vary. Two of the existing alarms were less than 10 years old and did not need to be replaced (i12040, 1275) and these as expected worked with the new CO detector, plus 3 P12040 and 4 i4618 smoke detectors.
Schuenemann Sheryl Audrey
Easy replacement for old Firex detectors
We replaced all our smoke detectors due to their age (replacement is recommended every 10 years). Our old units were Firex as well, so we stayed with the same brand. We chose this model specifically because the battery door is in the front of the unit. (How come smoke detector batteries always decide to fail late at night? It's a conspiracy, I tell ya!) Replacing the units couldn't have been any easier. A new mounting plate is provided in the box, so it was just a matter of removing the screws from the old mounting plate and installing the new mounting plate using the same screw holes - easy swap. Make sure that you buy the appropriate wiring adapters if you're replacing older Firex detectors since the pin configuration is different. Once the adapter was installed on the detector, we simply connected it to the existing wiring and mounted it to the plate - very easy and quick swap. We've had no issues with them, and I love the fact that we won't need to remove the detector to replace the batteries.
Kirsten Figueroa
Plugs into 2010 Firex i4268 Alarm-No Adapter Needed
I built a new home in 2010. The spare bedroom alarm just went bad and it has a Firex i4268. I purchased the Kidde i4268AC along with an adapter, because it sounded like one was needed for compatibility. However, that was not the case. The new alarm clipped directly into all aspects of my old alarm—the cord plug and the cover both fit perfectly. Luckily the adapter was only a $5 (non-returnable) loss. I have provided photos of both my old and new alarms. Hopefully this saves someone some time and money!
Kay Stansberry
Easy Installation - see adapter picture
I have installed two of these to replace low squealing broken detectors. Just goes to prove you need to check them annually. Easy to install with no rewiring as they provide an adapter which fits three prongs in a straight line of the old wiring. See picture. Battery easily accessed.
Hamza Khan
Easy to install by an unhandy homeowner!
Just like another reviewer, my home was built in 2001, and it was equipped with Firex 120-1072B units in each room wired for interconnectivity. One of my units began to sound randomly even when there was no fire. I changed the batteries in all units, but one kept beeping (the one by the kitchen exposed to cooking). Considering that recommendations are to fully replace smoke detectors after 10 years I decided to replace them all. After searching online, I found that the Kidde i4618 is the current replacement model. I also got the Kidde KA-F Universal Smoke Alarm Adapters so that I did not have to fuss with any wiring or even have to turn off the breakers. The adapters fit easily although it took a very firm hand pressure to snap them on. (It really is a snap on adapter from both sides, to the old connection and then to the detector, so no tools required other than a screw driver to loosen the old mounting bracket and replace it with the new one.) The mounting brackets fit easily with the existing screws from the old detectors' mounting plate. The mounting plates were the tiniest bit bigger around, so perfectly covered paint lines going around the old detectors (no paint touch up required!) Again it took very firm hand pressure to snap on the adapter to the new smoke detector plus this made the detector beep loud which startled me at first. Connected correctly the light goes green. One I thought connected correctly had a flashing red light so I pressed harder to snap the connector on more firmly into place, and it went green. The detector, attached by wires, simply rotates snuggly into the mounting bracket. It took me less than 10 minutes per detector, and was of course easier after the first one where I was scared at first to press really hard to snap everything in place. I would recommend these smoke detectors (and the adapters).
Tara Muşîr Hormzyar
Nice Price, Easy to Install
I had 8 Firex FADC detectors that were 10+ years old. I started getting false alarms (always in the wee hours of the AM) and research led me to find that you need to replace these units after 10 years. The i4618 has a nice feature that if one of the alarms does start giving a false alert - the red light will tell you which one is the culprit. Same goes for the low battery chirp. Looking forward to both of those when the time comes! Because I already had boxes for the FADC units, the 14618's were easy to install. Had to take down the old mount plate (2 screws) and replace with a new one. And had to replace the wiring harness (finding the unmarked breaker was the longest part of the job). But installation was less than 5 minutes per unit. Units have been in place for about 3 weeks with no false alarms! PS - Don't repeat my mistake. I bought a dozen 9v batteries and then found out each unit already came with a battery!
Amy Harris
Perfect replacement for Firex--and not too hard to install
I bought these to replace my old Firex alarms that were about 12 years old. I was encouraged by the review from the man who said he wasn't handy but found the rewiring to be straightforeward. So I bought of these and have taken them out a number of times but am just flummoxed. I don't see any pre-stripped wires, just the three prongs sticking out from the back. Are there any instructions? I can't find them on the website and of course the help line is open only during business hours, not during the evenings or weekends when I try to install these. Currently, because I did find the breakers that control the alarms and have that turned off, we are without any smoke alarm protection. I bet this is some small, obvious thing, but I can't figure out where to get to these wires in order to rewire the new alarms. Any help will be deeply appreciated. UPDATE: Finally, I hired an electrician to install the alarms. Once I saw how he did the first one, I realized I could have installed them all very easily. The info I was missing was that the connectors for the old Firex had to be removed first--as you do that you will see where each of the the new wires needs to go. A ten minute operation. You do need to change out the holder, the piece that attaches to the ceiling to which you screw in the alarm box. But that, too, swaps out without a problem. The best part of these alarms is that you can change the batteries from the front of the box. In other words, you don't have to remove the alarm from the ceiling to get at the battery compartment in the back. The battery compartment is behind a sliding door on the front of the alarm.
Misty Rene Freudenberg
Replaced a Firex 120-1182b
I needed to replace a faulty Firex 120-1182B smoke detector. It was flashing red every 15 seconds or so and causing multiple other alarms to chirp randomly (even with new batteries & clearing the memory by disconnecting from all power and pressing the mute/test button for 20 seconds). For those that aren't aware, Kidde bought Firex several years back and this is the replacement for that Firex model. The packaging actually says FIREX on it with a smaller KIDDE located in the corner. As others have stated, the wiring harness on this KIDDE i4618AC unit is different than the Firex 120-1128B smoke detector. Do not panic and don't bother buying the wiring harness to connect the old & new model. The picture on Amazon's website does not show you that this "hard wired" version is nearly identical to the wiring harness of the Firex 120-1182B unit. The Firex model has a 3-wire harness and this Kidde replacement has a 3-wire harness. The Firex model uses white, black & yellow wires. White & black are your AC electric & the yellow is the interconnecting wire to the rest of the fire alarms in your house (all of which work with this new model without issue). The new Kidde i4618AC wiring harness has a white, black & red wire setup. If your Firex was connected to the yellow (interconnected wire), simply connect the red wire instead of the yellow wire. This is not rocket science and you don't need to be an electrician to swap this thing out. Here's your replacement process. The 1st step is not mandatory, but recommended. 1) Turn off the breaker that controls the power to your smoke detectors to avoid electric shock during replacement. 2) Remove old smoke detector from the ceiling by twisting it counter-clockwise. 3) Unhook the old smoke detector from the wiring harness by pulling it out of the back 4) Loosen the 2 screws that are holding the mounting plate to the ceiling. 5) Remove the mounting plate by simply rotating it to allow it to pull off of the mounting screws (you'll see what I'm talking about once you have the smoke detector out of the way) 6) Pull the wiring harness wires out of the ceiling so that you have access to the 3 wire nuts 7) If you are worried about switching wires (or your specific housing wires all appear to be painted and indistinguishable, simply unhook 1 wire at a time from the wire nut, and install the new wiring harness using the same wire you are disconnecting. (In other words, if you disconnect the black wire, simply connect the black wire from the new harness before proceeding to the next wire). This will avoid confusion. As noted before, the yellow wire from the old harness is replaced by the red wire from the new harness. 8) Shove the wires back into the ceiling and install the new mounting plate. You must use the same mounting screws that were used to hold the old one in place (mounting screws are NOT included in the new unit packaging). 9) Remove the dust cover from the new smoke detector & remove the plastic battery saver tab from the battery compartment. A battery is included with the smoke detector but I have no idea if it's a true alkaline battery (like Energizer or Duracel, so I replaced mine with a new Duracel so that I was sure). 10) Connect the wiring harness to the new smoke detector and secure it onto the ceiling by a 1/4 right turn. 11) Restore power to the smoke detectors if you turned off the power at the panel in step 1. I did not bother turning off the power before installing my new smoke detector. While unhooking the yellow wire from the original wiring harness, the rest of my smoke detectors sounded the alarm. I recruited by son to press the mute button on a different alarm and that took care of it. I'm not sure if disconnecting the power will eliminate that issue for others, but be aware that there's a chance your other alarms will sound during the install process, so you might want to avoid this project if someone in your house is sleeping. Hope that helps someone out there. Happy replacing.
Sheteka Villa
So far, so good.
I just installed this a few days ago so I cannot report on how long it lasts. Despite the instructions stating it will only work with certain brands, it does appear to work with the "LifeSaver" wired smoke detectors in our house. I believe the LifeSaver brand installed in our house is no longer sold so I had no choice but to try a different brand. Pressing the test button on this new Kidde does set off the other wired smoke detectors in the house as intended. It was easy to install. I spent more time getting the old detector off the base and then flipping off circuit breakers with my wire tester hanging from the ceiling to find the right circuit than the actual installation. I was replacing an existing failed smoke detector and was able to use the existing screws that held the base to the ceiling. So didn't have to get the drill out. I just had to remove the old smoke detector which required getting the old one off (in my case required pushing flat head screw driver up in two or three places to release some spring loaded plastic connection points between the detector and the base, then loosing two screws to pull off the old base, then unplugging the old smoke detector connections to get it out of the way, pulling down the wires connected to the junction box in the ceiling with wire nuts, unscrewing the the wire nuts to remove the other half of the plug and short wires from the junction box, installing the new base which has a hole in the center for feeding the wires through, screwing in the base with the existing screws, wiring the new with the existing wire nutes, and rotating the new smoke detector into the new base.
Laurie Patino
Stay Safe Smoke Detectors
These do what they are supposed to do and detect smoke or fumes generated by heat in the house. Have these throughout my three level house and they are connected to each other so if one goes off, they all go off. So if the one in the basement activates the one in my bedroom goes off as well. They most definitely create a racket in the house waking you up in the event of an emergency. False alarms with the one in the kitchen can be annoying and probably should have installed that one further down the hallway as they are sensitive enough that it would detect a kitchen fire without being in the kitchen. They are plugged into the main power of the house with battery back-up so changing batteries every few months is not needed. This is a nice feature. This along with the facts that they are interconnected and sensitive enough to go off in an actual emergency make me sleep well at night.