


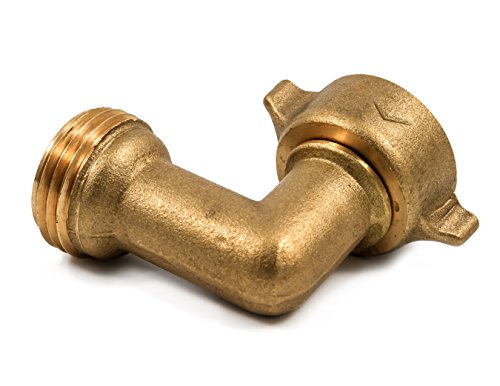
- Prevent hose crimping and strain
- Eliminate unnecessary stress and strain on all RV water intake hose fittings
- Solid Brass
- Easy-grip connector
- Compliant with all federal and state level low lead laws. CSA Low Lead Content Certified to NSF/ANSI 372
-
Information
-
Twitter
-
Pinterest
-
Youtube
-
Facebook
Ajay Kapoor
Works for washing machine supply lines
Everyone who needs to position a washing machine close to a wall has discovered the "steel wrapped" supply lines are not flexible enough to allow a straight connection to bend enough to get sufficiently close to the wall. I replaced old rubber hoses recently with the steel wrapped ones and could not get the washing machine to line up with the dryer as it did with the rubber hoses. The washer stuck further out than the dryer by 4 or 5 inches. I looked into all sorts of remedies including hoses with a 90 degree elbow built into them but found the elbows appeared much narrower than the hose (which IMO would slow the fill) and had a slight reputation for failure at that fitting. The obvious answer was a separate 90 degree brass fitting which would solve the problem, allow the use of less expensive and more reliable hoses, and which could be transferred to a new washing machine when the time came. The Camco 22505 90 degree elbow fit the bill. We ordered a couple on my wife's Amazon account and I installed them easily. The protruding flanges appear more difficult to deal with (due to how close the inputs are on the washing machine) than is really the case. A little bit of coordinated fiddling and they were both attached in less than a minute. Connecting hoses to them took another 30 seconds. Why no company apparently makes such a fitting for washing machine use is beyond my comprehension. I am simply glad this fitting intended for RV use works well for washing machine supply lines.
Christine Ann Andico Arriesgado
It's great!
This is a very good invention. I use it to connect a hose to the float valve in a water trough for horses. Using it means the hose does not have to bend and wear out too soon. I do use plumber's tape at both connections to prevent leaking, so I don't know if it is threaded perfectly, or not. I just use the tape on every connection so I never have to go back and redo. I would love to have a few of these made with a shutoff valve as part of the elbow. It would have to be a little longer to accommodate the valve, but that would be a perfect combination.
Ben Myers
A must have item for your Camco pure taste water filter!
This is the perfect accessory for the Camco Pure Taste water filter if you are filling your fresh water tank from the side of your van/rv thru a garden hose. Attatching this between the fill nozzle with the cut-off valve and the filter removes the need for you to stand there holding the filter in a horizontal position so it wont break. You put this on and now you can insert the nozzle into your filler inlet and let the filter hang by itself on the side of your vehicle. No more stress on the nozzle or you! It has a nice all brass connector with wings for tightening onto the nozzle end, and should last a lifetime. A must have item, and a steal at this price!
Gary Layne
Works good so far (1 month)
Camco has questionable quality. I won't lie your carbon filters are iffy. Every time I use Camco blue carbon hose filters they work better or less good than another. The elbow must be made by another manufacturer they typically deal through. This thing has been quite solid since owning it. The Flexy bendy hose thing they sell with the plastic tightener is a complete piece of poop. Out of the package it leaked and sprayed all over me. Anyways, the 90 degree elbow is fairly priced and works great so far, so 5/5 on every attribute. Easy to install, value for money and easy to use also overall just quality product for the price. As for your Filters Camco, step it up buddy.
Hilario Castrejon
Elegant Solution for Simple Problem
I purchased two of these elbows to fix a problem with a clothes washer. Unlike the similar items found at Ace Hardware and Lowes, this item solved the problem. The problem was that pushing the washer as close to the wall as possible put a lot pressure on the hot and cold hoses which came straight out of the back of the machine, horizontal to the ground. The problem was made more difficult as the hot and cold intake fitting was stacked, the hot below the cold. Other elbows I looked at had a nice handy large female fitting that prevented installing both elbows on the hot and cold male fittings. The female fitting was too large and because the hot and cold were stacked to close together, I was unable to install both. This fitting, because of the wing design on the female side allowed me to put both on at a slight angle so the hoses could be connected without the kink that was there before. I admit I had to work with the wings so they would not get in the way of each other as I tighten them, but once I figured that out, things went very smoothly. While initially I had been looking for a simple fitting on the female side, this design allowed me use the wings to get a little more leverage when tightening or loosing the connection. As an additional benefit of these item, it works with the hot water. Other elbows usually had a disclaimer the they were only rated for cold water and external use. So all in all I have been very pleased with this item.
Andrew Springer
Big Helper
The fresh water connections into my RV are really tough to work with. Connecting the hose is tricky and then once it's been connected for a few days it's a bear to disconnect. This 90 degree elbow solves two problems for me. It makes the hose run straight up and down instead of kinked and it makes it simple to connect/disconnect. I like this one so much that I just bought a second one. This fitting also has a union joint in it, so you can screw it onto the hose without having to twist the hose. _____________________ UPDATE: 11/1/16 I just bought a third one of these so that all three of my commonly used connections are covered and I don't have to switch them around. I have one each for my fresh tank fill, city water connection, and black tank flush. I love these!
Victor W Black
It twists on confidently and the turn knob is easy to grasp
Our travel trailer is a little screwy in how they decided to set all of the recepticles up. The power is on one side and the water fill and city connector are on the opposite side. The water connector is on the side of the campers with the door and awning, so when we setup on hookups, the water hose is right there in the way. Without this elbow, the hose sticks out from the camper and makes it even more likely that it's going to get tripped over. We'll certainly keep an eye out for this if we buy a different camper, but for the time being, this elbow helps ease our woes. It twists on confidently and the turn knob is easy to grasp. No complaints here and worth the money if you need to make up for short-sighted manufacturing decisions like we do.
Nicole F Jarrell
Less tripping, less strain on RV connection
The Camco 22505 does a good job of keeping your water hose "close-in" to your RV, so you can avoid attempts by you and the kids in the RV next door to have "Whoopsie - I just tripped over the water hose and broke the connection at the RV" moments. In general, the Camco el seems to place a lot less strain on the connection at the RV than connecting a hose directly, so it seems like a good idea to use one to cut down on wear-and-tear on your RV's water connection(s).
Terrie Hansen
Saved the day during sediment drainage for water heater maintenance
Thanks to Roger, my trusty plumber, and the Camco hose elbow, I drained the sediment from my hot water heater for the first time today. As a new homeowner in May 2015, I thought I could forget about the water heater after I had it replaced. Then last February, I ran across a home maintenance article that said a new hot water heater should be drained every six weeks for a few months, that every six months to 1 year. Since it already been 9 months since the water heater was installed, I worried that I had damaged the hot water heater by neglecting it. Fortunately, a call to Roger solved the problem immediately. He recommended draining the hot water heater once a year, including during this early period, so I could wait until June 2016 to do it the first time (but I did it early to be safe). He gave me these instructions that were extremely easy and effective: 1. Do NOT shut off the water valves going to the hot water heater. 2. Connect a garden hose to the spout at the base of the tank, and run the other end outside where a large amount of water can drain. 3. Use a flat head screwdriver to open up the valve (90-degree turn) at the spout. 4. Let the force of the water pressure drive out the sediment for 15 minutes. 5. Close the valve at the spout using the flat head screwdriver. 6. Remove the garden hose. It was as easy as it sounds except for one detail-- the wall of the drip pan holding the water heater was high enough that the hose would have crimped over the edge. Thanks to Amazon, I found the Camco hose elbow that would give more than enough height for the hose to clear the edge of the drip pan. The Camco's connector allowed perfect positioning of the elbow vertically, and a similar connector on my Flexon 50-ft hose made the exit connection just as easy. By luck, the hose was exactly the right length to snake off my porch and reach a water drainage ditch on one side of my yard. There was zero leakage throughout the whole process, and the crystal clear water at the end showed that the flushing action was successful. I've seen quite a few variations on instructions for draining sediment, all of which were more complicated than Rogers version. Although I can't guarantee his instructions will work for everyone, they worked great for my new water heater and took MUCH less time than I anticipated.
Robin Stricklin
relieves stress off hoses
Does what it says. Originally purchased for RV to relieve stress on hose hooked up to inside of RV. Not long enough to allow hose to go through bottom hole entering RV without adding some strain. Purchased 45 degree one to rectify. Keeping this one for campgrounds with faucets sticking straight out rather than down. Otherwise, works fine and no apparent issues. Just not for what I originally intended.