

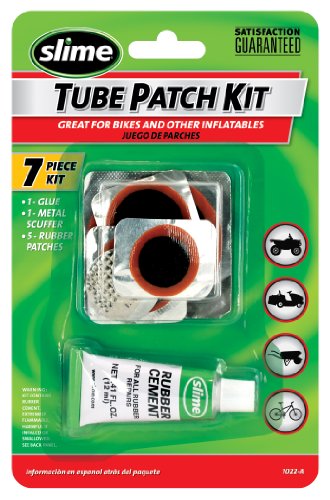
- Repair puncture related flats on ATVs, mowers, bicycles and wheelbarrows
- 7-piece kit
- Five rubber patches, one metal scuffer, and one tube of rubber cement
- Everything needed to patch a leak on a tube or other inflatables
- This item is not for sale in Catalina Island
-
Information
-
Twitter
-
Pinterest
-
Youtube
-
Facebook
Kathy Mumford
Just caught a flat today and fixed it.
Finally used it today and it worked well. I ran over a nail and decided to patch the thing and ride home. After patching and trying to fill with air, it was still leaking. After removing and inspecting there was actually another hole one the other side of the tube. I then patched that but it leaked as I was filling it with air. I nearly completely missed the second hole so more filing and patching in the proper location and I was able to pump and go. Make sure you look for other holes and make sure that you place the patch on the actual hole. LOL
Kevin Robinson
Does the job in a pinch
This was a refill, if you will, for a Slime Tube Patch Kit that comes in a small plastic container. Same patches and cement. I've used this twice while mountain biking to repair my friends' tubes when they experienced a flat: 1. Take the tube out of the tire 2. Scuff around the hole with the sandpaper 3. Put the cement around the hole 4. Place the patch on the cement 5. Hold the patch firmly in place for one minute 6. Pump a little air in the tube to check for leaks 7. Reinstall tube in tire, and reinflate 8. Ride
Bonnie Clyde
Low cost tire patch repair kit for my eBike.
I was disappointed with the performance of my eBike's solid core tires so I switched to Slime brand inner tubes. Performance is much better, but now I have to worry about flat tires. Yes, the slime tubes resist going flat, but they don't stop big punctures. So it's important to plan ahead; This patch repair kit is stored in the bike's tool pouch for tube repairs while on the road. I selected the Slime brand repair kit because it has the essential items (adhesive, abrasive scuff, patches) and was very low cost.
Ashley Bree McNally
It's a patch kit. More patches would be nice
It's a standard patch kit. Make sure the area you're patching is as flat & clean as possible. Clean with alcohol. Use very, very little rubber cement, maybe several layers, very thin layers. Let dry for at least a minute. Remove the bottom plastic coating on the patch, and stick it on. If you have a clamp and two flat pieces of something, clamp them together. Now, wait. A long time. Then wait more. Now, wait overnight. Leave it clamped. The whole time. Finally, after at least several hours, unclamp and remove the plastic layer from the top. if the patch pulls off when you do this, rip it all off and start over.
Francisco Peña
Simple to use
I had a pin-sized hole in my tire's inner tube. Used the smallest patch and it fixed it perfectly. Keep in mind that the rubber cement dries very fast. So, my first attempt failed. By the time I got the foil peeled off the patch, the rubber cement was almost dried. I still tried to stick the patch but when I tried to remove the top plastic film, the patch came off the tube. Luckily, the orange coating was pretty much intact so I simply added more cement to the tube around the puncture and then spread it around with a popsicle stick. When it got slightly tacky, I pressed the patch onto the tube and continued to press and slightly swirl it for a minute or two to ensure the orange coating was reacting with the cement. I left it like that for a couple of hours *WITHOUT* removing the top film. Eventually, when I removed the top film, the patch remained attached to the tube and the edges were firmly attached and almost were part of the tube. FWIW, I used the rasp to roughen up the area around the puncture as instructed. Later, I inflated the tube a little bit with a hand-pump and tested the patched area under water to see if the leak was fixed. I left it like that overnight and the next morning, inflated it to its full PSI.
Vincent Neron
I like these kits of tube patch
I have used these in the past to repair rubber boots and the patches have held in all types of weather. I used one of the patches today to repair a leak in a wheelbarrow tube and so far it holds just fine. I think the trick to using patch repair kits is make sure to rough up the tube with the included tool, apply ample glue and let it dry for a few minutes so it doesn't have a wet look, then apply the patch making sure the edges are well sealed and blended using a blunt tool to rub the patch well enough to insure the patch is intact.
Katie Lopez
Excellent and strong patch
I had two punctures in my rear tire tube. One a pin hole and the other about 2mm cut. These patches worked very well for me. I carefully followed the instructions for repair and let it dry for some time. To get best adhesion I used coarse grain sand paper to rough up the puncture area. Wiped it clean and liberally applied glue. I let dry for at least a minute before applying the patch. If at home, run a pasta roller or flat weight over the applied patch to further cement it well on the tube. If fixing while on the road then put the tube against a flat surface and evenly press across the applied patch. Done already 100 miles on my wheels after the fix!
Melissa Lynn Gilliland
Remember to scuff and apply pressure
The product works well to patch a 4mm hole in the bicycle tube. Make sure to scuff the surrounding area well and wipe with alcohol, then apply the rubber cement. Place the patch on and apply pressure all around the patch until you see the orange patch "melt." A note to Amazon: You rock! I couldn't find this product locally and yet Amazon carries it at a reasonable price. The only thing I bought this time was this $3 kit and Amazon delivered it. In a way, I got this for free. Wish I bought Amazon stocks much sooner.
Alicia Flickinger
Slime tube patches
These are great patches for any tube, motorcycle, bicycle, lawn equipment, virtually any tube you my have. They are much better than scabs for bicycles, no need to worry about having to replace the tube once you get home because these tube patches are high quality and thick. These are a must have in your pack for any Adventure rider with a set or two in the tool boxes in the truck and at home. They are easy to install and absolutely won't leak if installed properly.
Shawnee Danielle Hensley
Works great
These are easy to use and the patches have worked perfectly. I like the small tube of rubber cement that helps the patch stick air-tight. For me, there are too many of the big patches and not enough of the smallest ones. The instructions were thorough and helpful.