


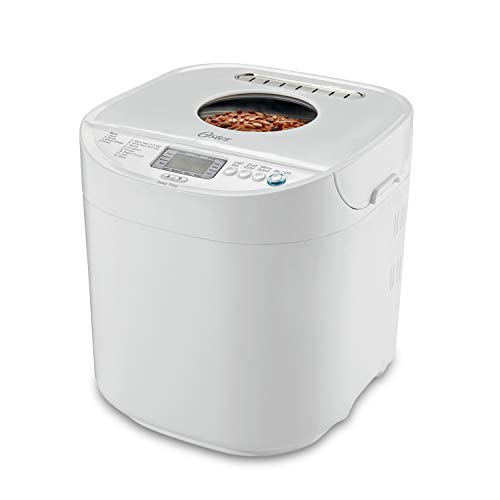
- 650 Watts Oster bread maker with up to a 2.0-pound loaf capacity is ideal for larger families
- 12 bread settings and 3 crust settings for making a variety of breads, dough, and jams
- ExpressBake setting bakes bread in under an hour
- 13 hour programmable baking timer for fresh bread anytime
- Large LCD display and intuitive button controls for easy operation; 40 inch cord length
-
Information
-
Twitter
-
Pinterest
-
Youtube
-
Facebook
Trevor Bowers
Oster CKSTBRW20 vs Zojirushi BB-PAC20
In this review I will compare Oster CKSTBRW20 and Zojirushi BB-PAC20. Background: For the last six months I have been making various type of breads using my Oster bread maker. Since getting a bread machine I have stopped buying bread. I use the machine every 2-3 days to make 1.5 loaf to my family. Bakes such as bagel`s for example require me to take the dough out, shape it and etc. In my opinion to much work and therefore I have not used the machine for these bake goods and I purchase those. The recipes I used are turnkey where I put all ingredients in the machine and press a button. Any recipes which require additional steps (with exception to sourdough are not my forte) So far I had excellent results, however I was tempting to see if there is added value in a “better” machine which should produce better results. Two key things which were of interest for in in the Zoj were; 1. Preheat of ingredients prior for mixing a. In many cases I make breads which require milk and/or eggs. These I keep in the fridge and when added they are COLD. When using my Oster I would add a 30 min extra to timer to allow ingredients to come to room temp , however in many cases they are still cooler than they should 2. Long shape a. It is a pain in the A## to cut the bread Oster produce. The shape does not allow for easy to produce and consume sandwich slices. In addition it is hard to find a decent bread box which will fit the 1.5 loaf let alone 2lb loaf. When making soft fluffy loafs this is becoming a real issue. Today I got the new BB-PAC20 and my initial impression compare to Oster: • Zoj is heavier then Oster • Zoj is twice and take twice the counter space as Oster • Due to size of Zoj it is there to say where Oster can be stored and be used when and as needed. • Zoj stops when lid is opened, which can be bothersome (my kid like to watch the bread getting mixed) • Zoj seems to be better constructed. • Zoj does not shift on counter when mixing due to its weight (My Oster already crushed to the floor once which required me to take it apart and put all the buttons and display back where they should be) • Zoj have much better handles the Oster ( I removed the handle from my Oster , as in some cases high raise breads will “stick” to the handle and will challenge the loaf removal as the bread will stick to handle ) • Zoj looks “better” as its stainless and black finish vs white (which look dated). Baking; I took a basic sweet bread (with egg`s) recipe and prepared the same recipe side by side on both units. For both recipes I used same ingredients and same measurement cups, all in all beside the machine all other parameters are identical. This test would allow me to test and see if there is added value for the high premium of the Zoj ($200 more the Oster) and see if the money and counter space are well spent here. ** See pictures for difference between Zoj and Oster during mixing and baking, as well for product produced ** This test is for BASIC functionality and used basic cycle with medium crust settings. Results: Crust – Both units were set to medium. Zoj product a thicker darker crust. Zoj crust is more consistent where Oster has lighter top then its sides. Shape – As expected Zoj products longer and “lower” loaf which is easier to cut. Zoj loaf had two “bumps” due to its design of two mixing blades. Texture – Zoj have more consistent texture where air “bubbles” are spread more evenly. Blades leave smaller hole in bread due to lower profile . Taste – better “crunch” in Zoj , beside this both taste same to me. My $0.02 : If you children like bread with no crust Oster might be better, where if you like thicker crust with more crunch Zoj would be better. If you intend to keep the bread machine on your counter Zoj will be more appealing due to design and color. If you plan to keep it in cabinet Oster is a better choice due to size and weight. Zoj product a better product but by a very small margin, is it worth the extra $200 is all depend on the value of $200 to you. If I will keep Zoj it will only be due to the loaf size and shape, all other to me is relative equal.
Justin Skaggs
Love it!
So far I've made 2 basic loaves and they've been delishus. I changed the direction that are in the manual. During the last rise, I took the paddle out, put Crisco grease on the post, reshaped the dough and put it back in to finish. It turned out great. Just know that the shape of the loaf for this breadmaker, is not like a normal loaf. It's tall and short. The pictures show what the post looks like after taking the loaf out after using Crisco and the bottom of the loaf. Edit: I've had a chance to make more bread and I read reviews since I purchased mine. I think some of the problems people are having is because the manual says not to open the lid while it's working. I have disregarded this. I've had to add a bit of water because I noticed the dough was too dry. I have also reshaped the dough just before the bake cycle. I think as long as you don't have it open for to long, it's fine. Also, 2 thing's that are important, measurements of the ingredients and making a furrow in the flour to keep the yeast from getting wet. You can use recipes that aren't in the manual. Oh, when I first pulled the pan out, I thought something was wrong because I pulled pretty hard and it wouldn't come loose. But all that you have to do is wiggle and pull at the same time and it will come out. After that you won't have any problems. I hope this helps, because this is a great bread machine.
PoisonIvy Roxette
A basic bread maker that makes great basic loaves.
I use this on average once a week. It replaces an old Oster which was over 10 years old, which I took as a recommendation for the brand. It is clearly more cheaply made that the old one - lighter overall and with a much thinner pan, and the kneading motor really sounds like it's straining (but it does the job OK). I bake a couple of different but basic loaves - one with raisins added during the rise cycle. I am very pleased with the results. Note: for the bread with raisins, I add them gradually immediately the second mix/knead starts, and do not wait another 5+ minutes for the beeps; I found that they did not mix into the dough very well when I waited for the beeps, and they do not get mashed up due to me adding them sooner. However, after only a few months the paddle lost its non-stick quality. Originally it just slipped out of the loaf when removing the loaf from the pan or came out very easily if it stayed in the loaf. Now (6 months old) it just seems to have almost no non-stick quality at all - see pictures. It does not appear to have lost its surface coating. It has never been scoured or mistreated - only washed with a sponge, as recommended. The same problem also applies to the studs at the bottom of the pan, although this is not really any problem from a bread removal or usability viewpoint. UPDATE: Customer service is first class; everything replaced with no question. I've up-rated the product to 5 stars on the assumption that I had a 1-off issue, and will revise again in future if the problem recurs.
Kayla Gundermann
Review, high-altitude recipes, and tip to not getting that big hole in the bottom of the loaf...
I got this Oster bread machine over a year-and-a-half ago and am very pleased with it. I live alone and those two-pound loaves from stores are just too big. I wound up throwing away lots of bread when it either gets moldy at room-temperature or because of freezer-burn. Now I make one-pound loaves in this bread machine and they are the perfect size for me. Also, when you make the one-pound loaves, the shape of the loaf and slices are perfect for sandwiches. I like that the metal handle can be removed from the bread pan, making it easier to remove the bread. I remove the the pan from the machine immediately after the baking cycle is complete, place it (the pan) on a wire rack to cool for five minutes, remove the handle, tip the pan upside-down with one hand by holding onto the projection on the bottom of the pan, and catch the bread in the other hand. Then I allow the bread to cool completely on the wire rack before placing it in the bread box. USE OVEN MITTS ON BOTH HANDS! I don't use the time-delay feature because I live at 8,000-feet altitude and the climate is dry. The liquid ingredients would evaporate too much.. Besides, I like making my bread with milk and egg, so using time-delay isn't a good idea. Salmonella - and don't think that the heating will kill the Salmonella and make the bread safe because the bacteria release a poison that heating doesn't destroy. It's this poison, not the bacteria, that cause illness. It took me about six tries to get the yeast, salt, and gluten balance right for my altitude, but now the loaves come out perfect. Here's my favorite recipe that I came up with after a little experimentation: BETH'S HIGH-ALTITUDE MILK AND HONEY BREAD (Do not use time delay!) 1 large egg, placed in measuring cup Enough milk added to measuring cup with egg to make 3/4 cup, beaten until egg is mixed in 4 Tbsp butter (= 1/4 cup or 1/2 stick), melted 3 Tbsp warm honey (microwaving the glass or plastic honey container makes it easy to pour) 2 1/4 cups bread flour 2 Tbsp vital wheat gluten 3/4 tsp salt 3/4 tsp bread machine yeast -Add ingredients in the order listed. I like to warm the milk and egg mixture in the microwave for 20-30 seconds, add the melted butter and warm honey, and mixing them. Don't worry about the mixture being so hot it will kill the yeast because it will cool enough once the flour is added. -And don't worry about making sure that the yeast doesn't touch the liquid ingredients because you will be turning the bread machine on right after adding all the ingredients. I just sprinkle it over the flour. -Select the basic, one-pound settings and desired crust darkness (I use medium). -Press button to start cycle. I love this bread for making honey ham and baby-Swiss cheese sandwiches! For those who prefer a more basic bread, try this recipe: BETH'S BASIC WHITE HIGH-ALTITUDE BREAD 3/4 cup water 2 Tbsp Canola oil or butter, melted 2 cups bread flour 2 Tbsp vital wheat gluten 1 Tbsp sugar 1 Tbsp dry milk 3/4 tsp salt 3/4 tsp bread machine yeast -Add ingredients in order listed. If using the time-delay, poke a well in the flour and place yeast in that. -Select basic, one-pound settings and your choice of crust color. -Start machine. Here's a little trick I use because I dislike the hole the paddle leaves in the middle of the loaf: Set a timer to 1 hour, 33 minutes. Turn it on immediately before turning the bread machine on. When the alarm rings, the baking cycle should be at the point just after the last punch-down and it will be in the last rise step, so the paddle will no longer be needed for the rest of the cycle. Open the top of the bread machine, remove the dough and paddle. Close the lid. Shape the dough into a nice, even oblong shape and return to machine. Allow cycle to complete. This is for the one-pound loaves - the timing will be different for 1-1/2 and 2-pound loaves. I don't bake these sizes, so I never figured out the timing. I use the following two items for storing and slicing the bread: https://smile.amazon.com/gp/product/B001BB2LMM/ref=oh_aui_search_detailpage?ie=UTF8&psc=1 https://smile.amazon.com/gp/product/B0011EZ7AC/ref=oh_aui_search_detailpage?ie=UTF8&psc=1
Angela Williams
Confessions of a Bread Machine Virgin
I received this at an amazing deal from Amazon Warehouse for a damaged box, which is what prompted me to buy the bread maker in the first place. I, embarrassingly, admit that I have never owned a bread maker prior to this. I did it the old fashioned way, sweating in the kitchen with the dough and then putting it in a pan into the oven. Wow, have my eyes been opened. Today, while three loaves of bread would have left me exhausted before I got this machine, I made two loaves of pumpkin spice bread and a banana bread without breaking a sweat. I am also ashamed to admit that the bread tasted better than when I made it by hand without this machine. As for the machine itself, there was a bit of a learning curve but that's not the bread machine's fault. It's just me being a total newbie. For example, until I had read different instructions about 3 times I did not know I had to put the wet ingredients in first and THEN add the dry ingredients and that yeast can NEVER touch wet ingredients (it's not as hard as it sounds but, yeah, it is intimidating at first). Fortunately, figuring out the settings was a breeze because the instruction manual was very easy to understand (let's hear it for writers who obviously speak English). With six kids in the house, the homemade bread lasts minutes unless I make multiple loaves. Now, with this bread machine, I won't dread bread making day since the machine does 90 percent of the work for me. As a first-time bread machine user, I definitely recommend giving in to the new technology and investing in a bread machine. This one proved to be very easy to use and made very delicious bread for my family.
Elaine Fragua
Five Stars
Love it! This is awesome and I am happy to have this bread maker.
Gabrichidze Nodar
Gluten-Free bread comes out great
Very happy with the Oster, it does what it's supposed to do without a problem, even for us few who can't eat gluten. This is the healthiest gluten free recipe I know: no grains except rice, and no "gums" to bind the dough. A dead simple recipes, great result, with minimum effort! Ingredients (makes a 1.5 lbs loaf) * 1 egg * 2 tablespoons olive oil * 1 cup warm water (or more, as needed) * 1 tspoon brown sugar * 1 tspoon salt * 1 tspoon baking soda * 2 cups rice flour (white or brown) * 1/2 cup tapioca flour * 1/2 cup potato starch (not flour) * 3 tspoons gluten-free active dry yeast * 2 tspoons psyllium husk (optional, used for binding) * 1 tspoon nutritional yeast (optional) Method 1. Replace the kneading blade in the breadmaker's baking pan. 2. Add the liquid ingredients in the baking pan. 3. In a separate bowl, mix well the dry ingredients (except the yeast), and then add them on top of the liquid ingredients. 4. Make a small hole with your finger in the middle of the flour, and add the yeast(s). 5. Set the pan inside the bread maker, close the lid, and select from the menu the default program #1, and: 1.5 lb loaf, and medium crust. Press to Start the process. The bread will be ready in 3.5 hours. Use a cooling rack. ------ Notes: 1. The psyllium husk is used as a substitute to various gums (like xanthan gum, which is known to create health problems). Psyllium husk adds fiber into the bread. 2. The nutritional yeast will add B1 vitamin to the bread, a vitamin that most gluten free dieters easily get deficient on (wheat flours come enriched with B1). 3. Eating the bread cold, will help you get more "resistant starch" (that comes primarily from the potato starch). That type of starch isn't digestible (so it doesn't make you gain weight), and it's food only for the good gut bacteria. That starch is only "resistant" when it's cold.
Dona Brown Moyers
so I know the one that is cooking this very min will be that much better. I gave 4stars cuz it does what I ...
this was my first attempt with eye balling teaspoons and tablespoons with kitchen spoons. I picked at it and it tasted "like" bread. I later found the teaspoon and tablespoon scoop that comes with it (yeah I'm not too skilled in the art of baking). so I know the one that is cooking this very min will be that much better. I gave 4stars cuz it does what I paid for. I will update this and give a five star if I get two loaves a month for 1 year without the machine breaking down. You should note that the #1 low star rating being read, has pics and the complaint being the bread was too much in the "raw doughy" state (with over an hr left to bake). well if you decide to buy this and bake your own bread,.....LET IT BAKE before you start playing with it like an illiterate todler. the manule tells you what the machine does for all of it's stages and at what times. it doesn't start to bake until the last 60min for all of the recipes I've seen so far.
April Engada Taberna
The Best!
I had two breadmachines that were expensive brand for serveral years. I gave one of the breadmachine to my mom who just learned how to bake and other one I kept, but it broke after few years of good use. So I came to amazon in search for another "good-expensive-high end" brand breadmachine. I was looking for really good customer review product and found this. Since this is one of the cheaper breadmachine, I was VERY skeptical, but I do trust good customer reviews from amazon. So I thought if it doesn't make bread well as other breadmachines that I've used before, I would just use it for making doughs and jams. So, I recieved this machine today and made my first loaf just now. I wanted to put it to test, asap. And my thoughts?? WOW, WOW, WOW! I am dumbfounded! How does this plasticy, light weight, cheap-looking (with all due respect) breadmachine make a way~way~ better bread than my previous expensive, high-end breadmachine????? HOW?? JUST HOW?? The dough mixed well, rose well, and after it baked, the crust was just perfect (I baked on medium color), and the crumbs... ooooohhhh the crumbs... It is moist, soft, bouncy, chewy, nutty, did I mention soft? Yummmmy!! Well, forget about all the over-$100 or $200-expensive breadmachines. Just get THIS ONE.
Donna Renee Rensel
Fantastic Bread Machine
I bought this for my daughter and she loved it, SO I bought one for myself. I've made three loaves (Basic White, Cinnamon Raisin, and Cranberry Blueberry) and all have been awesome. This machine has all the features you could want ... viewing window, four bread types, light/medium/dark crust settings, and much more. Beeps when it is time to add fruit, delay timers, etc. For under $60 it is a steal. I just finished making the 2lb Cranberry Blueberry bread (to which I added some pecans for fun) ... see the attached pictures ... enough said. I do have one caution: If you have a "slick" counter top brace the machine with your blender or some other heavy object. During the kneading cycles the torque can lead to the unit "walking" across the counter. Mine almost fell off onto the floor. Easy fix ... just be careful. Love it!!! BTW, the book shown in the picture is the Betty Crocker "Best Bread Machine Cookbook" which I bought used on Amazon for under $1 (plus $3.99 shipping). Great pictures and the source of the Cranberry Blueberry bread recipe.