

- THE SYLVANIA STANDARD OF QUALITTY: With over 100+ years in business, Sylvania is the world leader in automotive lighting for Original Equipment Manufacturers (OEMs) and the aftermarket.
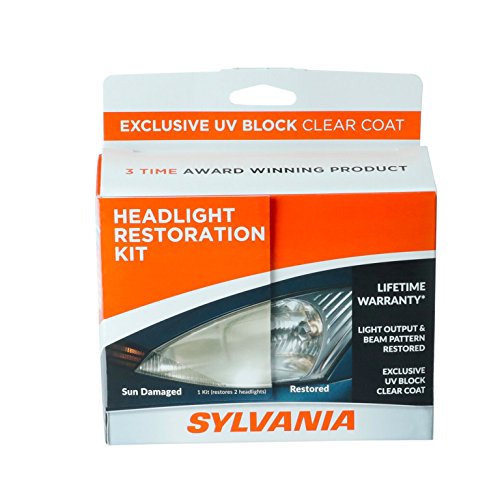
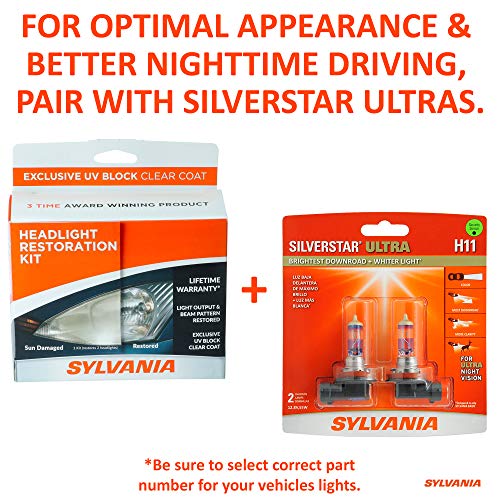
- LIFETIME WARRANTY: The components of this kit are good for two headlight assemblies. Once installed properly the performance of the Sylvania Headlight Restoration Kit is guaranteed for as long as you own your car.
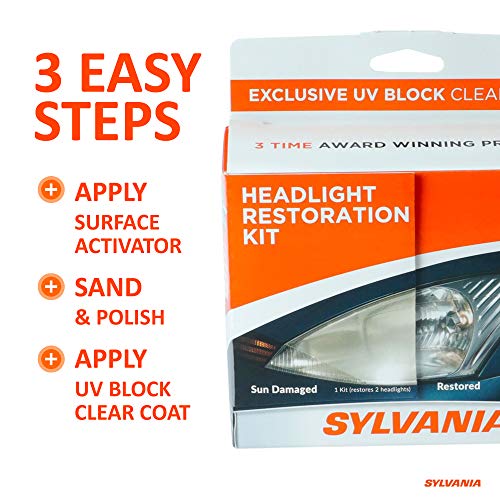
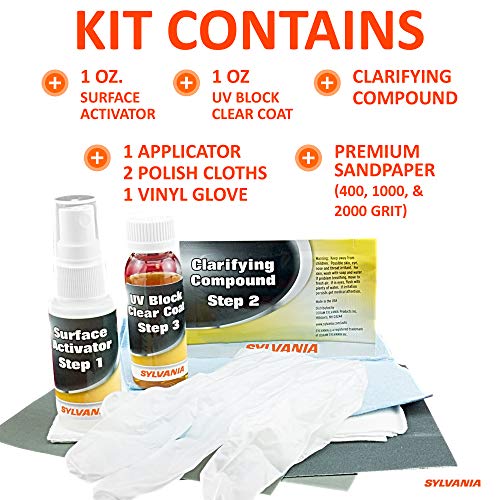
- EASY STEPS TO RESTORE LONG LASTING UV PROTECTION TO YOUR HEADLIGHTS: Step 1 - Surface Activator, Proprietary activator softens plastic, making it easire to sand smooth. Step 2 - Sand and Polish. Step 3 - Finish and seal with UV Block Clear Coat applicator.
- RESTORES HEADLIGHT LIGHT OUTPUT: Restores original clarity and vision to sun damanged plastic headlight lenses. The lenses will be clearer, the headlight will shine brighter, and the road ahead will be better illuminated.
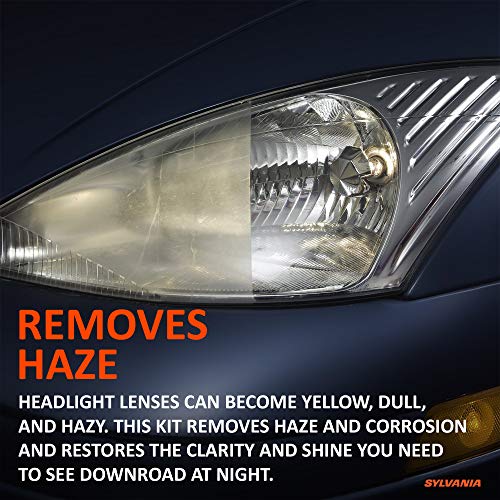
- RESTORES HEADLIGHT TO A LIKE-NEW APPEARANCE & REMOVES HAZE: Headlight lenses on your vehicle can become yellow, dull, and hazy from the sun. Our Headlight Restoration Kit fully removes haze and corrosion and restores the clarity and shine you need to see downroad at night.
-
Information
-
Twitter
-
Pinterest
-
Youtube
-
Facebook
Betty Straub
Don't listen to the 1-star Reviews...this REALLY does work!! It's all in the UV Clear-Coat!
My brother recommended that I try using this kit to clear up the yellow-hazing on my 2005 Honda Odyssey's headlights. They had been yellowed for years and I kept meaning to get them cleared up. After completing steps 1 and 2 in the directions, I was really feeling like this wasn't going to work. The lights were still very hazy, just a white haze vs. a yellow haze, and I was beginning to feel like I had just screwed up the headlights more. I pushed on, though, and applied the UV clear-coat...and WOW! Just...WOW! They instantly cleared up to like new! I still have a few dings and scratches in them, but those are physical nicks in the plastic, which is beyond the scope of this product. But, yeah...this worked! And the UV protection will keep them from yellowing for some time to come. The directions are simple enough to follow -- just make sure you follow them EXACTLY! DO Parts 1 and 2 as the directions indicate on BOTH headlights before moving on to step 3 -- trust me, it's worth it. I takes a bit of elbow grease (my arm hurt the day after) to do that much sanding, which is no big deal. Also, I be sure to go ahead and use plenty of the UV Sealer and work QUICKLY! The thicker the coat, the better. The directions say to soak 1/2" up the edge on the blue towel -- I soaked my towel a bit more so I could lay it on thicker. Just make quick passes, slightly overlapping, and avoid going back over an already treated area -- you WILL put streak marks in the finish if you do (this stuff starts to set very quickly). I think those that gave this product a 1-star review likely didn't put enough of the clear coat on, since that is what gives the headlight it's "new" look. I highly recommend this (along with the majority of reviewers)! Completely worth the $18, and no tools needed!
Kelley Darling Tessier
I have never really be inclined to write a review but wholy crap
I know, i'm a terrible person for not writing reviews when I buy things, considering I go strictly off reviews but that's beside the point. I didn't buy this off of amazon, I picked it up at a local store but the results are so amazing I have to leave a review here. I have a 2002 jeep grand Cherokee. The headlights were to a point where I barley even wanted to drive at night because I had a small blob of light MAYBE 20 feet in front of me, not even. and thats all it was, my headlights were crap. I liked this kit because it didnt require a drill, like the 3m headlight kit does. Im sure the 3m will probably be less effort, but I went with this one because it came with everything you needed. You just needed to supply water (for wet sanding) and some paper towels to wipe the lights dry between the sanding. The box says 35 minutes. Im not sure who the heck can do this in 35 minutes but..not me, 35 minutes PER light maybe. The whole process took me about an hour, hour and a half. its fairly simple. The directions are clear, all the items in the box are even labeled "step 1" "step 2" "step 3" The results though. I am still in shock about them. I saw some pictures of "results" and I thought they were all fake. NO, they are not. Its that good. I am very pleases with this product, and if it only lasts a couple months, then so be it. I'll do it again. If you need your headlights cleaned buy this kit! On another side note, my mom was so amazed by how well it worked she made me go buy another kit and clean her headlights too!
Ayesha Ashraf
Can't Believe The Results - How Is It Possible?? Tips & Pics Included!
I own a 2004 Nissan 350Z. Obviously I enjoy it because it is a sports car, but at the time, one of the coolest things to me were the headlights. Back in 2004, Xenon headlights were rare and I really liked how they looked, especially with the clear headlights. Unfortunately in this day in age, most headlights, if not all are made of plastic. They aren't like they used to be (my dad's Ford Aerostar and my mom's Chevrolet Corsica had glass headlights). What many people don't know is that your plastic headlights, when you buy the car off the lot, actually have a clear coat on them that provides UV protection. Over time this clearcoat wears down due to various elements, chemicals, and abrasives (sun the rain, pollution, road salt, bugs, car wash, automatic car washes - the bristles). When this clear coat is worn down, the sun's rays will eventually break down your headlights to that yellowish color with or without the haze. When this happens, you have a choice to either restore them or replace them. Obviously restoring is usually cheaper but the results vary and the yellowing of the headlights returns within weeks or months. There are many headlight restoration products out there. I've used a handful, such as Meguiar's PlastX Clear Plastic Cleaner and Polish -10 oz. and Stoner 95121 Invisible Glass Headlight Restoration Kit - Pack of 2. Although these products do clear your headlights, they do nothing to protect them after you clean them. Remember, the yellowing occurs from the sun's rays. Luckily my 350Z's headlights aren't to the point where there is no return. The haze/yellowing is mostly around the headlight and not in the center. But still, yellowing/haze headlights are embarassing. It wasn't until this Sylvania Headlight Restoration Kit was one of the Lightning Deals of the Day did I decide to pull the trigger. I did compare the LIghtning Deal price to my local Autozone. With the deal, it was $2 cheaper and I decided to give it a try. First and foremost, READ THE DIRECTIONS BEFORE THE WORK. I'm the type of guy who reads the directions as I go along and I really wish I hadn't. Here are a few tips for those of you like me. 1. Honestly set aside at least an hour and 30 minutes. The box says 30 minutes, but that's bologna. I did exactly what the box said and it took me an hour and a half given my headlight damage. 2. The glove that comes with it is for the last step (applying the UV coating). When I saw the glove and didn't see any mention of it on the first 2 pages, I put it on. It won't hurt to put it on right away, but it's really for the last step. 3. The Step 1 Surface Activator is used in more than 1 step! I ended up using 2/3rds of the bottle by graciously spraying it all over both my headlights. This made for a skimpy amount when you reapply it after the sanding procedure. In actuality, there you should only use 1/4 of a bottle per headlight for a total of 4 times. 4. In the sanding step where it says apply medium pressure, really do apply medium pressure. The only time you apply firm pressure is in the last step of sanding with the 2000 grit sandpaper. Although my headlights look great, if you look real close, you can see some scratches that are still there. It's because I applied firm pressure with the 400 grit. I thought the firmer the pressure, the quicker I could get the hazing/yellowing out. Well because of that, there were some scratches that were deeper than they should have been. 5. In the last step where you apply the UV block clear coat, douse your blue cloth with it. You want your towel saturated. Don't worry about wasting it because you won't. I doused mine and had about 1/3rd of a bottle left. The reason you want a heavy saturation on the blue towel is because you want a nice heavy coat of the stuff on your headlights. Heavy coat = heavy clear coat = lasts longer. Thin coat will wear away quicker over time. So remember, put a HEAVY COAT on it! The results? Freaking amazing man. My headlights look brand new. I really don't know how this is possible because anyone who has polished anything can tell you that after the using a rubbing compound with a buffer, things should look shiny after you wipe off the compound. This is the exact opposite from using this kit and finishing the Clarifying Compound step. Even the directions say after cleaning off the Clarifying Compound, the headlights will still be hazy. Knowing there was 1 more step, I was very skeptical. I thought there was no way 1 more step of just a UV coating can clear up the haze from the sanding & clarifying compound. But the end result is just like my review title says, how is this even possible?? I can't believe the results. I give this kit 5 stars. It's only been 1 day since I applied it and things are looking good. What I'm curious about is how long it will last because any person who knows about yellowing headlights knows it won't last forever. The clearcoat that's applied will eventually wear away. Which leads me to my next point... the kit itself has a lifetime warranty! Why would Sylvania do this? Again, clearcoats don't last forever so , if Sylvania is going to send me a new kit every time the clear coat wears away, then I'll definitely take advantage of it. I am so impressed by this kit, I bought another for my wife's car who is experiencing the same yellowish-haze. I showed her my car after using the kit and she asked if I could do hers. Don't forget to look at my before & after pics! I'll come back and update in a few months.
Patrick J Dougherty
Great product - more time than 30 minutes - plus a bonus!
This is great stuff - everything needed in one box and in the right amount. What you get: 1 - One bottle of surface prep solution. This removes oxidation and surface oils & dirt. What is this? It is basically the same as "Simple Green" or "That Purple Stuff". Same idea, same function same result. This is a very important step but it is not really a secret sauce. 2 - Three sheets of wet/dry sand paper - 500, 1000, 2000 grit. Just the right size for the job, but the quality of the sand paper is not top shelf. yes it gets the job done, no problem with that, but I already have much better product in my shop. 3 - Polishing compound. Again, this is nothing special but you do get a tube of compound which is just enough for the job. I already own several types of polishing compound and this is just as good as any of them. It is however slightly more course a grit compound than you would use on a painted finish. 4 - Two low lint cloths for applying the compound and drying it afterwords. 5 - One bottle of UV protection & application cloth 6 - One reel of protective tape. This is actually just electrical tape and you get quite a bit of it. I only used about 1/4 of the reel and the rest goes into my shop drawer. How to use: Tape off the areas surrounding the headlight. You are going to use sand paper and do not want to scratch the paint - electrical tape is a good choice here because it is going to get soaking wet. Spray the prep solution - this removes all of the road junk and oxidized layers. Go through all the sand paper going from coarse to fine grit, finish off with the compound. Re-clean with the solution, dry, remove tape and then apply the UV protection. They state "30 minutes" - took me more like 45. Results: Wow - this is great stuff. At the start of the process you will have your doubts right away. These doubts increase as the headlights start to look like frosted glass but hang in there. As you go through the finer grits and compound the lens clarity starts to return. The you add the final step of UV protection and it all comes back. The UV protection is quasi clear coat paint and it fills in all of the gaps created by the polishing. Once this stuff is on your headlights look like new. Really - like new. So, where is the bonus? Well when I was done with the entire application, everything was spent. The paper showed its wear, the surface prep solution was gone as was the compound. However, I still have 1/2 bottle of UV protection. To be honest, I already have paper, compound, tape & Purple Stuff in my garage so I can easily go through all the steps to prep the headlights on my own. I just need some of the UV protection to finish the job; which I now have. So you are faced with two scenarios.... 1- use the kit and toss the leftovers, 2 - use the kit and save the UV and if you have some basic items you can go after car #2. Nice!
Whitney Suzanne Junelle Brooks
Tips to help make this go easier.
First, this product works great, but be prepared to take your time and put in a bit of an effort. Set aside at least an hour to do it right, and read the directions VERY carefully. Here are some tips. 1. Make it easy on your knees. Pull up a chair and put a bucket of water and roll of paper towels between your feet. Turn on some music. 2. Realize you will will be putting the Step 1 Activator on each headlight TWICE, so don't use half of it on Headlight One the first time you spray it on. 3. Directions advise folding each sheet of sandpaper in half, and use each half on each headlight. I suggest tearing a tiny corner off side one of each piece, as it is easy to mix up which half you are using since you are dipping it in water, drying of the light and repeating. (NOTE to Manufacturer: Why don't you just give us an extra set of small sandpaper squares for both lights?) 4. On the final STEP 3, pour about half the UV Block Clear Coat onto a paper plate so you can dip the blue cloth evenly into it. Don't try to pour the liquid out of the little bottle evenly onto the cloth. Tilt the plate a little so it pools on one side. Check out the before and after pics on my 2002 Jeep below.
Ana Kolevska
Worth the work
I used this on my 2003 BMW 325i. The headlights were so yellowed I failed the Maryland safety inspection. All the reviews are true to form. Yes, it's a fair amount of work, but the result is really worth it.
Vicki Boo
Yeah, it really works
This kit works well. My experience and advice. Use a chair, unless your vechine is very tall. I got two and perched one in front of each headlight to make the physical labor easier. Cut each piece of sandpaper in half. I did and marked the back of each "400L, 400R, 1000L, 1000R etc. to keep track of which is used where. Be careful not to over-use the activator in Step 1. You don't get much and you need to use it a second time. As for water, I used my hose with a Mist setting on the nozzle. You cannot use too much water when you do the sanding. When it doubt, apply more water and less pressure when sanding. Blue painters tape does not stand up to water. Watch the Sylvania YouTube video on application, several times. It gives reassuring advice about what you will see. I transcribed the steps onto paper and taped it to my hood so I could follow the directions exactly. The sealer is where everything comes together. You get plenty and you must apply apply one, thick, even coat. I did my headlights in parallel fashion: step 1 on both headlights, then step 2 on both headlights, etc. It helps keep track of materials usage. Last, I did the job on a dry summer evening when I knew no rain was coming and there would be no morning dew. No driving until the next day, of course.
Vyanjana Vyas
Holy crap, it really works!
I went into this with no expectations of success, literally none. I was certain that it would take much longer than advertised, be more difficult than described and the results would be iffy at best, I couldn't have been more wrong. To say that I was pleased was to say it was an understatement - I have posted pics for reference, truly amazing difference! The kit came with everything needed to do the job perfectly. I made the mistake of buying the kit in the middle of the worst winter on record in Northern NY, so needless to say I had to wait several months to do it. Once I got to it, it was a snap and took 30 minutes to do both headlights. All I needed to supply was water. Sanding the headlights was the most tedious part of the process by far, especially if you are as OCD about evenness as I am. As you near the final stretch and put on the clarifier, things are still looking a little sketchy on the lights. I was getting a bit discouraged that it wasn't working at first, then I applied that magical polish from the gods and in an instant things starting looking up. Literally, within seconds my headlights started looking brand new. I had a feeling of accomplishment on par with the scaling of Mt Everest (I didn't say the challenge was the same, put the feeling of victory certainly was). I have had them restored for about 3 months now and there is no sign of fading or yellowing like there was before, I am certain that I will have to do it again sometime in the future, but that is no different than any other upkeep on the car. Honestly, for the price and quality, you would be foolish to by anything else. This product is absolutely as amazing as advertised... and that is saying something coming from a natural skeptic and critic.
Lori Kirkpatrick Finney
Easy to apply, seems to be protecting the lenses from refogging
I have only had this product on my headlights for 3 weeks, but so far, so good. I only purchased the UV blocker kit, not the entire restoration kit. My headlights had very noticeable fogging on them. I did not use sandpaper. I used a Macguire's autobody polishing compound with a soft cotton cloth to polish off the fogged surface of the lights. Initially, when I did this, they started to show a little bit of haze again after only about 2 weeks. This is the common problem that occurs with these lights. Once you polish off the haze, you have also removed the UV protective coating, so the lens is even more susceptible to oxidizing from the UV rays of the sun, and it will re-fog very quickly. So I bought this Sylvania UV coating. I repolished my headlights with compound, washed them with clean water and dried them, and then applied the coating per the instructions in the kit. I did spray the oxidation cleaner from the kit on my lenses and washed them. Then I saturated the provided cloth with the coating fluid and made clean one-swipe passes over my lens with the saturated cloth. It's important to do it this way like the instructions caution you. Don't try to get creative or make multiple swipes or dabs with the cloth. The idea is to lay down a very wet layer of the fluid and then let it self-level and dry without any interference. It only took me about 1/2 hour to do this on both lenses. After 3 weeks, there is no sign of hazing at all and they still look terrific. Bear in mind, I did NOT use sandpaper, only polishing compound. So my lenses looked great by themselves after I polished them. The only thing I am expecting this product to do is protect them from UV radiation so they don't re-fog, and so far, it seems to be doing that.
Raluca Teodorescu
Amazing results the very first time!
Wow! I read lots of positive comments about this product and process but was still somewhat skeptical. The only negative is the time required... the marketing copy says it takes less than 30 minutes, but my experience was that each light took about 60 minutes - so 2 hours total rather than 30 minutes. There are several steps in the restoration process and I found myself frequently re-reading the instructions to make sure I didn't do anything out of sequence. I'm sure it will go faster the next time (though I hope that won't be necessary for a long time!) The kit contains several grades of sandpaper - you start with the coarser paper and work your way down to the finest paper. During that process, the lens covering your headlight gets more and more scuffed up until it appears much worse than it started. Along the way, you'll be asking yourself "OMG, what have I done?! Maybe this kit ISN'T compatible with my particular headlamp!!" Still, don't give up - the final step is when it all comes together and you should end up with 'like new' headlights. I highly recommend this product.