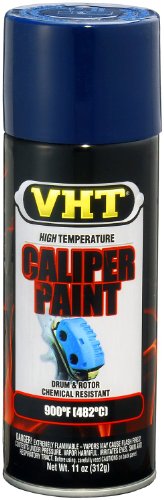
- Features EZ Touch conical nozzle
- Ceramic resins resist heat up to 900 degrees Fahrenheit
- Fast drying durable finish
- Dry to touch in 30 minutes / handle in 1 hour
- Resistant to chipping, chemicals, and brake dust
-
Information
-
Twitter
-
Pinterest
-
Youtube
-
Facebook
Lori Peeples
Great coverage, easy to use, and looks OE. Impressed!
I really like VHT products. Prior to seeing my friend use this on his Audi R8, I was quite skeptical of spray cans. I prefer to powder coat the calipers, or use G2 paint kits because of their heat proof coatings. Well, seeing is believing. When I saw how great my buddy's calipers came out, I knew that was it. The color was good, and light-medium coats settled real nicely. It was so smooth; almost like factory! Needless to say, I was impressed. However; for my own Honda Fit, I wasn't too sure how it would come out. The Brembo calipers on higher end cars are smooth as silk and a great platform to start with. I don't have those though. My Honda calipers are roughly textured steel pieces. But hey, what the heck? Worst comes to worst, it just looks like a cheapo Honda caliper. Bought one gold can. There's enough to spray two calipers, with extra to spare. My DIY process went something like this: - Cleaned my brand-used DC2 ITR calipers with brake cleaner - Masked off the piston and other delicate areas - Hit it once with a light coat, wait a few minutes for it to dry - Proceed to do two light coats, with a few minutes in between so that it could dry - After that I laid a nice, thick coat and waited for another 5 minutes before I hit it with the last medium coat - Once the paint dried and settled on the surface, I proceeded to let it dry overnight Damn, this thing looks good. I installed it, and even tried to knick it to see if the paint would come off. Nope. I definitely would recommend this to any diy-er. It's a great product at a great price, and the durability so far has been extremely good. I have had it on for about two months now and it still looks great. I don't even clean it, to be honest lol.
Nwobodo Emeka Stanley
Color is beautiful! Spray pattern is wide and covers nicely
Looks just like the European/German car's Brembo yellow color. How do i know? Because i refinished my Brembo's using this exact paint! Perparation is key! This stuff is best suited to stick on bare metal, but previous powdercoat is just fine as long as its sanded and cleaned correctly. Color coverage is excellent and doesn't require any sort of primer to cover properly. Three coats is all you really need! Be sure to follow the instructions carefully!!! Its best to use a clearcoat so that the color doesn't absorb brake dust, making it look tacky and ricey, i personally used a professional 2k (2 part) clearcoat on my calipers in combination with this paint, its available in a spray can with a button on the bottom side here on amazon for around 22 dollars and gives an amazing gloss. 2k clear is chemical resistant and can handle quite a bit of heat, track days where high temps occur will absolutley destroy that 2k clear however, so use at your own risk. Pros- -Color is very close to Brembo yellow -it doesn't need a primer underneath -spray pattern is excellent and wide -Chemical resistant -affordable Con- -this paint without some sort of clear coat will absorb brake dust and fade to a brake dusty color -paint is only chemical resistant when baked to proper temperature for 1 hour, and withn 7 days of initial application (hard braking may cure it to be resistant, but an oven bake is best suited)
Christy De Pasquale
Works great. Don't forget to clean and undercoat!
I used this product in conjunction with an appropriate primer and clearcoat, all from VHT, to paint my car's brake calipers bright glossy red. step 1) remove brake dust, grease, and rust using a brake caliper cleaning agent of some kind. Also use a wire brush if you can. step 2) Sand your calipers using 320-grit sandpaper. Really rough them up. Then use some more brake cleaner. step 3) Mask off your car's corner body panels, the wheel wells, the struts and hoses, and finally, the brake rotors. Take the time to mask the bleed valves on the calipers too. step 4) Apply primer to the caliper in a very light, speckled coat, then move to the next caliper until you've applied a coat to all 4. Do this 4 times, gradually getting heavier, but avoid letting the paint run (it's okay if it happens in the primer). Try to do this as quickly as possible. step 5) Apply your base color (THIS PRODUCT) using the same method as in step 4: light coats multiple times. I suggest a sweeping method, rather than just spraying hard. Do NOT allow the base color to run. step 6) Apply a clear coat using the same method as in steps 4 and 5, but be careful not to overdo it. Clear coats can run more easily than base colors. The paint should be looking thick and glossy by this time. step 7) Wait an hour. Drink a beer or something. step 8) Remove your masking. Gaze upon your new calipers. Then, use some brake cleaner to remove any overspray from the brake rotors or undercarriage areas. Do NOT use brake cleaner to clean body panels, as it will probably remove the paint. step 9) put your wheels back on. wait a few more hours. THEN drive your car pretty hard, making sure to go fast, and brake hard. This will heat your brakes up. The paint needs to cure at 200ºF, which means you need to drive and brake repeatedly. Don't go too nuts. That's it! All finished.
Christala Valdez
Really great product!
This stuff is awesome! Sprays on really well, the coverage is good and the color is FANTASTIC!! Only time will tell how it holds up but so far, I'd highly recommend this brand of Hi Temp Caliper paint.
John P Irwin
Made my rotors look a million times better!
I didn't take my calipers off, as I didn't want to bleed the brakes and deal with a hanging caliper if I left it connected to the brake line. I did tape up well, and paint them on old rotors that I changed as soon as the paint dried. So in the pics, you're seeing the painted calipers with my new rotors. I put 5 coats on each caliper with about 10-15 min time between coats. Still, I only used 1 can, and I still have some of the can left. I bought two, so I guess it won't cost me any more in the future if I need to repaint them. As a guy who details my car frequently, I believe I can keep these in good shape for a long time. I used a brake cleaner product to spray it down, and then a wire brush to knock all the dirt off. After that, spray more brake clean, and then sand down with 320 grit sandpaper. I then washed off any leftover debris and began painting. It was a simple process and really brought my old calipers back to life. They're still in good working condition so I figured it would be ideal to make them look better before putting on my new drilled and slotted rotors.
Raluca Luiza
Gloss Clear Caliper Paint
I purchased this product for a brake job I did recently. While I replaced my pads I decided I wanted to paint the calipers to fend off rust and brake dust while adding that little bit of detail to my sweet ride. I started with a black undercoat. Once dried I put on some vinyl stickers and painted over them with the gloss clear to protect them and help them last longer. They've since been great and have showed no significant signs of wear. I always see my calipers peeking out from my wheels, and they've braved the tough Midwest salty roads. This job was roughly 5 months ago, and the only wear is a slight peeling of one of the rings that I placed back down and painted over once more. Attached are a couple pictures of how it all turned out (mind the curb rash, the wheel was replaced a month ago).
Jeffrey Nii Armah Adamah
So far so good
For some unknown reason my BMW big brake kit didn't come with painted rear calipers so I wanted to paint the rears to match the front. Unfortunately the ambient temperature was below the recommended application temperature, but it still worked. I sprayed 3-4 coats per caliper, allowing it to dry to the touch between coats. After the final coat I baked it for an hour at 200 degrees. This yellow doesn't match my front calipers, but I used it as a base coat. I figured this paint would adhere to the calipers while my color-matched paint would adhere to it. I applied 2-3 coats of Phoenix Yellow color matched paint to the painted calipers. After that dried, I baked them again. Once the Phoenix Yellow had dried, I applied 3-4 coats of VHT clear coat and baked it. I'm very happy with the results. Not only does it look like the factory caliper paint now, but it should hold up for years. The nozzle does spray quite a lot of paint so you do want to keep your distance. I was a bit sloppy, but since these calipers were cast aluminum anyway, it just looks like the natural texture. If you were painting a smooth surface, you would need to be more careful and pay close attention to the application instructions.
Po Kouji
Silky smooth paint application, good coverage and quick drying.
Bought this VHT Satin Black product to paint my brake calipers and also the rotor hat portion. I wish all spray can paints performed like this one. You can tell it's a good product because the spray can and nozzle are first rate and the paint goes on smoothly and covers very well. It also dries quickly to a very nice satin finish. Yes it's somewhat expensive but it's worth it to get the high temperature resistance and ease of application. Recommended.
Fozia Amjad
Good quality, holding up very well after 6 months of driving 3 hours a day
About 7 months out from applying this to my caliper, still looks great besides some VERY minor chipping which you can’t see unless you’re right up on the caliper. But fixing those little spots is nothing compared to doing it the first time. First I removed the caliper and took out all the hardware, sanded off all the surface rust, and cleaned it up, using new hardware I just went ahead and rebuilt the caliper while moving along with the painting process. I plugged all the holes with screws and used zip ties on the screws to hang them from a metal pole and applied about 3 base coats with the VHT white primer. Letting each coat dry for about 20mins before moving onto the next coat. Also be sure to spray from a distance and let the paint get tacky and don’t let it build up too much in one spot to avoid runs and bubbles. After finishing the primer base I let them dry for 24 hours before doing the same thing with the VHT blue paint. After letting those 3 coats dry for 24 hours I reinstalled the calipers and some new brake pads. Color is bright and honestly better than what I was expecting from the top of the can. Holding up much better than I thought it would, currently doing the same thing for my brothers car since he likes the look as much as I do. Great product, highly recommended for painting calipers
Joan Ellen Erbstoesser
awesome for paint prep but overpriced for what it is.
I saw a review saying it's no different from brake cleaner. I am a master mechanic and I can tell you it is much better than brake cleaner. Brake cleaner does level behind a VERRY small amount of residue that can hinder the paint from sticking well. I'm not sure what all is in this but it smells like pure acetone and I know painters and welders use acetone to prep surfaces because it cleans everything and leaves no residue. That being said it is pricy for just spray acetone