- Easy to use and long lasting
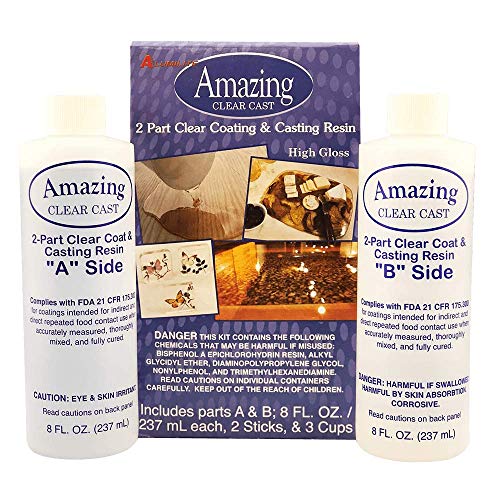
- This package contains two 8 ounces bottles of clear coating and casting resin (mix portions out of each bottle together in order to create a casting)
- Also includes two stir sticks, three measuring cups that fits up to 2 tablespoons of liquid and easy-to-follow instructions
- It is used to make extremely detailed designs out of your Amazing Putty mold or as a protective layer of furniture and more
- Made in USA
-
Information
-
Twitter
-
Pinterest
-
Youtube
-
Facebook
Leslie Roland
GREAT for tumblers
Worked GREAT to coat a spray painted/acrylic painted stainless steal tumbler. Its thinner than I expected (probably a good thing in most cases) and takes ~1hr to set enough to quit running/dripping. Not an issue, just a learning curve... I've never used epoxies other than my garage floor. Seems very tough, though I haven't torture tested it either. I used ~1/8 of it to put a heavy coat on this small cup, and actually threw away most of that mix (poured enough to ensure an even mix, and accidentally over-poured a bit). Next time i may line up a few projects so there's less waste. Don't remember if the directions said to use in ventilated area, but there were no harsh fumes. I've got several ideas on future projects to use it on, can't wait to get the time to try them out.
DonnaMae Zurbano Gutierrez
Mix and measure really well!!!!
I've purchased this product several times and have always had good luck. You HAVE to be exact when measuring out each part. I use a kitchen scale, zero out my mixing container, an pour each part into the cup. For a large tumbler, I generally use 15g of each part, making both parts 30g. Then, you have to mix really well. This is critical otherwise your end result will still be tacky. I usually mix until the epoxy has a milky color. Though, it will dry and cure with a clear, glossy finish. Generally, I'll mix it for 5 mins. A tip: when pouring your mixture, if air bubbles are present, take rubbing alcohol and spray the surface. It breaks the bubbles but doesn't mix into the epoxy and won't mess up the end result. Over all, this product is reliable, easy to use and is a quality product. I won't entertain looking into other resins or epoxy. This is it for me!!
Becky Elaine Lathan
I decorate stainless tumblers
After a lot of research in professional user groups, I chose this food safe reliable brand epoxy for coating the stainless tumblers I make. I was so stressed and delayed long before getting the nerve to jump in. This product was so easy to use, I didn’t need to worry. Protect your working surface, you will get some drips, and have a space heater or heat gun nearby, to help your epoxy go on better. The room, or at least immediate working area needs to be in the 70’s fahrenheit. It helps to warm the epoxy before applying, just hold it in front of the heater, or wave the heat gun around it. With my cup on a motorized turner, glovedhands, and a mask, I pour slowly and smooth the surface as it turns. I am pleased with the glossy, glassy, clear finished surface, after about 7 hours. Then I add decals, etc., and repeat with another epoxy coat. Some like to add a third coat. I do my spray paint and glitter (or no glitter) before epoxy.
Carrington Keys
Great Castings
Did a great job making the base for a model brass cannon. All the brass turnings and chips were saved and mixed with the Clear Cast. After some cleanup, the result is a beauty.
Amber Elizabeth Lewis
After it dried I sanded with finer and finer grades of sandpaper to bet the desired ...
I carve walking sticks and canes for a hobby and sell them, I added a silver dollar to the top of a stick and, after making a small dam around the top with masking tape, I poured clear cast to fill the area around the silver dollar. After it dried I sanded with finer and finer grades of sandpaper to bet the desired effect. Very pleased with results
Andres Romero
Really is Amazing and Clear
Poured this about 1/8” thick over a printed photo, and so far so good. It’s still curing (instructions say up to 7 days for the full cure), so it’s still a bit tacky, but it is hard and is very clear. The bad thing about the long cure period is trying to keep it clean that long. I seem to have gotten some dust or debris in there, so try to use this in a clean environment! Otherwise it is extremely clear and seems to have worked really well. Directions are easy to follow, just mix equal parts (by volume) A & B, stir slowly to avoid a ton of bubbles, and pour. The resin does a pretty good job of self-leveling, so as long as you pour onto a level surface you should have any issues, but I wouldn’t recommend just pouring all of it into the center of wherever you are pouring this.
Sarah Quintana Castro
Won't buy resin anywhere else
Absolutely one of the best resins on the market! There are some that are bonkers in price, and considering the ones I have tried, this one is reasonable, and won't cost and arm and a leg. I don't like using resins that aren't name brand; as they have a tendency to not either dry entirely, or are still viscous, and will ruin your project (and sanity)t. Art Resin is hefty in price, which is why I continually come back to Alumilite for my masu box pieces, and layering glass pieces.
Seif Eldeen
I use it to seal glitter on keychains and tumblers and it works great and gives a very pretty glossy look
I was so intimidated to use this but it ended up being so much easier than I thought! I use it to seal glitter on keychains and tumblers and it works great and gives a very pretty glossy look.
Jared Hans Atienza
My favorite epoxy. Plus it’s FDA compliant!
This has been my go to epoxy for all my crafts. I make tumblers, jewelry and keychains. With all resin, make sure you mix equal parts! And this will self level. So if you’re putting this in a mold, make sure you’re level. If you have bubbles, you can take a heat gun to it. Or quickly run a lighter across it. Heat will pop it. Wear gloves when using all chemicals. It’s sticky! It will dry crystal clear! Or you can add a tiny drop of acrylic paint and glitter to color your epoxy. Just for your entertainment and enjoyment, I’ve attached some of the work I’ve done using Alumilite epoxy.
Tara Freeman
I made this piece of jewelry for my girlfriend and it turned out very nice, took a lot of time and patience but ...
Long work time, dries very clear, seems to set up hard and cures well, I made this piece of jewelry for my girlfriend and it turned out very nice, took a lot of time and patience but well worth it!