THESE ARE AWESOME!! I absolutely hated driving down the road, especially on freeways when the speeds are accelerated, and watching my hood shake up and down, heaven forbid EVERY TIME A BIG RIG passed at high speed going the other direction. I was always praying my hood wouldn't fly off! Since placing these on a couple months ago, NO MORE ISSUES....no matter the speed, the hood stays firmly closed with absolutely no wiggling at all....I had one of the factory installed (bought my jeep new) rubber hood closures break while going high speed on a 4 lane road, had to pull over and use a long thin electric cord to tie down that side of the hood with yet over a 100 miles to go on Hwy 6 in Nevada...If I every buy a new jeep, these are going on DAY ONE!
These Rugged Ridge black aluminum hood latches are fantastic!! I love ‘em! I bought them because something hit one of my OEM latches and it broke. They’re plastic after all. So I thought the aluminum would be a good idea. And with stainless steel mounting hardware I wasn’t worried about strength or durability there either. They were “easy” to install - the most difficult part was reaching the Nuts inside the fender. I wound up going to the store and buying offset box wrenches (metric) and they were just the thing. They were designed for exactly this task. All told it took me about half an hour and I couldn’t be happier with them. They feel good to latch and unlatch. They look good! They butch up my Jeep a little bit, but not too much. I would have done it sooner if I knew I would have liked them this much! Well Done Rugged Ridge!
Seen some of the other reviews about how hard these are to install. Hopefully I can make this a little easier. Took my time on this install...from opening the box, reading the crappy instructions, getting tools, install itself (with a few bumbles), then checking everything and packing up (including taking the pic below)...45 minutes. 2010 Jeep Wrangler. Tools: 5mm allen (2) 4mm allen (2) 1/4" socket drive 1/4" extension 1/4" universal joint 1/4 to 3/8 adapter (for me as I didn't have a 13mm 1/4" socket, but did have a 13mm 3/8") 13mm socket (for lower latch nuts) 10mm socket (for upper latch nuts) Blue Loctite (242) (for the threads of the cross bolt of lower latch(part the holds the actual latch onto the latch mount), when screwing back together you don't want this to loosen over time so I put blue loctite on threads. Blue loctite is light strength removable type, good for this application) Long slim slotted screwdriver (for prying the plastic center pins up on fasteners that hold the top of grill on(first!), then for prying up the fasteners themselves) Adj wrench (for tightening the new latch adjustment nuts after install is done..the ones on the center threaded rod) Gloves (for plugging the turn signal light connectors back on...DO NOT forget this BEFORE you put the grill back on!) Flashlight (for seeing the damn nuts in the first place and where they are, and how to get to them) Crappy instructions (worth looking over if you have no technical skill whatsoever) I have a distinct advantage of having slim fingers, so it was relatively easy to place the socket over the old lower latch nuts and again for the new latch nuts (even to feed the new nuts onto the screw threads). I don't know how to advise if you have fat fingers. after the grill is off, your now working around the engine compartment frame so you've got to get in there somehow to feed the nuts off and on, and fit the socket head. The old latches came off very easy. The nuts were ridiculously easy to loosen (almost too easy, they weren't even tight), so was able to unthread the screws by hand after breaking the tension with half a turn of the socket wrench. The new latch nuts have the plastic insert to prevent self unthreading, so they were a little harder to get thread on by hand, but once I got a couple turns, they stayed in place to allow the socket to slide over and tighten. At least if you drop the nuts or tools, they drop down to the ground. It happened a couple times and was thankful I have a jeep...you know, without the big plastic panels covering the underside like most cars and trucks. A little tip: when installing upper latch, pull down on this piece when setting into position and tightening, so that it is at its lowest position in the hood holes for the screws. The lower latch is going to hook onto this so you don't want it to slip down over time. Slide it to its lowest position and then tighten and the fit will be rock solid. See pic for the only tools necessary (ref list above). A little common sense and patience and you'll be fine.
Installed on a 2012 JKU Sahara What a difference. I live in the High Desert of Los Angeles County, and we get some pretty significant wind up here. With the stock hood latches, I let seeing my hood fluttering when driving into headwinds, or even going over 50mph on the freeway. Yeah, I know, a Jeep, going over 50? Is that even possible? It's true! It's happened a few times! Anyway, installation was relatively straightforward. YouTube has a bunch of videos on installing them, so grab your trusty ratchet set and get to it! You might scrape up your hands a bit as the nut for the bottom portion is a bit of a pain to get to, but hey...scrapes are just a small sacrifice to the Jeep gods, right? Cinched the hood down nice and tight, and looks good too.
Read a lot of reviews with others having frustrations on installation / hard to get at. Simple solution is: 1. Remove the Grill (5 minutes tops - simple plastic pull up clips on top and a row of metal clips along the bottom) 2. Remove headlights (5 minutes tops - 4 torx screws each headlamp. Pull headlight towards you and unplug wire harness) Now you can easily get a small ratchet / socket to the lower hood catch nut on the back side. I used a knuckle / flex at the end of my 1/4 drive extension. Very simple to do above - then reverse is even quicker because you already know what is where. As far as the product. Rock solid hood now. No more lifting with wind / opposing traffic and such. On one of the pieces the threads were a little tight to turn - but still doable. Just take your time re-assembling if you happen to unthread one all the way. I can see how they can easily be cross threaded as the aluminum is very soft compared to the stainless bolts. Very nice produce - only thing worth repeating that someone else mentioned is that they will rest on your fender when you go to open the hood. Easy solution for that too: Cary a pair of gloves in your jeep (you probably do anyway) - just set a glove on each fender and rest the hood latch on them when opening the hood. Rugged Ridge comes through again :)
**2012 Wrangler** Wow these things are way more meaty than I had imagined. They make me feel like I am driving a legitimate Tank now. They look amazing and I love that you can adjust them. For looks alone these are amazing but I purchased due to hearing a few horror stories from some local Jeepers about hoods latches breaking and decided to be proactive on this one. Install Notes: The uppers(part on the hood) are very easy and if you can't figure those out, sell your Jeep. The Lowers are another story. I will tell you what I did and hopefully it will help you out. For the driver side I was able to use a standard ratchet with and extension to get the single bolt underneath. Just weave around the horn and a few other things and you should be able to get in there no problem. Passenger side is packed with goodies to work around and made things fun. I chose to take off the grill and I am glad I did. If you haven't done this before, don't worry, its easy. There are 6 plastic clips on top of the grill that need to be removed. Just use a flathead and pry the middle section out and then pry the bottom portion out. Next grab the grill by the uprights closest to the headlights as low as you can and give it a healthy tug away from the vehicle. This should pop out the metal clips and all that is left is to disconnect the turn signals. With the grill removed, you should be able to fit a normal wrench in there now and start to take off the passenger side bolt. From there its just installing the new hardware and putting it all back together. Make sure to remove the little rubber piece from the original latches that rests between the hood and the fender area. This will prevent you from over tightening your hood down and having a paint on paint rubbing issue that could lead to rust. There is a spot on the new latches to install this little rubber piece. Make sure to completely remove the adjusting bolt from the latch before you install. Mine only had about two threads in on one side and the other was threaded about 4 times further than that. Even them out on each side of the latch so you don't have the threads strip out on you. After you find the sweet spot just hit the nuts with a wrench and tighten them up. Just make sure not to go too crazy and strip the bolt. After that, step back and admire your new military grade hardware that will outlast your Jeep.
These really are excellent hood latches, and are far superior to the stock Jeep latches. There is a noticeable decrease in hood chatter, and provide a much more rugged appearance. I've put them on both of my Rubicon's and love them. The stock plastic Jeep latches also turn grey with time, so these aluminum ones solve that issue as well. The install isn't hard, but can be fiddly, and will take about 30-45 min for an average DIY'er. I wasn't able to install the lower latch portion without taking off the front grill of the Wrangler, though, I've read others say they haven't needed to do so. (Though I can't imagine how) The grill is extremely easy to remove, so don't struggle to work around it. The Rugged Ridge instructions don't cover how to do that, so here it is in a nutshell. The grill is held on with just six snap locks on the top and several push clips on the bottom. A small screw driver will pop the top ones out easily - be gentle. The lower part of the grill is just held in with snap clips, and just pulls off with a little pressure. Remember to protect the grill from the two front tow hooks with towels to prevent scratching the grill. Start on one lower side, and with a little pull at the base of the grill, it will pop out. Then unclip the two turn signals, (optional) and you will have much better access to the lower hood latch bolt(s) — it's still a tight fit though. You don't have to remove the light connections if you don't want, just lean the grill down and out of the way. You can continue to follow the instructions, and then reinstall the grill by reversing the order above. It just snaps in. Hope this helps someone out. I would recommend them for not only appearance but superior function. I do wish they were made in the US instead of overseas. ****** Update ****** After having both latches for a while, there is something I've noticed. The silver version developed significant water spots that are not nice, and couldn't be removed. It's important to understand, the silver finish is paint (like a powder coat) not an unfinished aluminum. I personally would not buy the silver ones again because of the way they look after a short time. In the end, I traded in the older black Wrangler (with the silver latches) due to mileage, mechanical issues, etc. and bought a new black one. This time though, went with the black latches. Looks great, and no spotting problems like the silver latches.
Silver Aluminum latches ordered. They have a good weight to them and a solid feel. Finish is a matte grey/silver...not chrome-looking. There seems to be one issue that is sub-standard and that is the rubber bumper piece. I can tell that it will cause an issue later, I had it glued down to hopefully prolong its life. I do like the look of the silver latches on my white jeep sahara, the body is white on white and I feel this silver color detracts attention away from the latches, as opposed to bringing attention to them if they were black. I ordered these as my hood has 'flutter' when its windy. These latches function to hold the hood down solid, there is no flutter.
Very "RUGGED" ......real nice look ....firmly holds hood . I had different latches before, another aftermarket company . Had the wire loop that held the pin , that went through the latch , I noticed that scratches were forming around the latch area. So I bought the RUGGED RIDGE LATCHES .........SWEET !!!!! .........CLEAN !!!!!!!!.........EASY INSTALLATION
I really love these hood catches and they are the perfect replacement for the OEM hood catches or whatever else you currently have now. I bought these black textured hood catches for my 2011 Call of Duty Black Ops Rubicon as I was concerned that they will eventually weather and rot. The instructions were not written as well as they could have been. Not included in the parts list 6 washers (which I found buried in the bottom of the box after I had completed the installation) and the 2 hood bumpers, which I found to be much better than the stock OEM bumpers. The installation was somewhat difficult concerning the lower anchor catch assembly. I have small hands and found it very trying to get the 13mm nuts threaded. The upper catch assembly was very easy and after getting the bottom catch installed, the rest of the installation went easily. I do see that the finish may be easily weathered so I will take everything off in late spring or so to put the washers on and coat everything in spray on bed liner. I can't have enough black on my black Jeep! These hood catches are very sturdy and I feel will outlast anything I had looked at before I bought these. It would be nice if every Wrangler came with these or something similar. Minor things aside, I would recommend these clearly superior hood catches to anyone with a Wrangler. Touches as these makes a Jeep more solid where it really counts.


Rita Henderson
THESE ARE AWESOME!! I absolutely hated driving down the road
THESE ARE AWESOME!! I absolutely hated driving down the road, especially on freeways when the speeds are accelerated, and watching my hood shake up and down, heaven forbid EVERY TIME A BIG RIG passed at high speed going the other direction. I was always praying my hood wouldn't fly off! Since placing these on a couple months ago, NO MORE ISSUES....no matter the speed, the hood stays firmly closed with absolutely no wiggling at all....I had one of the factory installed (bought my jeep new) rubber hood closures break while going high speed on a 4 lane road, had to pull over and use a long thin electric cord to tie down that side of the hood with yet over a 100 miles to go on Hwy 6 in Nevada...If I every buy a new jeep, these are going on DAY ONE!
Angela Williams
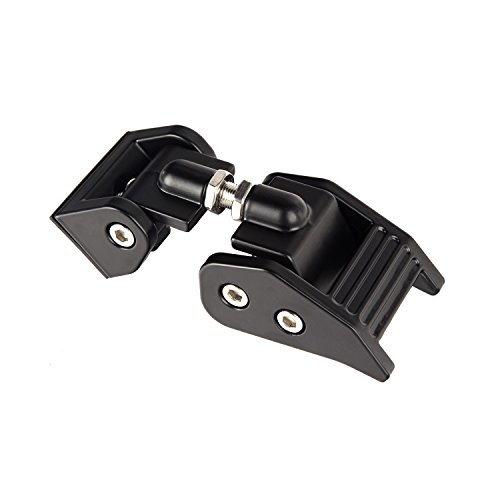
Beefy
These Rugged Ridge black aluminum hood latches are fantastic!! I love ‘em! I bought them because something hit one of my OEM latches and it broke. They’re plastic after all. So I thought the aluminum would be a good idea. And with stainless steel mounting hardware I wasn’t worried about strength or durability there either. They were “easy” to install - the most difficult part was reaching the Nuts inside the fender. I wound up going to the store and buying offset box wrenches (metric) and they were just the thing. They were designed for exactly this task. All told it took me about half an hour and I couldn’t be happier with them. They feel good to latch and unlatch. They look good! They butch up my Jeep a little bit, but not too much. I would have done it sooner if I knew I would have liked them this much! Well Done Rugged Ridge!
Ryan Jay
Heavy, built like a tank. Easy to install....for me.
Seen some of the other reviews about how hard these are to install. Hopefully I can make this a little easier. Took my time on this install...from opening the box, reading the crappy instructions, getting tools, install itself (with a few bumbles), then checking everything and packing up (including taking the pic below)...45 minutes. 2010 Jeep Wrangler. Tools: 5mm allen (2) 4mm allen (2) 1/4" socket drive 1/4" extension 1/4" universal joint 1/4 to 3/8 adapter (for me as I didn't have a 13mm 1/4" socket, but did have a 13mm 3/8") 13mm socket (for lower latch nuts) 10mm socket (for upper latch nuts) Blue Loctite (242) (for the threads of the cross bolt of lower latch(part the holds the actual latch onto the latch mount), when screwing back together you don't want this to loosen over time so I put blue loctite on threads. Blue loctite is light strength removable type, good for this application) Long slim slotted screwdriver (for prying the plastic center pins up on fasteners that hold the top of grill on(first!), then for prying up the fasteners themselves) Adj wrench (for tightening the new latch adjustment nuts after install is done..the ones on the center threaded rod) Gloves (for plugging the turn signal light connectors back on...DO NOT forget this BEFORE you put the grill back on!) Flashlight (for seeing the damn nuts in the first place and where they are, and how to get to them) Crappy instructions (worth looking over if you have no technical skill whatsoever) I have a distinct advantage of having slim fingers, so it was relatively easy to place the socket over the old lower latch nuts and again for the new latch nuts (even to feed the new nuts onto the screw threads). I don't know how to advise if you have fat fingers. after the grill is off, your now working around the engine compartment frame so you've got to get in there somehow to feed the nuts off and on, and fit the socket head. The old latches came off very easy. The nuts were ridiculously easy to loosen (almost too easy, they weren't even tight), so was able to unthread the screws by hand after breaking the tension with half a turn of the socket wrench. The new latch nuts have the plastic insert to prevent self unthreading, so they were a little harder to get thread on by hand, but once I got a couple turns, they stayed in place to allow the socket to slide over and tighten. At least if you drop the nuts or tools, they drop down to the ground. It happened a couple times and was thankful I have a jeep...you know, without the big plastic panels covering the underside like most cars and trucks. A little tip: when installing upper latch, pull down on this piece when setting into position and tightening, so that it is at its lowest position in the hood holes for the screws. The lower latch is going to hook onto this so you don't want it to slip down over time. Slide it to its lowest position and then tighten and the fit will be rock solid. See pic for the only tools necessary (ref list above). A little common sense and patience and you'll be fine.
Tracy Carrier
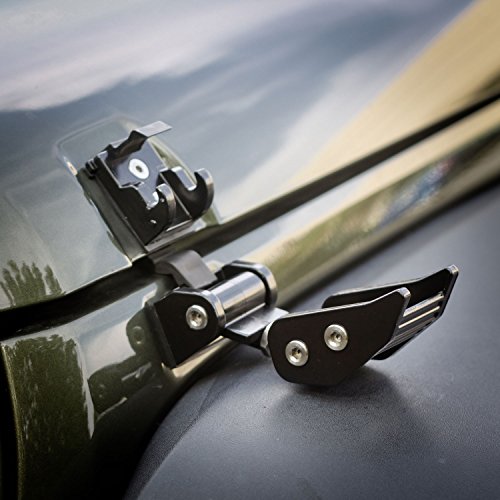
Function over form, but still sexy!
Installed on a 2012 JKU Sahara What a difference. I live in the High Desert of Los Angeles County, and we get some pretty significant wind up here. With the stock hood latches, I let seeing my hood fluttering when driving into headwinds, or even going over 50mph on the freeway. Yeah, I know, a Jeep, going over 50? Is that even possible? It's true! It's happened a few times! Anyway, installation was relatively straightforward. YouTube has a bunch of videos on installing them, so grab your trusty ratchet set and get to it! You might scrape up your hands a bit as the nut for the bottom portion is a bit of a pain to get to, but hey...scrapes are just a small sacrifice to the Jeep gods, right? Cinched the hood down nice and tight, and looks good too.
Amanda Rose
Solid / Good product - Easy Installation.
Read a lot of reviews with others having frustrations on installation / hard to get at. Simple solution is: 1. Remove the Grill (5 minutes tops - simple plastic pull up clips on top and a row of metal clips along the bottom) 2. Remove headlights (5 minutes tops - 4 torx screws each headlamp. Pull headlight towards you and unplug wire harness) Now you can easily get a small ratchet / socket to the lower hood catch nut on the back side. I used a knuckle / flex at the end of my 1/4 drive extension. Very simple to do above - then reverse is even quicker because you already know what is where. As far as the product. Rock solid hood now. No more lifting with wind / opposing traffic and such. On one of the pieces the threads were a little tight to turn - but still doable. Just take your time re-assembling if you happen to unthread one all the way. I can see how they can easily be cross threaded as the aluminum is very soft compared to the stainless bolts. Very nice produce - only thing worth repeating that someone else mentioned is that they will rest on your fender when you go to open the hood. Easy solution for that too: Cary a pair of gloves in your jeep (you probably do anyway) - just set a glove on each fender and rest the hood latch on them when opening the hood. Rugged Ridge comes through again :)
Rachid L. Manreal
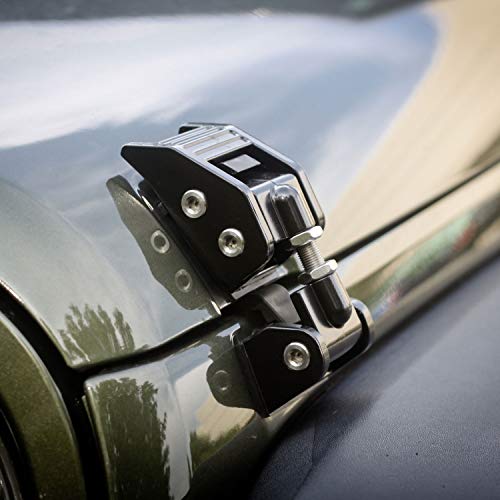
Amazing Upgrade!
**2012 Wrangler** Wow these things are way more meaty than I had imagined. They make me feel like I am driving a legitimate Tank now. They look amazing and I love that you can adjust them. For looks alone these are amazing but I purchased due to hearing a few horror stories from some local Jeepers about hoods latches breaking and decided to be proactive on this one. Install Notes: The uppers(part on the hood) are very easy and if you can't figure those out, sell your Jeep. The Lowers are another story. I will tell you what I did and hopefully it will help you out. For the driver side I was able to use a standard ratchet with and extension to get the single bolt underneath. Just weave around the horn and a few other things and you should be able to get in there no problem. Passenger side is packed with goodies to work around and made things fun. I chose to take off the grill and I am glad I did. If you haven't done this before, don't worry, its easy. There are 6 plastic clips on top of the grill that need to be removed. Just use a flathead and pry the middle section out and then pry the bottom portion out. Next grab the grill by the uprights closest to the headlights as low as you can and give it a healthy tug away from the vehicle. This should pop out the metal clips and all that is left is to disconnect the turn signals. With the grill removed, you should be able to fit a normal wrench in there now and start to take off the passenger side bolt. From there its just installing the new hardware and putting it all back together. Make sure to remove the little rubber piece from the original latches that rests between the hood and the fender area. This will prevent you from over tightening your hood down and having a paint on paint rubbing issue that could lead to rust. There is a spot on the new latches to install this little rubber piece. Make sure to completely remove the adjusting bolt from the latch before you install. Mine only had about two threads in on one side and the other was threaded about 4 times further than that. Even them out on each side of the latch so you don't have the threads strip out on you. After you find the sweet spot just hit the nuts with a wrench and tighten them up. Just make sure not to go too crazy and strip the bolt. After that, step back and admire your new military grade hardware that will outlast your Jeep.
Tammy Hubert
Excellent Latches That Prevent Wrangler Hood Flutter
These really are excellent hood latches, and are far superior to the stock Jeep latches. There is a noticeable decrease in hood chatter, and provide a much more rugged appearance. I've put them on both of my Rubicon's and love them. The stock plastic Jeep latches also turn grey with time, so these aluminum ones solve that issue as well. The install isn't hard, but can be fiddly, and will take about 30-45 min for an average DIY'er. I wasn't able to install the lower latch portion without taking off the front grill of the Wrangler, though, I've read others say they haven't needed to do so. (Though I can't imagine how) The grill is extremely easy to remove, so don't struggle to work around it. The Rugged Ridge instructions don't cover how to do that, so here it is in a nutshell. The grill is held on with just six snap locks on the top and several push clips on the bottom. A small screw driver will pop the top ones out easily - be gentle. The lower part of the grill is just held in with snap clips, and just pulls off with a little pressure. Remember to protect the grill from the two front tow hooks with towels to prevent scratching the grill. Start on one lower side, and with a little pull at the base of the grill, it will pop out. Then unclip the two turn signals, (optional) and you will have much better access to the lower hood latch bolt(s) — it's still a tight fit though. You don't have to remove the light connections if you don't want, just lean the grill down and out of the way. You can continue to follow the instructions, and then reinstall the grill by reversing the order above. It just snaps in. Hope this helps someone out. I would recommend them for not only appearance but superior function. I do wish they were made in the US instead of overseas. ****** Update ****** After having both latches for a while, there is something I've noticed. The silver version developed significant water spots that are not nice, and couldn't be removed. It's important to understand, the silver finish is paint (like a powder coat) not an unfinished aluminum. I personally would not buy the silver ones again because of the way they look after a short time. In the end, I traded in the older black Wrangler (with the silver latches) due to mileage, mechanical issues, etc. and bought a new black one. This time though, went with the black latches. Looks great, and no spotting problems like the silver latches.
Brenda Gleason
Good Quality
Silver Aluminum latches ordered. They have a good weight to them and a solid feel. Finish is a matte grey/silver...not chrome-looking. There seems to be one issue that is sub-standard and that is the rubber bumper piece. I can tell that it will cause an issue later, I had it glued down to hopefully prolong its life. I do like the look of the silver latches on my white jeep sahara, the body is white on white and I feel this silver color detracts attention away from the latches, as opposed to bringing attention to them if they were black. I ordered these as my hood has 'flutter' when its windy. These latches function to hold the hood down solid, there is no flutter.
Raynaldo Aldaco
EXCELLENT PRODUCT
Very "RUGGED" ......real nice look ....firmly holds hood . I had different latches before, another aftermarket company . Had the wire loop that held the pin , that went through the latch , I noticed that scratches were forming around the latch area. So I bought the RUGGED RIDGE LATCHES .........SWEET !!!!! .........CLEAN !!!!!!!!.........EASY INSTALLATION
Skippy El
Rugged Ridge 11210.17 Textured Black Hood Catches
I really love these hood catches and they are the perfect replacement for the OEM hood catches or whatever else you currently have now. I bought these black textured hood catches for my 2011 Call of Duty Black Ops Rubicon as I was concerned that they will eventually weather and rot. The instructions were not written as well as they could have been. Not included in the parts list 6 washers (which I found buried in the bottom of the box after I had completed the installation) and the 2 hood bumpers, which I found to be much better than the stock OEM bumpers. The installation was somewhat difficult concerning the lower anchor catch assembly. I have small hands and found it very trying to get the 13mm nuts threaded. The upper catch assembly was very easy and after getting the bottom catch installed, the rest of the installation went easily. I do see that the finish may be easily weathered so I will take everything off in late spring or so to put the washers on and coat everything in spray on bed liner. I can't have enough black on my black Jeep! These hood catches are very sturdy and I feel will outlast anything I had looked at before I bought these. It would be nice if every Wrangler came with these or something similar. Minor things aside, I would recommend these clearly superior hood catches to anyone with a Wrangler. Touches as these makes a Jeep more solid where it really counts.