
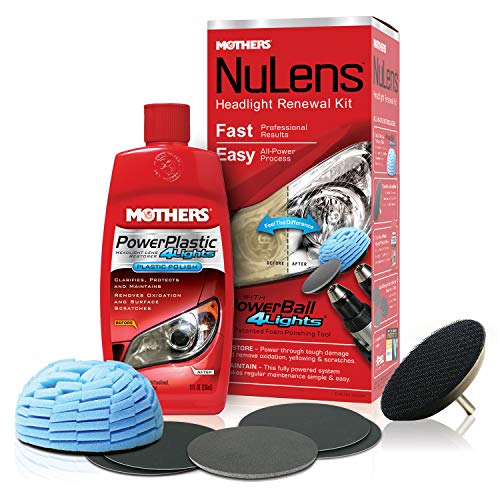
- Designed to quickly and safely restore, maintain and protect all types of smooth, shiny plastic and acrylic headlights to crystal clarity
- It easily cleans away yellowing and stains, and even buffs out unsightly hairline scratches, smudges, and flaws in a single step
- The included PowerPlastic 4Lights polish restores crystal clarity, leaving a tough protective, oxidation-inhibiting polymer layer to guard against future degradation from the elements
- Includes: 3-inch Backing Plate, PowerBall 4Lights Polishing Tool, Restoration Discs, 8 oz. Polish
-
Information
-
Twitter
-
Pinterest
-
Youtube
-
Facebook
Meli Tuiavi'i
Pretty straight forward
Worked well, With the drill attachment it only took about half an hour per headlight, Pretty straight forward, I didnt use water to lubricate though, I used some actual lubricant spray while sanding, kind of pushed too hard on an edge and created head and a burn smudge but i was able to sand that away, Keep sanding with the 800 until the residue coming off is white, then switch to 1500, and finally to 3000, 3000, the rubbing compound and buffing wheel will clear up the rest. I recommend getting some UV sealant spray to prevent them from yellowing again.
Rosemarie Noquera Lim
Needed retouching after 10 month's sitting outside 24/365.
I did the first application 11 month's ago and needed to touch them up a bit on a car that sits outside 24/365. I did not touch the headlights for 11 months. (sorry no pictures, did not think about it until the really yellowed one was done) The drivers headlight faces the south more directly and clearly it was yellowing again but not nearly as bad as it was before. The drivers side I taped off and, wet and used the 1500 a bit till the water turned white after wiping intermittently while sanding. Then the foam pad/3000 till evenly foggy, then power ball with polish. Do small areas and let the drill do the work. Then after seeing how clear the drivers side was I looked at the other side and it was yellower than it looked. So I taped it off then just used the foam pad/3000 and the power ball. I then put on a hand coat of the polish/UV protector and let dry. I will try and use the power ball every so often and re-coat the protectant to keep them well maintained and may not have to do the sanding routine. That is if I keep this car that long. I would be curious if power balls with courser grit could be used? The flat discs are hard to keep flat and they keep catching and jerking with the mostly curved headlamps.
Lonnie Heath
Skeptical. Then scared. Then given hope. Then pleased.
Got this at Christmas and only now 6 months later have I had the guts to try it. My headlights were worse than the "before" headlights on the box. My lenses were completely dark yellow and you couldn't see the light mechanism behind the lens at all. They were heavily pitted, also. I should have taken a before picture but quite frankly, I wasn't thinking this product would work. I am posting some "after" pictures. See explanation, since I'm really not finished. Previously, I had tried following instructions on using the restoration"wipes", using a dremel with toothpaste, etc. rubbing compound, blah, blah, and nothing really worked, hence my procrastination with trying this product. First, full disclosure, I'm a girl. Yes, you dang feminists it matters, because though I'm a strong girl, even the weakest beer bellied men on YouTube showing me how to do this, have more force behind them than I have. So, I'm going to give you gals, and men who don't want to have to exert much effort, some pointers on how to make this a success. 1. If your lenses are remotely yellow, use the "heavily damaged" instructions. This walks you through all the steps of using the fine grit papers. Most of the YouTubers show folks using the blue buffing pad only. If your lenses are yellow, don't waste your time. Jump right to the "heavily damaged" instructions. 2. Mask your dang vehicle with painter's tape. Yes, it is worth it to postpone this headlight restore until after you drive to the store for painters tape. Though, ladies, if you are a quality COO of your house then, by gosh, you should have a nice selection of tape to choose from already. 3. Make sure your drill is charged or you have a cordless. You will be working around water so use a cordless if you can. 4. Don't be afraid to ruin your headlight, it is already ruined. Go into this with knowing that the worst case scenario is that you will buy a new lens. 5. Relax, knowing that you won't ruin your headlight. Once you get past step 2 of the "heavily damaged" instructions, you will realize that all will be well. It took me 3 hours to get to the point you see in my photos. This is because I wasn't sure what the end of each process should look like. So, let me quickly give you my opinion based on anecdotal evidence. Use the 800 pad until ALL the yellow haze and chipping and pitting is gone. Use muscle and force. Yes, your lenses will be cloudy, still remind yourself this is better than it was. (worst case scenario right?) As you run your fingers along the lens you shouldn't feel bumps, or the fine cracks or scaling. Now, the worst is over. Use the 1500 pad until you can see, through cloudiness, your actual lights. At this point you may see the swirls left by the 1500 pad because you didn't move your pad around quickly enough. That's okay. That's what the 3000 pad is for. Remember to use the 3000 on a dry lens. Use the 3000 pad until you can't see the swirls at all. There will still be haze, but it should be a fine haze. At this point if you still see thick parts of damage or pitting then go back now to the 800 and correct it, following up with the 1500, then the 3000. You do yourself no favors rushing to the polishing pad when you still have embedded haze and scaling. The polishing pad will not, I repeat, WILL NOT, remove the pitted damage. If you have followed the steps correctly then you should have what is in photo 1. The polishing part is simply time consuming. You will think it's not working and are stuck with hazy lenses, but just stick to it. Keep applying the paste and work it in. It really does get there. What you want is photo 2. Photo 3 is simply showing you the contrast between the polished and unpolished. I'm still not even done polishing photo 2 but my drill ran out of battery because I kept having to go back and redo what I should have done correctly the first time. Plus there is that whole "lack of upper body strength" issue. So, I can't wait to drive in the dark now. In closing, don't waste time and money on the "quick" solution that give mediocre results at best. I suspect that someone with really bad headlights like mine, who can follow instructions and be fearless in really getting through the layers, should be able to get to through the polishing stage in less than half an hour.
Varsha Payaal
Worth the money
I’m trying to sell my car and make it look less worn out. The headlights were getting pretty dull and cloudy. I’d seen the before and after pictures and videos of other people and figured it was worth the $15. Each light took me about 20 minutes and as you start to sand the lens down with the 800 grit paper, you’re really hoping it works as advertised, because you’re literally sanding down your headlights. But it starts to look better after the 1500 grit sanding wheel, pretty good after the 3000 grit and it all comes together after the polishing sponge. I was impressed and for $15 and some elbow grease (with a cordless drill), it was well worth it. Like a lot of the other reviews have mentioned, take your time. My lights weren’t too bad and like I said, I spent about 20 minutes a side. Make absolutely sure that you do a heavy duty masking job around the lights, or your paint will get destroyed. It’s pretty easy to control the sanding wheel, but I guarantee you’ll mess up your paint if you don’t protect it. If you noticed the headphones and beer, there’s a reason. It’s a boring job. Crack a cold one and listen to some music. It’ll help.
Wildel Garcia
I have a 14 year old Audi Allroad which HAD terrible headlights. I tried Turtle Wax T-240KT Headlight Lens ...
Another WOW from me. I have a 14 year old Audi Allroad which HAD terrible headlights. I tried Turtle Wax T-240KT Headlight Lens Restorer Kit few years ago and gave up after 2 hours of sanding and zero improvement. I went to a professional car detailer and paid $100 to have them fixed - however when I went to pick up the car, he gave me my money back because he couldn't fix them (whatever chemical he was using got rid of some of the haze, but pitted them). Saw a commercial for this and thought maybe the drill would be able to get thru the thick yellow and remove the pits the detailer made. It did! - I used every bit of the two 800 grit sanding discs (Velcro on both eventually failed) - would have been nice to have 1-2 more, but my case was really bad and I managed to make it work. Took over 3 hours with almost all of that using the 800 grit to get rid of the yellow layer and pits. Used a hose to wash the lights and sanding disc every 30 seconds or so. My 3000 grit foam finishing disk and sponge tool are in great shape with enough polish to touch it up many times. First picture is before (no flash), second is after (no flash), and third is after with flash. I disconnected the stupid washer fluid jets that spray my headlights when cleaning the windshield. Maybe that (windshield washer fluid) was one reason they got so bad. Now they look like brand new headlights!
Bunnary Hang
This is the first headlight renewal kit I didn't *loathe*
So... 2 years ago I bought this ten year old Jeep. Headlights were a little yellowed and they had some sort of coating on them, like maybe just clear lacquer - but it had ugly edges. Whatever the previous owner had done. I went to the auto parts store and asked the clerk what the best headlight renewal kit was, reached for an orange box ( I don't even remember the brand anymore, doesn't matter) and I paid about 22 bucks and went home. 3 hours later, sore fingers and wrists, sweaty and frustrated my headlights still pretty much looked like crap... I did the best I could with that kit but gave up. About 3 months ago I was in another auto parts store and saw a Mothers brand kit (not this one) and asked the clerk what he thought of it, he said it's great - ok, I told him about my previous experience and I asked him implicitly, "Am I going to buy this, get home and use it, and be pissed off at it and at you for endorsing it?" - he said no it works very easily and it's the kit to buy. I dropped another 20 bucks on that kit. I spent another hour on that one - it wasn't any better than the previous one. The little squares of sandpaper were annoying to hold and move back and forth, the most coarse one wasn't aggressive enough to actually cut away the flaws in my lens and the finer ones didn't do anything to cut down the scratches from the coarsest one - so again my lenses ended up looking crappy. I was shopping for replacement headlight assemblies when I saw this kit and figured I'd give it a try - at least with the fully powered sanding process I wouldn't get more sore fingers this time. I have to say, this kit REALLY WORKS. The coarse pad was plenty coarse to get my lenses down to an even surface and the speed at which it works made it easy to keep the assembly wet (this is important, to keep the sandpaper from melting the plastic instead of cutting it away) and the next two stages (800, 1500, 3000, liquid polish) were appropriate to bring the coarse cuts down efficiently to the "new" crystal clear surface. So in summary, not only did this kit work, it was also the first kit that actually effing worked and didn't infuriate me.
Marissa Simons
It works; follow the directions
I was leery of wet-sanding my yellowed 2007 Toyota Corolla headlights, but I followed the directions, wet-sanding the first two pads, then dry-sanding the last one per instructions, then using the buffing compound. AMAZING improvement, and the Toyota already had the best factory headlights I've ever seen. The 800 grit, per directions, will produce a yellow runoff. Keep rinsing the headlight till the runoff turns white. Then shift to the 1600. Plus, there is more than enough to do a second car with this kit, if need be. I used a DeWalt cordless drill, as it was more physically and RPM-wise controllable than my air tool.
Linda Poodledog Taylor
I did two cars with this kit and could easily done a couple more
It helps to have a little experience wet sanding, just be sure you read all of the instructions, those on the box and those included. I did two cars with this kit and could easily done a couple more. Started with the 800, sanded for a long while, same with the 1500, then to the foam 3000 (sand dry with this one), then to the foam mop head. easy peasy, looks like brand new. Don't make the mistake of just using the mop head and skipping the sanding, if you want perfection then do it right. Also, after each course of sanding I took the sanding disk off the drill head and wet sanded with the disk in my hand to get all the little places and to add a more random pattern of sanding. One more tip, be careful not to push to hard with the 3000 grit foam pad, since it's dry sanding it can get hot enough to actually melt the plastic lens, then you have to resand those melted spots all over again with all the courses. Push lightly and pull away to allow it to cool even couple seconds (wet sanding doesn't have this issue). Terrific product really makes it look like new, even pitted stuff, and totally removes yellowed plastic... really lifts the car's appearance (my mother in law was very surprised! Got a free lasagna!).
Balsem Mosbah
Follow a youtube guide or my steps below and this will make them look new!
Wow I must say this worked wonders for my 05 toyota Camry. Helpful tips Tape everything off with painters tape first 800 grit - Wet sand with spray bottle or bucket and wipe down frequently (wet your headlight first before sanding then as you sand you will see grime and brown crud come off, I went over the whole headlight 3 times this grit will be hard to control at full speeds take it slower if needed and go for an even look) 1500 grit - Wet sand with spray bottle or bucket and wipe down frequently (Same as above but try to use this to remove spots where you skipped around with the 800 grit cause it does skip and is hard to control but 1500 is easier) 3000 foam pad - Dry sand wiping with dry cloth frequently (This will haze the entire headlight and smooth down scratches from the previous grits. Will appear to get cloudy from this but thats good, the cloudy sections will be clearer with polish) Buffing wheel - Spread bits out through the whole thing not a dime size like they said. Press downwards fairly firmly and go over the whole thing 3 times Mine look brand new!
Alfonso Lopez Jr
Wow! It really does work with very little effort. However a microfiber cloth is not included
I used the product on a 6 year old Prius. The huge ugly headlights were yellowed and hazed from the weather. Following the directions I used a cordless drill and placed the included sponge on the end with a very little small (nickle size) amount of cleaner then spun away for about 1 minute. After wiping clean with a microfiber cloth (NOT INCLUDED) the head light looked brand new again. Five minutes later I was done with both headlights. They only con is the package does NOT come with a microfiber cloth. I know they are cheap and the package could have easily came with one for 10 cents more. The directions on the outside of the box fail to mention "micro fiber cloth not included."