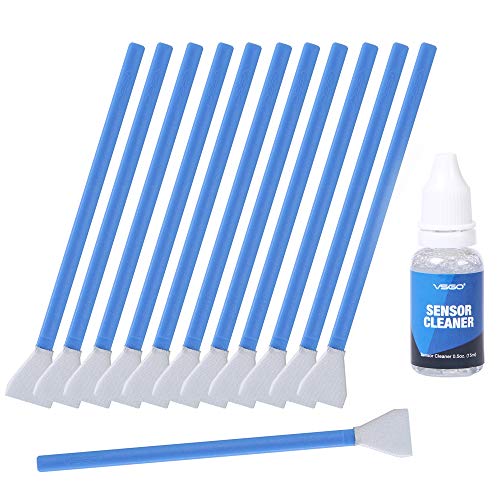
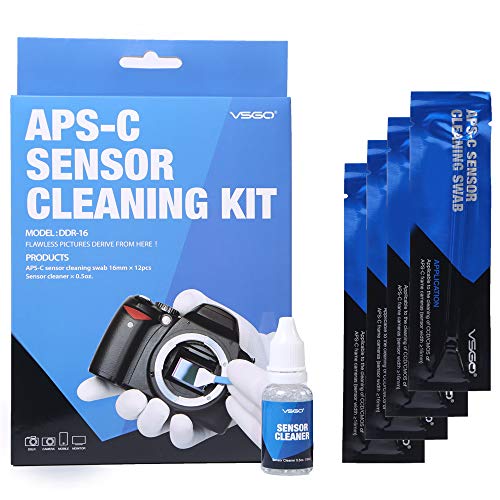
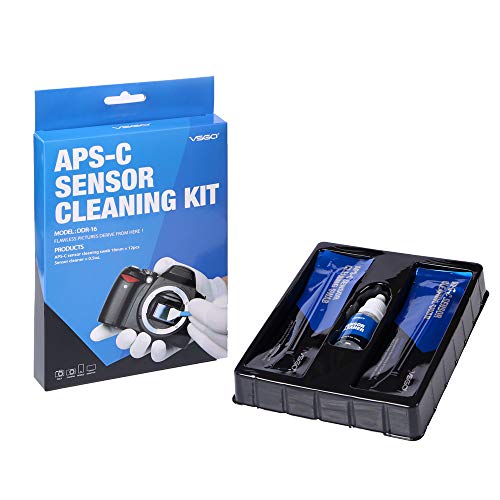
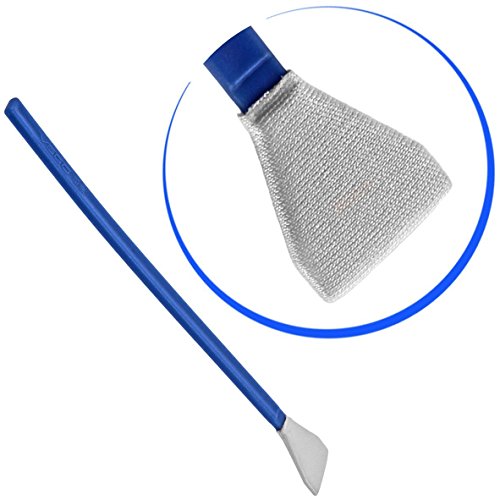
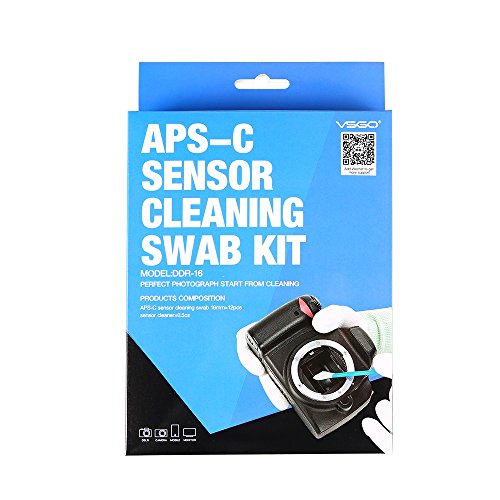
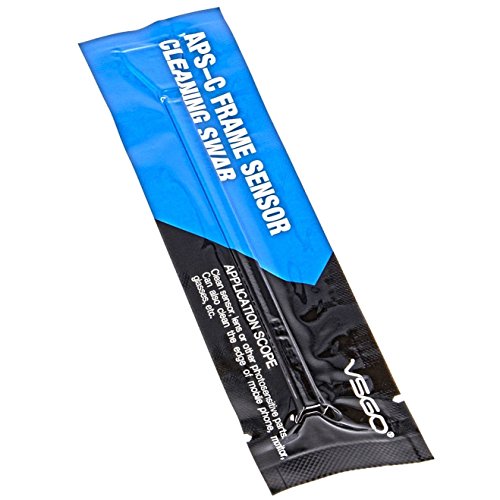
- Package includes 12pcs 16mm cleaning swabs for APS-C Sensors AND 15ml Sensor Cleaner
- Every sensor cleaning swab is made in a 100% dust-free environment and sealed in a vacuum package
- Super soft and flexible swab head spreads pressure evenly across the sensor and cause NO damage
- The sensor cleaner is made from ultrapure water, clean sensors without leaving streaks or blemishes
- The sensor cleaner is safe for both CCD and CMOS image sensors
-
Information
-
Twitter
-
Pinterest
-
Youtube
-
Facebook
Mian Sohail Farooqi
It works and much cheaper than sending them away to repair center ...
When you got a dirty sensor, you cannot see it with naked eyes. You need a lupe and a flashlight to barely see them. I was somewhat skeptical, but these do work. I also recommend that you get a Giottos Rocket blaster to remove any loose particles on the lens or inside the camera. I DO NOT recommend compressed air of any kind, ever. There are plenty of good tutorials on Youtube regarding how to clean your sensor. You should use the right size for crop sensor and full-frame sensor as the swabs are designed to fit each types. This kit is good as any I have seen that are more expensive, not that these all that cheap for what you get. I like using two of these, first one wet, with provided solution, then 2nd pass with a dry one. Using gentle but firm pressure, whereby the plastic handle bends slightly as you press against the sensor, you make one pass each way, using one side, then the other side going opposite way. Then, I follow through same way with the 2nd dry swab, one pass. It seems like a waste to chuck'em after one use but these are not reusable. I recycle the used ones to clean particularly dirty lens or filter. https://www.amazon.com/Giottos-AA1910-Medium-Rocket-Blaster/dp/B000L9OIQC/ref=sr_1_2?ie=UTF8&qid=1486478286&sr=8-2&keywords=rocket+air+blaster+camera
Eihg DeeCee
Works well for Nikon D7200 and Sony A6000
I had a resilient piece of dust on my sensor that the blower wouldn't remove. I followed the instructions exactly (1) clean the work area with the blower (2) use a blower to clean the camera body and sensor area (3) use dry swab across sensor (4) (not needed) use 2 drops of cleaner to wet-swab the sensor Thankfully I have a bright / focused LED desk lap that made it easy to see the spot on my sensor. After the dry swab, the dust spec was gone. Here are my tips (1) Clean your body and then sensor frequently using a blower. This alone has prevented and removed 99% of dust on my sensor. FYI, cameras typically have an adhesive strip under the sensor to trap dust. Keeping dust out of your camera body will allow the adhesive to stay clean and do it's job (2) Find a focused & bright light to spot the dust with your vision. Doing the reference photo is a slow process -- it works, but it's a long cycle from clean -> check -> re-clean
Garcia Matias Lee Harvey
Great kit
Great cleaning kit. I tried it on my Sony a5000, whose sensor was... well, beginning to get disgusting. I used four swaps, but I think in general two should be enough : one wet and then one dry one in order to absorb the remaining liquid. Here are one "before" and one "after" image, taken at f/22. I think there might be a tiny spot left at the bottom of the sensor, but I do not think that it has any relevance in real world usage.
Goldy Sharma
First time for everything
Did the job without damaging sensor glass, it is now perfectly clean and I am perfectly happy. I tried dry swab first and it got quite a bit of stuck on dirt off (after using rocket blower NOT can cleaner) the swabs are very soft and clean so really there is no way they can damage the sensor if used properly. Just flip swab after first pass don't use same side again (especially if the sensor is real fouled up), how you do it exactly is whatever is comfortable for you just make sure you get the entire sensor surface. Check for spots again, I just open blank text document on my laptop closed down the aperture and zoomed in to take a shot. I also adjusted image levels to increase contrast so any light spots or residue will show better, be warned you will probably see more than you care too. If you are lucky you will get it first shot, but chances are if you are using a cleaning kit it is real dirty right? Then came the solution, just touch the bottle after taking of the rubber stopper out to the swab a couple times each side that is all you need DON'T get it dripping wet. I am not sure what is all in it but there definitely is a lot of some kind of alcohol. It dried very quickly and left no residue that I could see even with magnification, I then went over it again with a dry swab the same way as before anyway. Took me a total of 4 swabs to do the job but you may use the whole kit, who can say. Some people would never attempt this themselves and of course go out of there way to warn everyone against it citing some horror stories about a cleaning gone bad. Sure some people have screwed up but I bet most of those folks that ran into problems probably used the wrong materials and had no clue so really not relevant in my opinion. All you need is fairly steady hands with a bit of confidence, reasonable eyesight (a magnifier will help for sure) to enjoy a nice clean sensor again using this kit.
Emma Tosi
Works perfectly
I was thrilled when I got home today after taking pictures this morning to see that there are no more spots on my image sensor after using this (previously it was building up quite badly, with at least 5-6 dark spots and 15-20 faint ones... and blowing air didn't do anything, neither did in-camera vibration). I was hesitant to clean my image sensor by myself but it wasn't hard; just be careful not to scratch it or touch it with anything besides the swab and do not get liquid inside the camera body (use small amount to coat the sensor). This is what I did to clean: -Have camera under light source, mirror open, with image sensor exposed and ready -Open 1 swab but don't take it out of package yet -Take out another swab, put about 2 drops of solution on each side -Swipe gently across sensor from left to right, then right to left (worked best to switch directions, because it's awkward to reach the opposite side) -CAREFUL not to get solution inside camera, only on image sensor surface -Pull out opened swab and use it dry, in the same way to wipe up leftover solution (if necessary use another dry swab) I did this twice (4 wands total) and all the dust was gone. I'm so happy that I don't have to spend hours cloning out dust spots anymore!
Airic Aie
Works for the sony a6000 and a68!
I am a real estate photographer, and I can't tell you how many times I've seen dust particles in my photos. It stresses me out to no end, they're like a disease, really. So I would spend about 20 minutes frantically cleaning my sensor with lens cleaning solution, multiple cotton swabs, microfiber cloths, and tissue papers. I would lightly damp the cotton swab and then spend 15 minutes trying to get rid of all the streaks on the mirror. Then I would have to blow all the dust out from the cotton swabs, micro cloths, and tissue paper. It was a ORDEAL, and a stressful one at that. I dreaded changing lenses because it was inevitable. Dust was going to sneak in no matter what. After purchasing these sensor swabs, it literally took me less than a minute to complete undo what I had done with my weird method. It got rid of all the dust, streaks, everything. IN ONE SWIPE. I am so thoroughly satisfied, you have no idea! It says to not re-use the swabs, but after I got done cleaning my a6000, I went ahead and cleaned my a68 with the same sensor swab. No harm done. I am so happy that I don't have to spend 20 minutes cleaning one sensor anymore! (And potentially damaging it!) This is safe, FAST, and affordable! I recommend it to all. And they give you enough to last for a very long time. It's a good idea to keep a few in your bag, just in case! Love this!
Mehboob Ahmad
Great cleaning kit!
I purchased this kit after watching a video on YouTube of someone using it. I own a Sony a6000, and I made the BIG mistake in the past of blowing on the sensor to clean it (with my mouth) and then wiping it with a microfiber after realizing there was now spit on my sensor. I photograph UTV races about 6-8 times a year, and my gear is usually completely covered in dust, and sometimes I need to switch lenses while out at the track so some dust ends up on the sensor. I cleaned my sensor with this kit, and it left it looking like new other than 2 small hairline scratches I managed to get on the sensor probably from using the microfiber, but they are not noticeable in pictures. A couple of words of advice: 1. When you open the little bottle, there's a small plastic cap that you need to remove to expose the hole for the cleaning liquid to come out. 2. I personally found that a single drop on a swab was more than enough to clean my sensor which was filthy. 3. Swap the swap across the sensor several times with the side where you put the solution, then use the other side to dry and clean up anything left behind. I have plenty of swabs and solution left over to last me a year. Highly recommend this if you need to clean your sensor, and don't forget to purchase an "air bulb" to blow off your sensor instead of using your mouth.
Tiffany Marie
YES!
this right here is a personal victory. since 2015 I have been shooting with two Sony mirrorless cameras. the sensors get dirty fast because they are always open and there is no mirror to boot like normal DSLR cameras. plus I often shoot in high humidity. for the first year or so of owning these cameras, I used a genuine eyelead orange gel stick to clean the sensor...until I ripped off the coating on the sensor filter glass. big repair, and from that point forward, I would sent my cameras up to NYC to get the sensors cleaned. BIG expense, esp. when doing it every few months. i tried doing it myself once before with Aeroclipse solution and their swaps and just made a mess, mowing through 12 of their expensive swabs to no avail. sent the camera in anyway. well, I was due for another cleaning but tried it myself one more time. I used part of one of these kits to clean my sensor by myself. inspected thoroughly with a head light, then test shot executed, no spots even at f22. I am so happy, lol.
Gina Ordiway
Wet cleaning your APS-C sensor is easier than you think
After 2½ years of use, my Canon T5 needed a sensor cleaning. Did the Rocket Blower and sensor brush thing, but I still had three (3) tough spots to remove. I purchased this wet sensor cleaning kit as part of my maintenance routine. Read the enclosed instructions, watched a number of Youtube videos and decided to go for it. It turned out to be far easier than you think. You will use two swabs for each sensor cleaning. Starting at the bottom, across the face of the sensor and then back. Second swab across the top. The swabs are not 100% of the width of the sensor. After two passes, my sensor with 3 hard to clean spots was clean. You will be hard pressed to get it 100% clean, since you are not in a perfectly controlled, air filtered room that is totally dust free. This kit will remove the biggest spots and I hope the next time I clean it, I can remove any possible residual that I was unable to do so in the initial cleaning. My test shots looked real good and the big blobs of dust/debris were history! Just be careful, read the directions and watch some DIY videos on Youtube. You will become a sensor cleaning guru after the first cleaning.
Kathy Cole Carrington Thomason
Does Everything Described and More
Excellent product. It does everything listed and more! Most videos I've seen have used this product to eliminate dust spots. I used this to clean off a sizable fingerprint smudge on my sensor. I saw a video that said that such a smudge might ruin my camera forever. The smudge ended up being no match for this sensor cleaner. If you're not sure how to use this product, watch an instructional video -- that'll help. This is an important product for camera cleaning, but if you'd like to avoid using it as much as possible, change your lenses out with your sensor facing down so that dust particles that do not fall down ONTO the sensor. Do NOT try to make a home remedy unless you've seen one work. And DO NOT, DO NOT put your finger onto the sensor. Even though I was able to clean the smudge off, don't give yourself more work to do. That being said, do yourself a favor and buy this product. It is so much better than using a microfiber cloth (which will simply spread smudges and dust spots.) It is essential for emergencies which can happen even if you are changing lenses properly.