
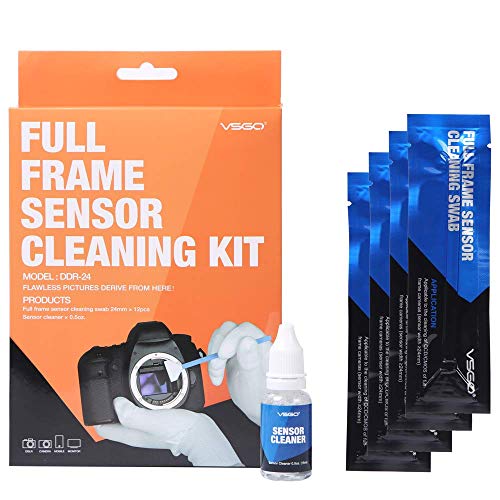
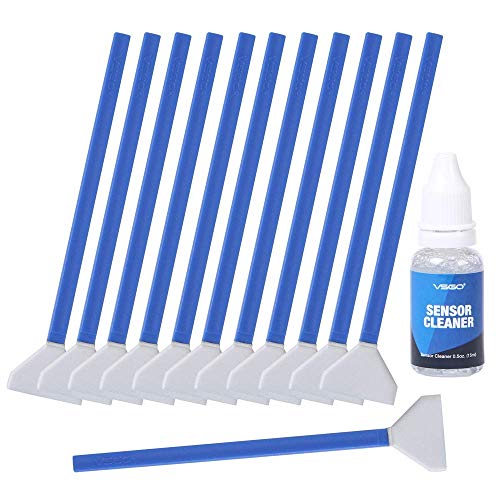
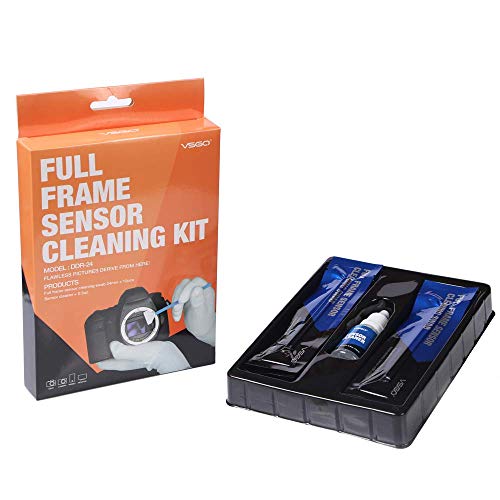
- Package includes 12pcs 24mm Swabs for Full-Frame Sensors AND 15ml Sensor Cleaner
- Every sensor cleaning swab is made in a 100% dust-free environment and sealed in a vacuum package
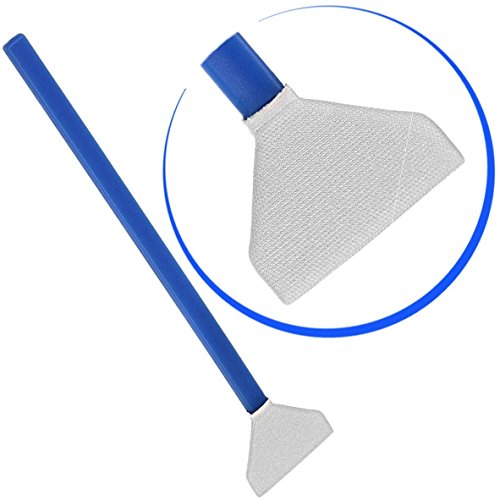
- Super soft and flexible swab head spreads pressure evenly across the sensor and cause NO damage
- The sensor cleaner is made from ultrapure water, clean sensors without leaving streaks or blemishes
- The sensor cleaner is made from ultrapure water, clean sensors without leaving streaks or blemishes
-
Information
-
Twitter
-
Pinterest
-
Youtube
-
Facebook
Sharath Sukumar
When careful, it works.
I had some small specks which were evident on day sky shots when magnified to the max. Since my Nikon D600 has a new shutter (replaced under warranty because of the oil splatter issue), I assumed it was dust. With the mirror up, using a small LED flashlight, I could see dust on the glass cover plate which protects the sensor. A hand-held blower (not canned air) remove most of it, but some was still evident (I photographed a white interior door to check). I used the wipes and first dragged it from left to right, then flipping the wipe over, I dragged from right to left (as the directions instructed). The dust on the glass cover plate was completely gone (nothing visible with the flashlight or in a subsequent picture check). It makes one nervous, but in reflecting, the plate is glass (so very hard) and you are dragging the wipe across the glass and not grinding any dirt into the glass. With reasonable care, one should be fine.
Michelle Southern
Very good. No streaks.
It works very well for the Full Frame Sony A7RIII. Compared to a mirrored camera the mirror-less does get dust easily while changing lenses. I used about 4 swab attempts to make the sensor 100% dust free. For the Sony ARIII make sure you turn it on and put sensor in cleaning mode, do not turn off. Clean in the most dust free environment you can find. Use 1 swab and 2 to 3 drops. Sweep once in one direction and back. Then discard swab. Turn off camera. Then attach lens and put in manual focus F22 and shoot blue sky or clean white background. (Move camera while shooting.) Then switch to play picture mode and zoom in and move square around to check for dust. You can even see the smallest of spots. Repeat process till dust free. You can also check in light-room to spot dust spots with the new dust visualizer in spot removal tool. Just bought my second kit for the future...
Shirley Branch
Gets the job done!
The photos I attached are of a blank piece of paper, before and after cleaning the sensor. I shot them at ISO 100, f/22, and deliberately out of focus to show sensor spots. As you can see, the results are excellent. Most, if not all spots are gone. The spots on my α7II sensor were quite stubborn so my cleaning method took somewhat more time: 1. Blew sensor out with Giottos AA1900 Rocket Air Blaster. 2. Swiped sensor using a dry swab as instructed (from left to right, then right to left). 3. Swiped sensor using a second, wet swab. I applied two drops of the included cleaning solution on the swab prior to swiping. 4. Swiped sensor using a third, dry swab to remove any possible residue left by the cleaning solution. 5. With one extremely stubborn spot still on the upper left corner of the sensor, I blew the sensor out with my air blaster again and used a fourth dry swab, after which the sensor was left practically immaculate. Factoring the cost of purchasing this kit, I saved $55 over having a camera shop clean it for me.
Felipe Aya Sanchez
My new favorite....
These are really nice kits and well worth the money when compared to other sensor cleaning kits. You get a lot too, lot's of fluid and lot's of sticks to cover you for quite awhile. I bought an APS-C kit and a full frame kit because I have both camera's and it cleaned the both of them perfectly. I would suggest to follow the instructions, one swipe left, one swipe right, and you're done. If the first time doesn't complete the job do it again. My simple point is, one swipe left, one swipe right. Don't get all fancy and scrub and up and down, otherwise you might suffer some fluid drying at an irregular area on the sensor and you will see it in test photos as I have. Also, use just a couple drops max of the fluid, don't soak it before applying to the sensor. Other than that, super easy to use, really well packaged. One more thing... make sure you put the cork back in the bottle when done, don't just screw the top back on. This fluid will notoriously evaporate when you didn't think it should. Cork it!! Good job VSGO, Highly recommended.
Kristen Youngblood
Best sensor swab available. Period. (drops microphone)
I'm pretty meticulous about my sensor's cleanliness. In fact, I'm kind of a freak about it. I sent a camera in to the manufacturer once, and was not satisfied with what they called "clean". So, a long time ago, I learned to do it myself. For years, I've been using Photographic Solutions Sensor Swabs, I thought that they were the best mankind can do. Even though, I usually needed two swabs to get the job done and usually had to use copious amounts of air blower (HEPA JET II) and gentle swipes from an Arctic Butterfly to get the pieces of loose dust and lint off the sensor. It was a critical pre-assignment ritual I never liked doing (but got pretty good at). Did it about once a week on my workhorse camera bodies. Then, on a whim, I tried this product. The VSGO swab worked perfectly the first time, with just one tiny spec of dust (that blew right off). The material is truly lint free and tightly & perfectly shaped to the plastic "spatula" design. The width is just right, keeping the action on the sensor, and not up on the edges. The liquid cleaner also works extremely well, and gasses off just behind the swab with absolutely no residue. This is a case where the cheaper brand is an order of magnitude superior. Just buy them....learn how to use them properly, and you will be rewarded with better (blem free) images.
Mary Dewitt
Solid product at the right price
These are good sensor swabs at the right price. I have cleaned DSLR sensors for the past dozen years, and had prior to used Photographic Solutions swabs. Now I use a combination of CRC Duster, Arctic Butterfly (recommended), Eclipse cleaning solution (recommended) and these VSGO swabs. For dust only I use and recommend an Arctic Butterfly and also use the CRC Duster. The trouble is that sensor dust gets sticky and becomes difficult to remove, and it can take a half-dozen repetitions to get a sensor clean - so it's nice that these swabs are cheap. The process goes like this: First I blow away dust from the camera exterior, and wipe the area around the lens mount with Photographic Solutions Pec Pads (also a must-have for camera and lens cleaning). Using canned air is fraught with peril and not recommended for anyone without mechanical aptitude and unaccustomed to risk. First, the majority of canned air has "bitterant" to prevent teenagers from using it to get high, and the CRC brand is the only one I'm aware of that does not contain bitterant, which leaves a residue (check the fine print on the can label). Second, using canned air involved a risk of getting freezing liquid on the sensor... so you have to have your brain engaged... store the can only in an upright position, never tilt it or the freezing liquid might be expelled and before applying it to the camera do a test spray onto your hand to make sure the flow line is free from liquid. Assume that if you spray freezing liquid onto your camera sensor then your camera is ruined, so that's why you'll never read elsewhere about using canned air. However, it effectively removes large dust particles from the DSLR mirror box, focusing screen and finally, sensor. I prefer to remove the big particles without using swabs to keep them from scratching. Next step is to use the static brush of the Arctic Butterfly to further remove dust from the sensor. I should remember to pack the Arctic Butterfly for travel to use after trips down dusty roads choked with diesel exhaust. Still, I'd only expose the sensor for cleaning in a clean environment. The Arctic Butterfly might do 90% of the job. Using the sensor swabs, I use one or two drops of cleaner to wet the swab, and try to swipe in a complete stroke without picking up the swab. I have tried the cleaning solution provided with these VSGO swabs, and it appears to contain water which when dries can leave streaks or "water-stains" on the sensor. Instead, I think Eclipse from Photographic Solutions dries cleaner, and a 2 oz bottle is a lifetime supply. Using one or two drops of solution is key to minimize the amount of solution that must evaporate. A next key is to check for dust effecitvely. Do to this, use a lens that stops down to a very small aperture, like f/22. I shoot into a blank white computer screen, using a word processor with blank page, shooting RAW and using the base ISO of the camera (in my camera's case that's ISO 100). No need to go outside and works in the dead of night. Also, I set the exposure compensation to over, like 1.5 or 1.7 stops.... else the exposure of your blank white computer screen will result in a medium gray. Next, import this image into your RAW processor, and set contrast and clarity to maximum, and shadows and blacks to minimum. What first imported looking clean now probably looks dirty and streaked. I find that I have to go back up to a half-dozen times and sometimes almost scrub the sensor. Each time I either use a new swab or use the canned air to thoroughly blow all the dust off a use swab. I'll finish up with a final pass using a brand new swab and a minimum amount of cleaning fluid, trying to make a full, continuous sweep of the sensor so I only pick the swab up off the sensor once at the end of the stroke. Getting the sensor really clean is takes patience, is finicky and requires a level of retentativeness. But clean means clean, and it's nice that these swabs are cheap so the cost component of the job is one less thing to worry about... You might not want/need to use f/22 any other time!
Victor W Black
Easier than I thought, Perfect Results on my D5
I've been a professional photographer for over 10 years and have always sent off my FX Bodies to the service center for sensor cleaning. Pretty scary to open the body, flip up the mirror and expose the sensor on a camera costing more than 6k. Lots of cautionary tales regarding the possibility of damaging the sensor coating. I was at an imaging convention where my camera company was offering FREE Sensor Cleaning Services to pro-members, so I stopped by and watched the process. The technician was not careful at all, locked the mirror up, put the sensor under a light, grabbed a swab and swept it across the sensor once in each directly, did a cursory look through magnifier glasses and closed it all back up and handed it to me. THAT was the confidence builder for me, if that's all it was, then I can do this and save myself having to be without one of my primary camera bodies for that simple cleaning purpose. THIS kit is just perfect, the with of the swab matches my sensor perfectly and I just swabbed in two directions with one dampened swab. Did my own inspection, did a test exposure at f11 to show any remaining artifacts on the sensor and it's clean as a whistle! I definitely like this kit and when time=money, I suggest learning to do your own cleaning.... don't be heavy handed! It's not as nerve racking as many will tell you. Save time, save money, I will definitely be doing my own sensor cleanings from now on. Excellent product.
Romel Cinco
5 Stars for a wonderful product.
No matter how many good comments and 5 stars, I was still skeptical of using it since a camera sensor is just that delicate. But nope. It worked flawlessly on my Sony A7s sensor. Stains which looked like they had dried up and had no way to be cleaned except for a wet cleaning, this kit was the answer. Just 2 drops on the swab and I waited couple of seconds for it to soak in, and in 2 wipes, Sensor is as reflective as a mirror spotlessly clean. Just make sure you don't use more than a drop or two, else the sensor will get those droplets. Also, after you clean the sensor, you can re-use the same swab to clean your camera LCD display. Although not recommended, It didn't hurt my LCD screen at all. Rather, I just got a dust free clean display.
Lia Sahakyan
Save yourself some time and money
I had a persistent spot on my images that was determined not to be from any lens; ergo, the sensor. It would show up especially on photos where the spot was in the sky or along some consistent color. In researching this, I determined I could take my camera to the local camera shop (and pay $50 or so) or I could try to clean it myself. The web is full of all kinds of warnings about doing this, but if you are careful, you can do it yourself with these swabs. The kit comes with 12 wrapped swabs and a small bottle of cleaner fluid, some kind of alcohol compound. Taking proper precautions with the camera (ensure sufficient battery, remove the lens, and lock the shutter up), place a couple of drops on the business end of a swab and swipe left to right (or right to left) at a shallow angle across the sensor. Use consistent, firm pressure, but not too hard, and maintain contact between the swab and the sensor. Result: image spot is gone.
Keriann Pepper
It Works! As Advertised!
I was editing some long-exposure pictures recently, resetting white balance completely and such, and I came across a nasty set of artifacts on the brighter greens of my night images. I had recently bought a used camera and used lens that I fell in love with, so I was concerned that this might be a lifelong issue with the equipment I didn't know about. I did some research online... And despite noticing no obvious signs of a dirty sensor, I thought this might be a related issue and ordered these. Long story short, it looks like my issue may have been a dirty sensor all along. I took some test shots throughout the cleaning process (I used 6 swabs wet total) and there were definitely problem spots (and they didn't come off with first swabbing). It was a little frustrating to work on it and test and find specks still there. So I used a little more solution drops on the swabs at a time and put a little bit more pressure, and it looks like everything's perfectly clean now. I'm going to try to never take my lens off again ;) I was worried between all the different versions of this and competitors and bad experiences, that using this would turn into a problem. It turns out this same brand was recommended by Tony Northrup and he even has a video explaining how to use it. That was a lot of help too.