


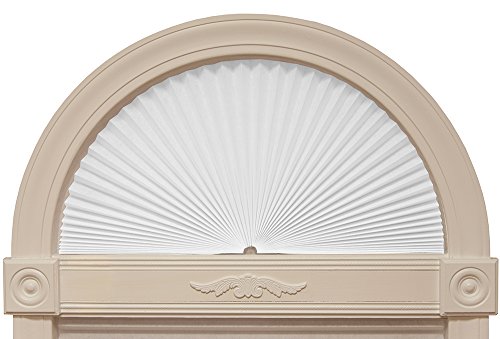
- Trim at home to fit in perfect half-round arch windows
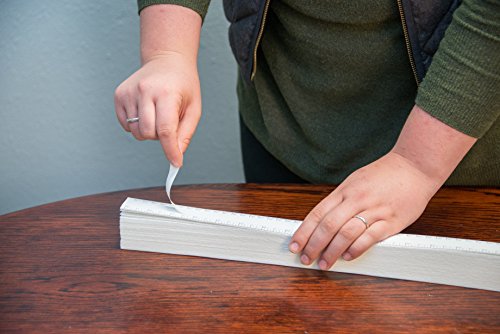
- No tools installation – peel and stick for permanent installation – no drill, screws, or brackets needed
- The light filtering fabric of the Original Arch shade provides privacy, light control, and reduces sun glare while helping prevent floor and furniture UV fading
- Customize at home with fabric or paint to match decor
- Fits perfect half-round arch windows, size 72W” X 36L”
-
Information
-
Twitter
-
Pinterest
-
Youtube
-
Facebook
Sam Mckay
Love these,....have used them for years.
Measure carefully. Make sure the window from top to bottom is 1 /2 the distance from side to side. We have four windows that are called,"Half round", the problem is, there is slight variations in three of them and a big variation in one of them. They are not 1/2 of a circle . I recommend Measuring these distances and making adjustments as necessary. I ordered four on first order and after not liking the finished shade on one of them, threw it away and ordered one more. THE PROBLEM IS WITH THE WINDOWS,...NOT THE SHADE!! We have used these on our windows for many years. Actually purchased them at a Home store. After 10 years or so, they looked a little dusty so decided to replace them. Cut them a little large, trim 1/4 inch at a time, don't hurry. They are great.
Rewe Milan
while I enjoy the clouds going by
I've lived in our house for 17 years with that half moon window blasting sunlight everyday at 5pm. while I enjoy the clouds going by, I HATE walking by the sunbeam everyday (can't be good for keeping the house cool either). Finally decided to try this. I like that it comes back so you can trim it back (it really is that easy to cut with a straight knife). You remove the backing on the tape on one side, plop it down, remove backing on other side, stick down. It seems like it won't stay vertical unless you wedge the bottom biased towards the front (so it leans a little). Also it'll bunch up a bunch in the center if you cut it to exact width (I believe you should leave a little gap in the center).
Sam Ghauri
Looks great and price is great too.
I bought these for the church. We have a quilting room, that the sunlight came bursting in these curved windows, and the ladies put cardboard in them to keep the light down, as we didn't want the sunlight on the quilts. I saw these, put them up, and everyone loves them. The pastor saw them and told me to purchase some for the conference room!! Even tho they are "paper", they are strong enough to handle this job, and they do not look like paper.
William Robert Leathers
Great, affordable shade solution for semi-circle window
So far, so good. Cutting it is fairly easy - I used a sharp, serrated knife and it cut smoothly. I didn't use the measurements on the shade, I just measured my window, divided that amount in half, then placed the shade in the plastic holder, and measured from the center point of the plastic to mark the end of the shade with my measurement. I marked it on all corners to make sure I was not cutting at an angle in any direction. I ended up having to trim a little, because (as I suspect is the case with most semi-circle windows) it's not exact all around, and the top of the shade overlapped with the window molding. I was able to trim more and then "pull" the bottom edges to cover the loss there. Also, after reading other reviews about the double-sided tape causing a limitation with opening and closing this, I decided not to use the tape. I used command picture hanging strips instead. The plastic velcro-style strips allow me to completely remove the shade along with its plastic holder, and the remaining side of the command strips are not noticeable high on the window ledge.
Rod Mackay
It is a rather inexpensive but good looking shade that blocks direct sun but still lets ...
I bought this shade to cover a semicircular window that is on top of the window at the front of the house in my home office. Right around 4:30 - 5:00 PM, the sun shines through this window and makes it hard for me to work for about an hour due to the glare in my eyes because I face the window while working on the computer. No more. I got the shade couple of days ago and installed it last night in about 1.5 hrs. Most of the time was consumed in measuring the window accurately. My window is not symmetric, i.e. the height is not half of the base of the window. Instead the height is about an inch shorter. This meant that the screen was too big for the curved portion of the window, even though it fit the base in unfolded position. To make it fit required some careful measurements and cutting. I first cut the shade while in folded position to the fit the half the length of the base. Then I made measurements along the vertical radius of the pseudo-semicircle. I also made measurements along 3 additional equally spaced radii on left half and assumed that they were the same on the right side. Then I laid the shade out in unfolded position on a dining table. I used scotch tape on the base strips to keep the shade in unfolded position. Then using a ruler I marked the measured radii in respective directions and used a pencil to connect the marks. After that I trimmed the pseudo-semicircle with scissors and installed it on the window. The base of the shade has this cardboard strips with glue. I found that the shade was still too big and extended outside the window on the right side. This required extra trimming with scissors after installation, which was tricky but not too hard. You can also use a sharp blade for this trimming. The circular part of the shade fits inside the lip of the window and has no risk of falling over. It is a rather inexpensive but good looking shade that blocks direct sun but still lets in filtered light.
Sheine Lou Sta Rosa
Very nice for the price
I recently moved to a new office which has a nice arched window, but unfortunately at certain times of the day the sun shines through the top of the arch and creates a disturbing glare in my face when I'm at the desk. I ordered this shade to diffuse the direct light through the top. The window is not a perfect arch though. The height is a bit more than half the width, so a simple straight cut as described in the directions wouldn't be suitable. The instructions for imperfect arches suggest fanning out the shade and then tracing the window outline on to the shade and cutting along the outline. That seems like it would be finicky though, especially since my window is quite large. Instead I measured for the top and bottom lengths and marked both on the folded-up shade as seen in picture #1. Then I made two angled cuts from the first mark to the second (picture #2). The middle of the folded shade corresponds to the top of the window in my case so I wanted that part to be longer, but probably you could make a V-shaped cut instead of a point if your window is opposite. Fanning out the shade then gives a smooth transition in length between the sides of the arch and the top. The final result is shown in picture #3. This method is likely easier than the trace-and-cut suggested by the directions, but the arch needs to be fairly close to a semicircle. In my case the required deviation in heights was less than 5%, and I'd guess it might be OK up to about 10%. Regarding the shade itself, I'd say it's quite nice, especially considering the low cost. The fabric looks good, the fan is very even, and overall fit with a careful cut is excellent. The light diffusion is perfect; I can now sit at the desk and work comfortably without the sun hitting me in the face. I can't say yet about the durability of the shade, but I don't expect a problem. And even if it needed to be replaced after a few years, it was cheap.
Nicole Farquhar
Excellent Product
Great product and easy to setup and install. Just measure the spot where you want to install the shade and follow the simple directions. I cut the shade to fit with a simple kitchen knife. The adhesive materiel is perfect to hold the shade in place. Also, it can be removed and replaced a second time but any more than that you will most likely need to reapply some type of adhesive (I will use Velcro strips on the window seal and the bottom of the shade in the future). We liked the first one so much I purchased a second for my office and painted it black to block the sun from coming in the window. The materiel is light fabric and if you need/want to block the sun plan to paint your shade, it painted an dried super easy and looks great. I stretched it out long ways on a piece of plywood to ensure a even coat was applied between all the folds in the fabric. You can't go wrong with this shade for the price.
Avis Evans
Looks nice for an affordable price
I had a headache trying to get this to fit properly, but that's not the shade's problem. If you expect to simply make one cut and place this, first measure side-to-side, then top-to-bottom. If your top-to-bottom measurement isn't exactly half of the side-to-side measurement, your window is not a perfect half circle and it will require special customized cutting to fit in. When mine was finally cut properly, the end that was facing up had a deep V cut in it rather than being a straight line. The arch was kinda squatty and not perfectly rounded, so I had lots of zig zaggy paper scraps to throw in the trash from whittling away here and there trying to get the shape right. However, the mess of getting it to fit right in a non-perfect arch is going to happen no matter what you put in there. My windows have a half circle at the top of the center window, and I used 14 inches for this portion. The two outer windows have quarter circles, which also had a radius of approximately 14 inches, so I cut this off, sliced the fabric halfway down, and put a little quarter circle of shade in each of them. All in all, I covered all three oddly-shaped windows where my blinds are unable to block direct sunlight, and the afternoon glare of the sun is greatly decreased. As an added bonus, the windows look more attractive when viewing the house from the front.
Stephanie Holton
Much better in my experience than far more expensive shades
Extremely happy with this purchase. The shade looks nice, adds privacy and tones down direct sunlight without leaving the room dark. Most importantly, installation was easy. The rest of my review compares installation of this shade to a much more expensive department store shade. This shade replaces two failed shades from a mall anchor store that cost 75 bucks a pop and look identical. The expensive shades disintegrated in the sun after only 15 months. Stupidly, I bought a second identical one to replace the first. Again, after just over a year the shades began to tear leaving my window looking like someone had cut a pie slice out of the covering. Admittedly, when I opened this package the shade seemed chintzy. Instead of a plastic strut across the bottom edge, I found flimsy cardboard with two sided tape. It took less than a minute to cut the shade to size with a utility knife. I had to use a band saw on the more expensive shades, so plus one for the Redi Shade. Installation is where this shade won me over. The expensive shades couldn't support their own weight which meant "fat guy on a ladder" yoga poses while I attempted to both hold the shade and drill and mount the support tabs. The Redi Shade fabric is light and the length is perfect to "spring" the shade into place under tension. The more expensive shades that I bought were inexplicably long which meant almost no tension, and as a result, they required plastic tabs for support. The flimsy cardboard that I mentioned is partly responsible for easy installation. The shade with the plastic channels had to be snapped into place prior to sticking the base to the sill, which was difficult to do while holding the shade up. The plastic center mount has no channels so you only have to drop the cardboard end into place and press firmly. Tip: Find the center of your window opening and make a small pencil mark. Center the plastic piece on the mark. To install, peel the double sided tape paper where the two ends meet in the center. You can peel the paper back while pressing the shade into place. I can't speak for longevity. The sun could certainly destroy this fabric like it did on my other shades, but ease of trimming and installation have won me over. Couldn't be happier.
Kayla Gundermann
cuts down on glare while still letting in light.
worked great. We had a glaringly bright window that overheated the room in the summer. This shade worked to cut the light to a soft glow. (I didn't want room darkening. Not sure if the "fabric" description is accurate. Looks and feels like heavy paper to me. I'd suggest measuring more carefully and maybe not using their marks on the item when cutting. I used their guide and my shade was just a bit too short for the opening. Doesn't look bad, just wish I'd measured twice, cut once. I cut through the shade with a very sharp box cutter. Worked great.