
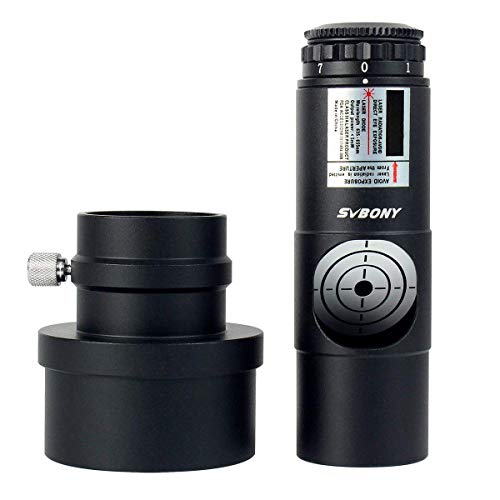
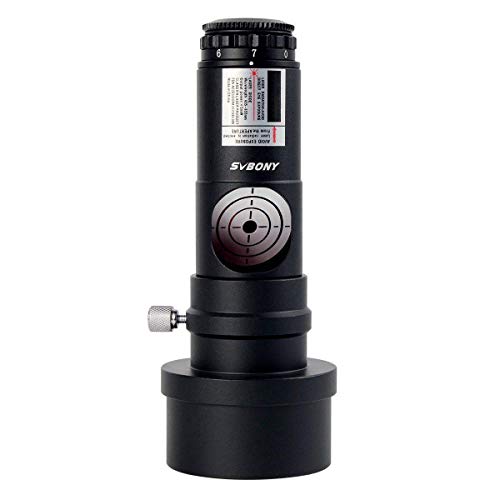
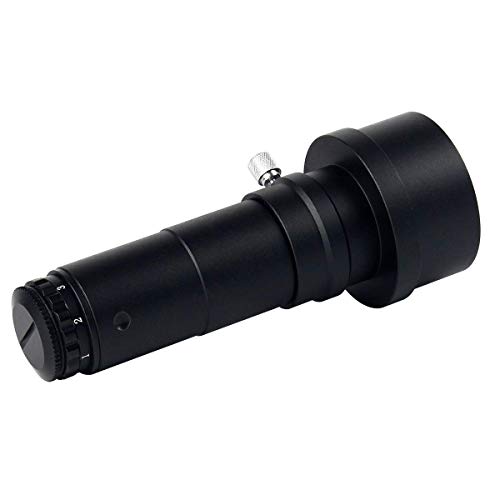
- SVBONY user adjustable laser collimator;allows anyone easily collimate 1.25'' and 2'' reflector telescopes;come with removable 2" adapter;built with metal material;make alignment no longer boring and time consuming
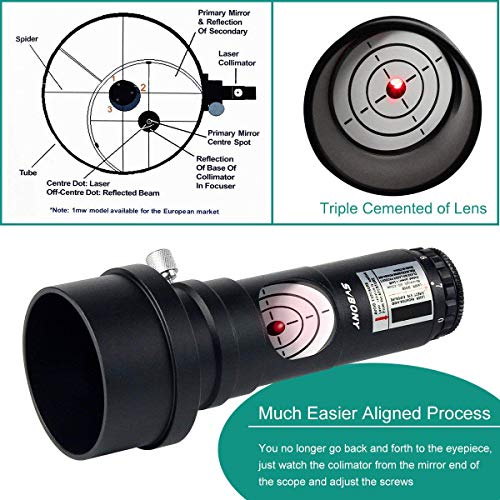
- Easy to use;accurate collimation in a few minutes provide a more clearer image;no longer have to go back forth;just watch the collimator from the mirror end of the scope and adjust the screws
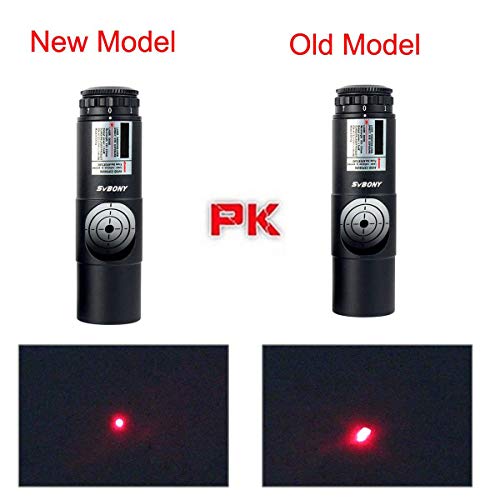
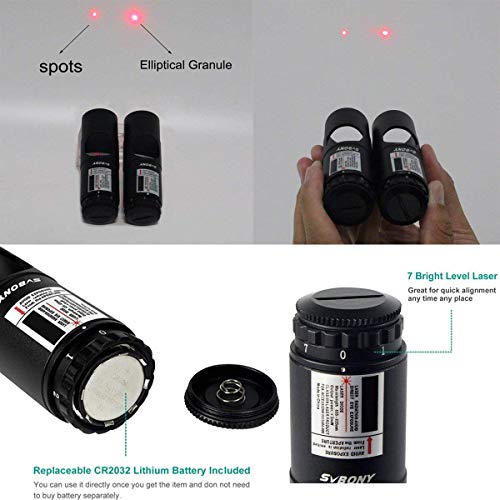
- 7 brightness levels red laser beam;adjustable brightness;suit for different light conditions;amazing alignment in dark and day;so can get the better views possible from your reflector telescope
- High quality solid metal body;for a long term use;CR2032 battery included and comes with a full set of instructions with a step by step procedure on how to properly align a relfecting telescope
- Lifetime warranty;we confidently promise lifetime warranty for every one bought from us
-
Information
-
Twitter
-
Pinterest
-
Youtube
-
Facebook
Tamra Lee White
Great low-cost laser collimator
You really have three choices for collimating a reflecting telescope: “eyeballing” the collimation which is the way most instruction manuals explain it, purchasing a $35+ collimation eyepiece from your telescope manufacturer to get closer to the goal, or with this low-cost laser collimator getting even closer mirror alignment. First time I used this product, I hit the collimation dead on. YouTube videos will definitely help first-timers figure out how collimation works. [On my Celestron 127EQ it required removing a correcting lens in the eyepiece mount.] Well made; should last quite a while with proper care.
Danielle Hope Faison
I have purchased a 10 in dobsonian and it also works just fine on that telescope
SVBONY Red Laser Collimator 1.25'' Battery 7 Bright Levels Triple Cemented Lens Metal with 2" Adapter for Reflector Telescope Collimation I had a 6 in. dobsonian Orion telescope and due to moving, it went out of focus. I tried a collimator with just crosshairs and that did not work. I then purchased the SVBONY Red Laser Collimator and within 15 minutes I had everything back in focus. Since then, I have purchased a 10 in dobsonian and it also works just fine on that telescope. I am extremely satisfied with this collimator and it is a real bargain for the money
Kristie Kramer Sportsman
Super convenient and easy to use
After receiving a telescope for my birthday, I did some reading to get the best from the scope and learned about the importance of collimation. After watching some videos on YouTube, this collimator was recommended by a few different people. After I saw the price, it was an instant buy for me. I didn't use the instructions included with the device and I would highly recommend watching some how-tos for your particular telescope to get a handle on the basics of collimation. This device, however, made the task a breeze, and in 5 minutes I was ready to go, having never collimated a telescope before. The resulting views of the moon were spectacular. With optical equipment, "what you pay is what you get" is often an adage that holds true, so I'm sure there are better devices out there that are more precise. But for someone who's not a professional astrophotographer and just wants to set up my scope in the backyard for some looks on a clear night, this gets the job done and a must-have for anyone that plans to use a telescope on a regular basis.
Eric Jay Sanders
A great collimation tool once you collimate the laser!
After purchasing my Orion XT10g and awaiting it's delivery, I knew I had to order a good laser collimation tool. This one seemed to fit the bill perfectly, as it had a 2" to 1.25" adapter included, brightness level adjustments - and most importantly - this collimator has it's own collimation adjustment screws. There are two covered by some silicon plugs (that must be dug out with a paperclip or the like) and the third is under the warning label. Before using this device, you need to ensure the beam being projected is on the same axis as the housing. To test this, you need to either find, make or buy some sort of V-blocks - or a big heavy book opened to the middle might suffice as well. The object is to project the beam onto a wall at least 6 feet away and carefully roll the collimator in place to check to make sure the spot doesn't wander in a circle. Be warned, that it will most certainly need adjustment. I knew this going in, which is why I did not dock a star from this product. After some time, I was able to make tiny adjustments to the 3 screws on the barrel to correct the beam's collimation to a level I felt was acceptable. I could have spent many hours messing with it, I'm sure. Once the laser is collimated, you can then use this to collimate your telescope with pretty amazing precision - as well as convenience. I was amazed at the visual improvement at the eyepiece after collimating my scope. The 7 brightness levels are also a fantastic feature. In the dark, Ill use it on it's lowest setting.
Apple Gabriel Cabading
Collimation on the laser was perfect
I received this collimator and right away I wanted to see if it was in calibration/collimation by the factory based on some of the negative comments I read here. I was prepared with a jig to "roll" the collimator in and had it vised onto a table waiting for this collimator to arrive. Right out of the box it was PERFECT contrary to some reviews. No wobble or "circling" occured. I had been using a Light Pipe Sight tube collimator on my Celestron XLT 150 reflector but wanted something to use to make collimation easier in the dark. I used the Svbony laser in my scope and found it to be spot on already in collimation. I was pleased as I am still new to the hobby and the verification by the laser not only showed how easy it was to use and that it was accurate but it also let me know I was proficient using both collimation tubes, Svbony's or AstroSystem's laserless tube. I must say that I found the laser collimation way easier and less time consuming than the sight pipe. Mine came with a battery and the 7 settings of brightness was useful and easier on the eyes. Great product.
Dawn Phillips
Good quality and good price
Laser arrived sooner than expected. Did a collimation test of the laser. Rotating the body in a machined test platform, the laser did not deviate with the laser dot projected on the wall and the body rotated a full 360 degrees. Collimated a Newtonian perfectly in about 2 minutes. Good quality and good price. Highly recommended.
Jonathan Birdman Martin
Great value for the price.
I originally bought a laser collimator from a name brand for just under three times the price and immediately used it to collimate both my Newtonians. Imagine my surprise when the images were terrible and nothing was aligned. Lo and behold: the laser itself was out of collimation and I didn't see any way of realigning it. I sent it back and swore off lasers for a while. Then, after a design flaw with my second scope was corrected, the company sent me a brand new scope and I just couldn't get the secondary aligned. I decided to give this collimator a try since it was cheap and I knew it could at least be adjusted if it was off. Turns out, it was perfectly collimated already. I can spin it around in the focuser and it doesn't move it at all. That may not be your experience, but if it isn't, it can be adjusted. At any rate, my secondary was way off and this finally helped me get it positioned perfectly. For the price, it's a steal.
Bryan Soon
Don't rely on the instructions
The instructions are informative than they are helpful. For the love of God save yourself a bunch of time, go on YouTube and search "collimate dobsonian telescope". You'll thank me later. Once you figure out how to use it you should have your telescope mirrors lined up in about 15 minutes. Make sure that you twist the laser in the eye piece hole so that the target is facing the back of the telescope. You'll need to be able to see it when you adjust the primary mirror. It's all very simple and the tool seems to work well I have no complaints. I would note that after you collimate your telescope you will have to re-sight the finder scope. I made the mistake of forgetting that part and had to call it a night early, due to not being able to find a thing in the sky. If you found this helpful please click the button below.
Roxane Goodfellow
There are indeed allen head laser adjustors...
Picked up a new telescope a couple weeks ago and it needed collimation badly, was going to get a basic one but decided to get the VITE Metal Telescope Laser Collimator instead. Very glad I did… it makes it so easy even a nub like me can do it in just a couple of minutes. The only issue I found was that when I turned the collimator in the eyepiece socket it would rotate around the “donut” on the primary mirror… That didn’t seem right to me so I went on YouTube (as I do when I need to learn something new) and found that this issue was typical for most laser collimators. Not being OK with having it rotate around the donut to get it “close” I decided to figure out how to calibrate the laser… On further inspection I found that the Collimator has 2 “dimples” at what looked like a 90-degree offset from one another on the tube near the end where the twist on switch is… and the dimples are rubbery when you push in on them. To my surprise when I started digging out the rubber pieces there are indeed allen head laser adjustors under the rubber. Now I’m not sure if removing the rubber voids any kind of warrantee but I’m not worried about that, I just wanted it to work properly. Now my laser device is “calibrated” to zero and it only takes a min or two to re-collimate when I want to do some stargazing… Hope this helps if you are having the same issue I was. Cheers All…
Tr Delphine
A great product. Must have!
I am new to astronomy and recently purchased a Celestron Nexstar 130SLT along with this SVBONY laser collimator. I am so glad I did because the telescope arrived with the primary mirror lock screws loose and the mirror definitely way out of alignment. With this laser collimator the process is quick and straight forward. It only takes a few minutes to do and the instructions were helpful. I like the adjustable laser settings which allow you to make the laser "dot" sharp or more diffuse. This is a precision and instrument and feels very solid and well-made.