
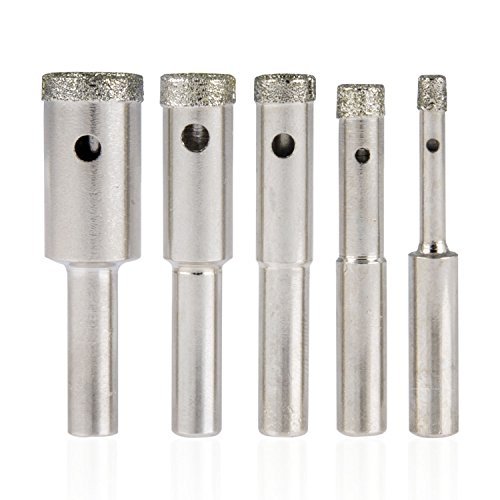
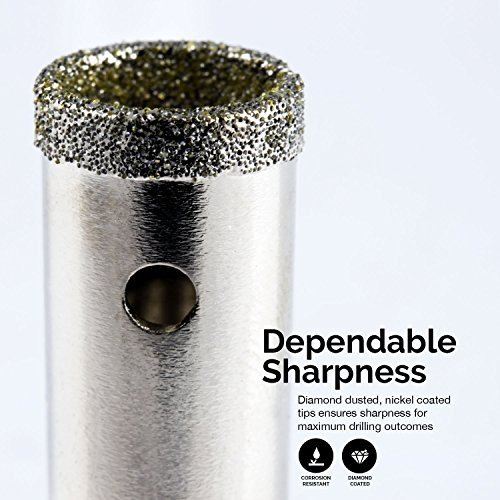
- Diamond coating maximizes performance and retains a sharper cutting edge than traditional carbide or bimetal hole saws
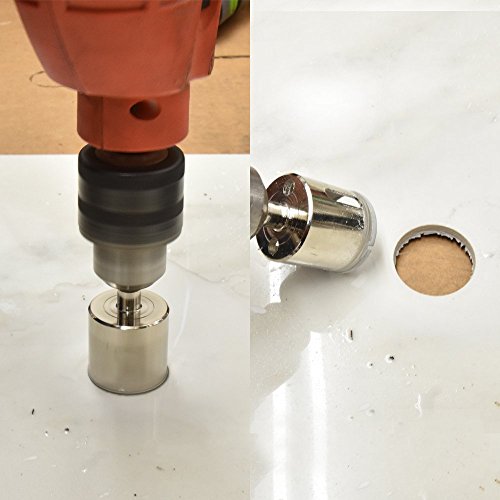
- Side holes allow for easy slug removal after drilling
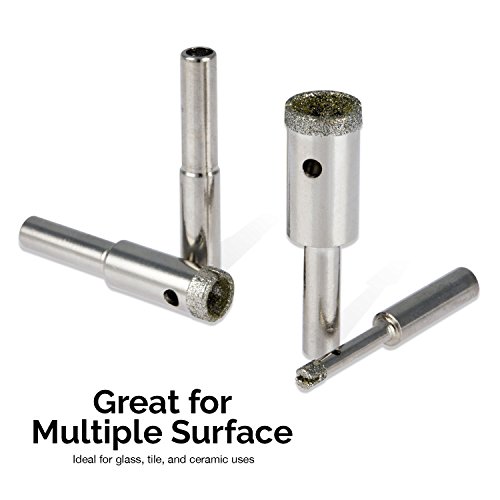
- Perfect set for cutting accurate holes in a wide variety of materials such as glass and ceramics
- Nickel plating on these bits maximizes your tool’s life with great resistance to corrosion
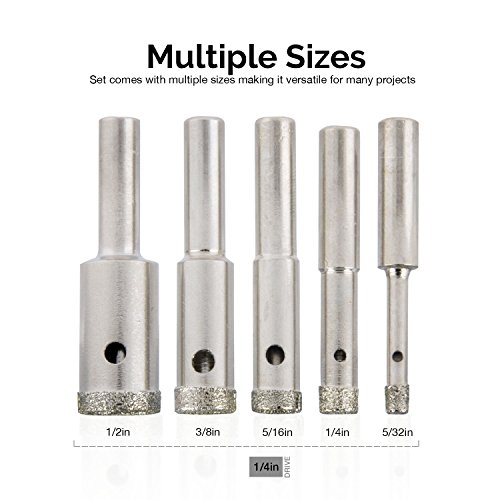
- Sizes include: 5/32”, ¼”, 5/16”, 3/8”, and ½” with a cutting depth of ¾”and ¼” shank
-
Information
-
Twitter
-
Pinterest
-
Youtube
-
Facebook
Jessica Bohannon
These Bits Saved Me
Read a lot of reviews and watched some vids online - had an outside entry wall tiled in order to provide a backsplash for a large wall fountain. Tile guys said they would not drill holes in the porcelain tile - it's like glass, not easy to drill and very easy to crack. I checked Home Depot & Lowes, $25 for one bit. Since I needed to make 4 different size holes I really wanted a set solution. I believe I paid <$12 for this set and had low expectations. Much to my satisfaction they all worked great. I drilled 18 perfect holes. 2 BIG points: 1: You must start by letting the edge of the hole saw scratch a mark into the tile by holding it at an angle - my Milwaukee cordless drill has a low speed witch was perfect - hold on tight, don't let it roll away and get it started on the lower edge of what will be the circle you cut around the center point of your hole - once you make that scratch keep the bit turning and flatten it out on the tile - when you've made your circular scratch around the center point, pull away to ensure your center point is in the middle of the circle your hole saw will cut - this is much easier than it seems like it will be, you can do it. 2: you must keep the bit cool - engage a helper with a spray bottle - let them continually spray (about once every 3 seconds) the end of the bit as you drill - the spay irrigates the hole as you drill. All of the bits have a lot of juice left - take care, do your part and these bits will get the job done for a fraction of what you'll pay at the hardware store. Very happy with this purchase - arrived quickly too...
Mark Nollan
Worked as advertised!
For the price, this worked very well for me. I had to bore a 1/4" hole through a crystal serving platter,that is a 1/4' thick. I am restoring a display that actually used this exact vintage glass platter. had to track down the platter, and then attempt the hole in the center. I used a snap-on cordless angle drill, which gave me exacting control over pressure, angle and speed. I took it very slowly because this is the only platter I have. Took about 15 minutes to go all the way through, with almost no splintering as it came through. I checked the bit before and after, and there is no noticeable loss of coarseness in the tip. Don't know why others have had less that good results, but worked perfectly for me, better that I have hoped or wished for. I am very happy with the results. If I had any advice for others using these bits, it would be, don't be in a hurry. expect to go slowly with very little downward force, and keep it cooled with water. For the occasional project these should work for you, if you can take the time to proceed carefully and slowly. If you are in a hurry, I suggest you not attempt to bore through glass!
Vinod Singh Rana
Great Value on These Diamond Hole Saws
I was skeptical due to the low price but decided to give these hole saws a try on a new ceramic tile shower wall. I needed some clean holes for mounting grab bars and a hand held shower head holder. So far, I have made 8 holes with the 5/16" saw and the saw shows no signs of wear. Some usage notes: To keep the saw from wandering from the desired hole location, I drilled the same size hole, with a standard drill bit, in a wooden paint stirrer and taped the stirrer securely to the wall. I had my wife help with the process by spraying the saw/hole with water from a spray bottle while I was drilling. Also, it works better if you clean the saw out completely between each hole. I would definitely purchase this set again.
Kamal Kumar Rajak
A trip to the local big box to get a masonry bit and I picked up some glass/porcelain bits that look like spear points
I bought these to drill holes in porcelain tile to install a threshold in a doorway. I immediately realized that I couldn't start the hole with these bits since it will slide around on the tile. A trip to the local big box to get a masonry bit and I picked up some glass/porcelain bits that look like spear points. I used the masonry bit on the first hole and about 10 minutes later I was about 1/3 of the way through. I swapped between the masonry and glass bits and got about 2/3 of the way through before I remembered these. It took 10 seconds to finish that hole. I started the next one with the masonry bit until the hole was large enough to start these bits and 30 seconds later I was all the way through. Outstanding! I doubt these will last for a while but at the cost and the time saved I don't care.
Andy Kovesdy
First timer in drilling holes in porcelain. Worked perfect!
I bought 8 porcelain pots to use for an herb garden -- what I didn't think about, was how the water was going to drain. I did an internet search which led me to these bits. Based on the reviews, I figured I'd give it a try. I grabbed my everyday drill (Ryobi), put the first pot upside down in the sink (so I could run a trickle of cold water on it) and started the angle at about 45 degrees. It took about 10 seconds for me to figure out how much pressure to apply, to get it to catch on the smooth surface. Once I figured that out, I slowly moved the bit to 90 degrees to finish the job. I did find I had to use a pretty good amount of pressure/muscle to finish the job. That being said, I did 8 pots in a matter of 10 minutes and didn't break any! Used the same bit the for all. Highly impressed -- I was fully prepared to break 2 or 3 because I had never done anything like this before -- nope, they're all perfect! Seriously impressed.
Christopher Fawcett
OMG! What a FIND!!!
I am SO amazed at the effectiveness of these bits for so cheap! I'm building our third home and needed to drill a shower head hole in 36"x 8.5" Italian porcelain. I bought two bits at my nearby Ace Hardware for $10 each. They only drilled four holes each max with dipping bit in water every 10 secs. I decided to buy these on Amazon and I cannot EVER complain about the bargain and usefulness. Dip and spin in a cup of water every 12 secs and slightly lean your drill in a circular motion. Use a pic tool to nudge out the tiny core in bit halfway through your tile and you'll be able to drill as many holes as you like without breaking the tile! For $7 I have NEVER been more pleased!
Yolanda Renee Small
Cuts ceramic with ease!!!
== Introduction My seedlings have started to produce flowers and I wanted to transfer some of them onto ceramic cups and bowls for display purposes. After purchasing a few beautiful cups and bowls, I found that drilling holes into ceramic material wasn’t easy. It took a couple of hours to drill five holes at the bottom of three cups using masonry bits. There had to be a better and quicker way. After some online research, I found that I needed diamond drill bits. A search on Amazon for inexpensive diamond bits led me to Neiko Tools’ Diamond Grit Hole Saw Drill Bit Set. == Packaging As seen on the included photos, packaging of the set is very simple. The bits are housed inside a styrofoam cutout. No fancy plastic case, just the bits, the styrofoam, and the external packaging that contains the name and picture of the product. I was fine with the simple packaging because it is a factor in reducing overall cost. == Performance Prior to receipt of Neiko Tool’s diamond grit hole saw bits, I purchased an all-purpose bit from a local home improvement store that was advertised to drill holes into concrete, metal, plastic and wood. I also purchased a diamond bit set from a local budget tool store so that I could finish drilling holes on the ceramic cups and bowls I had already purchased. The all-purpose bit barely made a scratch on ceramic material. The diamond bits worked better but were fully spent after drilling three or less holes. The diamond grit hole saw bits from Neiko Tools arrived a day early. With around 20 ceramic pots, cups and bowls purchased from a flea market, I was ready to use the diamond grit bits. Armed with a driver on one hand and a bottle spray on another, I started to drill at a 45-degree angle and as the diamond bit “bit” into the ceramic surface, I slowly changed the angle to be perpendicular to the surface I was drilling into. Three sprays and a few seconds later, the hole was made. I was really impressed at how simple it was to make a hole through ceramic material. The reviews were mixed so I had my initial doubts but I was delighted with the results. Listed below are tips that I found to be helpful in my project. • Wear protective eye gear and dust mask. This is a must for your safety. • Just like any drill bits, the diamond grit hole saw from Neiko Tools will become dull with time. Time is determined by the material you’re drilling and whether you use lubrication or not. • Be patient and take your time especially if you’re new to this. Your patience will pay off with the results. • Lubricate when drilling. This will increase the life of your bit by reducing heat, dust particles and results in cleaner cuts. • Start drilling at a 45-degree angle and slowly adjust to 90 degrees as the bit starts to cut into the material. • Apply very little pressure and let the saw do the cutting. • Keep in mind that with every hole you drill, the bit becomes more dull. As the bit becomes more dull, I had to increase the pressure by just a little. • As a bit became more dull, I had to use both hands on the drill to start the bit to cut into ceramic material. Once the bit started cutting, only one hand was needed. The other hand was back with the spray bottle. • To further stretch the life of my bits, I used the smaller diamond bits from the local budget hardware store to make a smaller hole and then finalize/increase the size of the hole with Neiko Tool’s diamond bits. As of this writing, I’ve only used one bit and it’s not fully spent yet. == Pros • Inexpensive • Works as advertised == Cons • Bits wear out eventually (expected) Conclusion What used to be a gargantuan task of drilling holes through ceramic became a smooth and more rewarding process with Neiko Tool’s diamond grit bits. For what it does and especially the price, consider this tool as disposable once the bits become dull. Lubricate to extend the life of your bits and purchase a new set when the current ones become unusable. Alternatively, you may opt with more expensive sets for longer lifespan. Based on my results, I highly recommend this set to anyone needing to drill holes through ceramic material.
Theresa M Bodman Barcavage
Install Curtain rod on 3/8" thick porcelain tile.
It took 2 people to do our job. One to drill, the other to spritz with water so the bit didn't over heat. The bits are hollow. This gives the material some place to go and I guess makes less dust? On the downside - hard to start. With out a pointed tip (which would wear out quickly) the bits tend to wander. To get around that, we started by holding the bit sideways (20 degree angle). This bore a smile into the porcelain - later connected with a frown at the top to make a circle. Once that was done the bit could be held forward - set into the marks. After we finished the first whole, my handyman was dialed in and he made short work of the rest. I think drilling the remaining 5 holes took about 20 minutes. I checked the bit several times with my fingers to make certain it wasn't getting too hot. Barely warm. I spritz constantly and didn't even use up half the large size spritz bottle. We used the center bit to make 6 holes and believe there is enough life in the bit to make at least another 6. On the down side. The bits would fill up with tile/water paste and which was hard to remove. This happened twice. Each time added another 5 minutes to the job.
RnzNa Bhattarai
Perfect Pieces to Make Glass Bottles
So I wanted to post this as soon as I did it so I would not forget to do it later. Let me give you a quick background of me: I don't use tools. period. BUT as a bored college student only going to school two days out of the week and has too much homework to actually get a job I wanted to have a hobby so I have been looking at Pinterest for inspiration. I got this in order to make a glass bottle lamp. I had watched plenty of YouTube videos and read plenty of How-To blogs with these drill bits as well as reading a lot of reviews on here so I had pretty good handle on how to use this drill bits. A little nervous to start right away on the bottle I actually wanted to make into a lamp with, I used a small brown glass bottle as a practice bottle. I put painter's tap on the place I wanted the hole to be and placed the drill bit at an angle. It took a few times to get the bit to catch against the glass but once it did the cutting didn't take long! I straightened out the bit and did circular motions with the drill as it drilled into the glass to help it along. I applied very little pressure. Every ten seconds (I actually counted to ten in my head) I would stop and pour a little water on the hole (I suggest doing this outside like I did) and then went back to drilling. After a full minute there was a beautiful hole right where I had planned it to be! Confident that I could do this, I did the same thing to my Jack Daniels bottle and sure enough (with the biggest drill bit this time - I used the smallest drill bit on the brown bottle in case it got ruined) there was a perfect little hole! After all the reading I have done I knew that you HAD to use water to not ruin these bits or ruin the glass so DEFINITELY MAKE SURE YOU USE WATER while making a holes. Overall these bits came in record time, worked great, and will definitely be using them again!
Sharon Brace
Nice bits!
I put a new floor in one of our bathrooms this past week and I decided that I wanted to have the flange on top of the tile. That meant that I would need something that could delicately cut through my nice new tile without causing breakage. I ordered this set (Neiko 00823A 5-Piece Diamond Hole Saw Set) hoping that it would get the job done. And did it? Yes, yes it did and better than I had hoped. I used two of the bits. I used the largest one to also some of the tile around the drain hole since I didn't get it cut quite right. I also drilled 5 holes for the screws with the 1/4 inch bit. Both bits did a fine job and helped make my work look semi-professional. I was quite pleased. There are a couple of things people ought to know though. The first is that anytime you used a diamond studded bit or saw that you need to mitigate the heat as best you can. I poured a little water over the area I planned on drilling in, and then about half way through I gave it a little more. You don't need a lot. I used a syringe, but a glass would have done fine. Keeping it cooler will help prevent the diamonds from detaching. The second thing is that cleaning out the shafts might not bee very easy if you don't do it regularly and by that, I mean every hole. If the dust mixed with the water hardens then it will take more effort to get it clean. Be patient. This isn't going to work as fast as a wood or metal bit and you don't want to put too much pressure on it at any given time (heat is your enemy). If you wonder if these are cutting just look for the dust or pull it up and see. Finally, understand that it takes a moment for these bits to grab and start a hole. The big one wanted to slide around on me, but when I fired it up and got my drill at full speed before touching the tile, that helped. When I tried to cold start it in place it went all over the place. All in all, these were a great purchase and they did they job very well. I have no idea how well they'd stand up to heavy use, but for my little job they were perfect. I'd expect them to do well for many more to come though.