
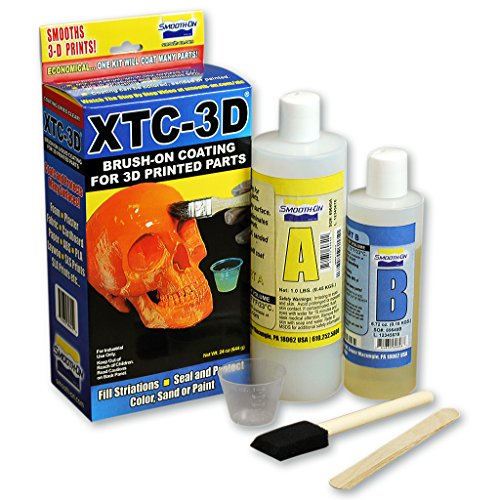
- Epoxy Coating for 3D Printed Objects
- Smooths 3D Printed Objects
- Compatible with SLA and SLS prints.
- It works with PLA, ABS, Laywoo, Powder Printed Parts and other rigid media. It also can be used to coat EPS, EPDM and urethane foam as well as wood, plaster, fabric, cardboard and paper.
-
Information
-
Twitter
-
Pinterest
-
Youtube
-
Facebook
Crystal Morris
Great for PLA smoothing
Pretty much what everyone else says. 1) A little bit goes a long way 2) READ the INSTRUCTIONS 3) Acid brushes work great for this application. With a single coating I was able to greatly reduce the ridges in my PLA prints. After letting it dry/cure a second coating was all it took on most areas to create a glass smooth finish. Some other areas required a bit of apply/let cure/sand/apply another layer but even that was about 80% less finishing work than I had to do before. This product is also great for filling in pinhole flaws in your print however by the same token it will also soften or cover small, fine details so you have to use some consideration and planning. On the whole I am extremely happy with this product and the kit is going to last longer and cover a lot more than I initially thought because you need so little to cover a pretty large surface.
Rod Mackay
Looks good and easy to apply
Used this on a few prints so far. Its def just as nice looking and easier to to use than a vapor bath. Also I think it gives extra protection from breakage too. It really looks very nice in the gloss form though. If you can get your coat even, I just like to leave it at that. Just make sure to have something disposable to mix it in and some additional foam brushes or something to apply it with. PS: This stuff stinks really bad too. I dont think the fumes are that bad but it just stinks. So make sure if you dont like bad smells, ventilate your room and have a fan going.
Nathanial Lovgren
Great Stuff when used as instructed.
I have been researching this epoxy for quite some time, after watching YouTube videos on how it is used and what it is used for. With that said, This epoxy works extremely well, if you follow the directions carefully and use the correct brush for it. I have coated a few of my printed models and let me tell you that this works... PERFECTLY. Almost TOO PERFECTLY. When Smooth-On says you need a very thin coat of this, they MEAN EXACTLY THAT. You only need very little. I was coating one of my makercoins with this, and I layered the epoxy on a little too thick and it ended up in the details of my logo (ruined the part but, hey, I printed another one). Also, make sure you wear gloves with this and keep the printed part free of grease. The mix ratio is 2:1, but at times you need VERY LITTLE, so I just carefully eyeballed it, and also pour the mixture into a tin foil and DON'T ALLOW IT to stick close, spread it out a bit One thing to note that once you use the medicine cup and the chip brush, say goodbye. I stocked up on dixie cups and popsicle sticks since I will be using this very often. I print my models at 50 microns, but that doesn't stop me from coating my models with this, before sealing it with primer. Also the cure time is shortened if you put it in the sun on a 90 degree day (I let it cure for 5 hours). And to get the model ready, I used 220 grit sandpaper to get the surface buffed up for a final pass of paint. I must say, all of my research paid off. I can't wait to use this on bigger models.
Leoj Flores Vidal
Great for Coating Many Things with Plastic
First, I'm wondering if those reviewers who say the stuff stays sticky did not follow directions. One thing: in the directions, it says to shake the B bottle before dispensing, but I couldn't find that direction anywhere on the bottle. If it's there, it's not easily seen. So I wrote "Shake Well" several places in bold letters on the bottle. Failing to shake the bottle might lead to some of the undesirable results mentioned in reviews--such as remaining sticky. I used this epoxy to plasticize three hosta leaves and a lily flower to create a floating plant for our backyard pond. It worked great. Of course, the result looks like plastic, but that's how it's protected from the water. After a few hours of curing, the coating definitely is not sticky. Definitely follow directions; for example, wear disposable gloves and safety glasses, work in a well-ventilated area, etc. Plan ahead. You have only a short time before a batch starts to harden. I recommend the video titled "How To Coat a Flower With Resin - YouTube." (Although, truth-be-told, she is coating a fake flower. But, as I mention above, it does work on real flowers and leaves too.
Sennen Cancerian Salise
If you wrap your head that this is not the end game for finishing 3D prints then you'll be happy with the results.
This produce is definitely worth the try. It is true when everyone says that a little but goes a long way. I used a graduated disposable cup to measure out the portions. I was able to coat an entire 3D printed gun with 30mL A and 15 mL B with enough to spare for more things to coat. A part will require at least 3 coats of the product. My only issue is that the finish is a little wavy. Sanding is definitely a must. Initially using 60 grit sand paper then working your way up will ensure a nice smooth finish. Think of this product more like liquid Bondo. It's easier to predict where you have to sand more as opposed to Bondo where it can have inconsistent layers. Until a better product comes out, I'll stick to this.
Mahnoor Hunjra
Mix small quantities - takes getting used to
When it arrived, I was concerned that it would be too thick to spread easily. Once mixed, it loosened up nicely and was painted on without a problem. I needed a lot less than I thought, so I had a decent amount left in the cup. When it got to about the 20 minute mark after mixing at 70 degrees, it set up very fast, going from spreadable thin to a giant chunk in what seemed like seconds. The leftover amount (about half of a mixing cup) also got pretty hot. I guess epoxy sets up in an exothermic reaction, huh? The fumes coming out of the cup were also pretty noxious, so the MSDS sheet that it came with is appropriate. My recommendations: * Mix less than you think you will need * Set a timer so you know when it will harden * Spread with a disposable brush like an acid brush - don't expect a second use of the brush * If you have any leftover epoxy, put it outside to harden
Maryam D Bello
Must have for finishing 3d prints
Great for finishing 3d prints especially PLA stuff. It's a pain, but several light coats is the best so you don't end up with pooling or uneven textures. Bought a small scale to mix these based on weight instead of volume and has made it a lot easier to make small batches so I don't end up with wasting a bunch.
Kim Losky
Perfect for cosplay!
I was searching the market for something to use when painting my chestplate for a cosplay I was making, and this did the job perfectly! It's very easy to apply and makes the surface premier and professional-looking. I highly recommend it for anyone looking to polish up a theater or cosplay costume.
Nicole F Jarrell
Great tool, use it right and you won't be disappointed.
You NEED this stuff if you're working with PLA or even ABS plastics. I'm never going back to Bondo or any other filler again. It goes on super easy and sands down in no time. It's liquidy nature means it'll fill in the cracks without you having to push it into them. Few tips: -READ the instructions. -Mix in small quantities and spread on a large flat surface like tin foil tray, don't leave in mixing cup. The more surface area the stuff has, the slower it cures. Realistically you have maybe a 10-minute window to work with it if you follow these instructions. The first time I used it I left it in the cup and it hardened in just a few minutes. -buy some spare foam brushes and maybe even cheap plastic paint brushes. -wear a dust mask when sanding or you will be smelling/tasting the color purple for a full day. -Be sure to only use acrylic paints with it. Don't just go to the store and buy whatever Rustoleum looks pretty, it will not cure right.
Ava B Maistry
Worked well, easy to use.
After the part we printed in Taulman T-Glase Clear was finished I coated it with XTC-3D High Performance 3D Print Coating and the results were pretty impressive. The process really enhanced the clarity of the part. I tried this product on Black PLA as well and it made all the layer lines smooth. And BONUS - I had some product left over in a mixing cup so I did a fuel test on it, pouring gasoline into the cup and leaving it set for about 4 hours. ZERO indication of the product getting soft or degrading. I followed the directions exactly and the product worked as advertised.