

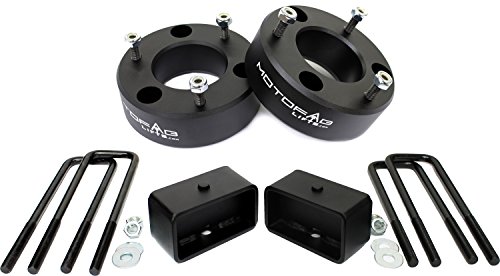
- Will Raise your truck 3" in the front and 2" in the rear
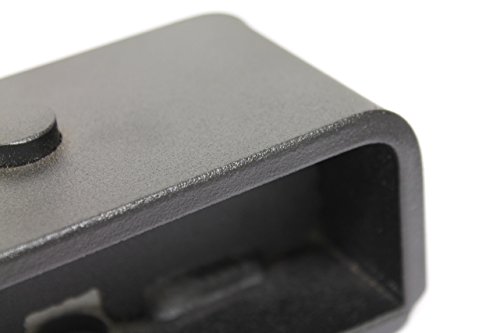
- Motofab Lifts are CNC machined out of billet aluminum then powdercoated black to match your factory suspension.
- Can be installed in about 1 1/2-2 hours and does not require strut/coil disassembly like other kits.
- Made In The USA with a Lifetime warranty
- Fits 2007-2018 Chevrolet & GM 1500 Pickups
-
Information
-
Twitter
-
Pinterest
-
Youtube
-
Facebook
Hilario Castrejon
Life changing
This lift made me more American in every way. I’ve now started chewing tobacco and drinking domestic lagers. After installing I got a buddy named Chet and we talk about trucks, ride around in trucks, look at trucks- heck, we’ve even watched truck shows on tv together. I’ve also noticed the sudden love life picking up. Well, I’m married, but after installing, she wanted to do stuff that you can’t see for free on the internet. Also, work started getting better- two days after installing I got a 15% pay increase and I told my boss to crap in a hat and wear it. My co-workers have increased project support, most of them buy me coffees now. It’s a good product overall. Does what it says.
Deigee Grandee
Great Kit !!!!
I wanted to give my 09 K1500 Silverado a lift without going too radical by installing a large lift kit. Even though big lift kits look awesome when done the right, is a fairly extensive job that requires bigger modifications to the frame and suspension and lets not forget to mention higher cost for most larger lift kits. I was in the market for a nice lift that was more than a basic "level kit" with small spacers between the lower control arms and front shocks and high enough to make room for the tires I purchased. I had Falken Wildpeak A/T3W LT275/70R18 tires (33.5 x 11.00R18) that I wanted on the truck and ordered Ultra Predator II 18 x 9 inch wheels through my Amazon account at the same time as this kit. I didn't want any clearance problems or modifications to my front air dam or GM molded mud flaps. This kit did the trick and exceeded my expectations!!! Let me start out by saying that I'm an ex automotive technician so I knew what I was getting into before I started this project. Even though I have previous experience, this was my the first time of taking on the challenge of installing a small lift kit so I did some research though several forums and youtube videos, especially since I have seen other comments that the provided instructions are not the best. The kit is fairly self explanatory however, if you purchase the MotoFab kit which raises the front 3 inches and the rear 2 inches, you'll have to remove the front sway bar links and disconnect the upper ball joints from the steering knuckles. This kit is too tall to try and do the cheat-method by only loosing the links and upper ball joint studs. Once everything is disconnected and the front spring/shock assemblies are removed, you will have to cut off the upper control arm bump-stops in order to re-connect the upper ball joint into the steering knuckle after the front shock spacers are installed. This isn't probably necessary with smaller kits that are also available though Amazon and MotoFab. The slight modification is not a huge deal to do and I found that using a cut-off wheel on a die-grinder to cut them off does the trick fairly quickly and easily. After cutting off the bump-stops, I then smoothed the cut-out areas with grinder to eliminate any sharp edges and used a little undercoating spray to protect the exposed areas from corroding. With the bump-stops removed and the front shocks with the new spaces in place, it allows the upper control arms enough downward movement to get the ball joint stud though the steering knuckle and the stud nut started. From this point all you need to do is finish the reassembly of the front end. When it came to installing the rear blocks, the new lift blocks were an easy swap out from the factory ones, just make sure you only do one side at a time or you may run into re-assembly alignment issues. The total project took me about 4hrs to do but depending on your mechanical skills and available tools/equipment to do the job, it may take you more or less time. It does help to have a second set of hands, especially when your re-connecting the front upper control arms to the steering knuckles. You will need to have the vehicle re-aligned after the kit is installed and if your going to put aftermarket wheels/tires on your truck, install them after its been aligned. A lot of aftermarket wheels don't have a recessed rim lips or make it easy to install alignment machine heads onto the outer rim edges which could make it difficult to align and/or mar-up your new wheels. I knew this ahead of time so I aligned the truck with the original rims/tires then put my new wheels on. After everything was installed and aligned the truck look awesome and the ran down the road with no problems. I think the ride feels even better than before the kit was installed with no rough or bumpy feel going over rugged terrain. Attached are before and after pictures the truck so you can see the difference this kit made along with the new wheels/tires. I cannot say enough about the quality of this kit (With A+++ that it's American Made!!!) and the price is a bargain at $125.00 when comparing to similar kits from other companies! I would highly recommend this kit and company to anyone looking for a new look to their truck!!!!
Ana Dulce Flores
Good Kit, Bad instructions. PLEASE READ
I installed this kit by myself with no lift like many others do. Two people is ideal but not impossible. The kit works great but the instructions are lacking along with their YouTube instructions they are lacking key information on the challenging parts. Removal and installing the kit on the strut is easy, reinstall is much harder. Two sets of hands is preferred but one person can do it if you really try like I did. On reinstall remove everything including the upper control arm even if the directions say don’t. Install the strut and hardware onto the lower control arm. Push the lower control arm down until you can push the studs of the strut into the strut tower or jack it up into place, do not tighten the strut bolts just hand tight to hold in place. Replace the upper control arm bolts to hold into place. Jack up the lower control arm so the upper control arm can be pushed into the knuckle and put the upper control arm nut for the knuckle on, this will take some forcing, the higher you jack the lower control arm within safety reason the easier it will be to force the upper down. At this point everything should be back on but not tight. Go back and tighten. I watched a dozen videos on the install and nothing explained what I did, just jam it together and figure it out. This is how I did mine and after this it works perfectly.
Hafeez R
Highly recommend!
Fairly easy to install. I had a buddy of mine, who is a mechanic for Chevrolet install it on my 2015 Silverado. He said the back was flawless but the front was a little more difficult but was still easily finished in a few hours. My CV angles are a little off but I am not too worried about it at the moment. The ride quality is completely unaffected and still rides as a stock Silverado. Allowed me to fit 34.5" tires on stock 17s with minor trimming and securing of the carpet in the wheel well.
Helen Hutchinson
Five Stars
Worked great. looks great too.
Patricia Best
Love this set up
Love this set up! It took me about 4 hours to install the entire kit. If I did it again it would take me about 2 hours. The instructions were good, the socket size was incorrect on several steps which resulted in longer installation time. I also re used the nuts holding the strut in place, the nuts that came with the kit did not have washers and seemed like a poor design. I've had Rough Country leveling kits before, I would buy this kit 100% over that product. Really a nice overall kit. No messing around. First picture is before I added kit and 295 Nittos.
Sanam Samiullah
Really pleased with this purchase
I installed this on My 2016 GMC Sierra Z71 in my driveway it took about 4hrs. 295 60 20 tires that measures approximately 34 x 11.5 had to remove a small piece of the fender well plastic insert behind bother front tires approximately 2x3 inches on the inside, closest to the motor at the bottom. No rubbing and the cooper discoverers stt pros are awesome on and off road they also look great fyi.
Ben Myers
Went on fast and easy, rides good.
Installed in under 3 hours, could've done it faster had they used 21mm nuts for the rear u-bolts, the supplied ones are 22mm but no biggy just had to go buy a bigger socket. Other then that it went on very easily, i heard some people talk about cutting a rubber stop off but i didnt have that problem, and didnt have to unhook the steering tie rod ends at all. Have driven 500 miles so far will uodate later on.
Varsha Payaal
One of the best mods I've done so far!!!!
I absolutely love this kit for my 2017 Chevy Silverado 1500. The install was pretty straight forward, took me and a buddy about three hours to do. It totally gave my truck the aggressive stance that I was looking for and rides much better than stock. You will need an alignment afterwards because my truck was reading completely off the charts when I took it in to the shop. Well worth the money and would recommend this kit to anyone with a Silverado that is looking for more height and that much sought after leveled look. I have attached two pictures of the before and after of each side of the truck. If you are considering buying a level lift, MotoFab is the way to go. The kit was very well built with quality parts and hardware and made in the USA which was my favorite part!!!
Chantal Finn
Great quality and great finished look for my truck!!
I have a stock 1500 silverado 2013, just bought 275/75/R17 AT’s and was getting a lot of rubbing, so after reading through 50+ reviews I decided to go with motofab 3/2 level kit over the rough country, I had to watch several YouTube video’s to get prepared for what I was getting myself into, I’ve never done anything other then oil changes and tire rotations, and a few break jobs before this. After watching the motifab video on YouTube I still felt in over my head because the lack of details, then I found a video from a guy with a snowplow that gave a great video, I felt a little better but still felt I should get a buddy to help me and I’m glad I did. We spent the first hour getting everything torn down and that went smooth. After setting the spacer on top of the shock we found getting it to line up with the bolts from the bottom arm was very difficult, but after playing with it for about 45 minutes we were able to set it. When tighting we broke the clips and I got pretty worried but after reading about them from another thread it wasn’t a big deal, we got everything else in without a hitch, and the passenger side went 5x faster since we knew what to expect, that’s when I realized we didn’t bolt the spacer into the shock, we only dropped it in, because the videos weren’t clear, when we tried to bolt it in on the passenger side none of my fittings would fit in the groves , so I decided not to worry about it since the would be tightened from the top of the shock to the wheel well. The back end of the truck went in quick and simple, the look was better then pictures show, you really can’t judge the pictures, they don’t do it justice! So far nothing has fallen off so I’m headed for an alignment next. Make sure you have an extra pair of hands before you start and expect to take about 4-5 hours if your moderately auto inclined. All in all the quality was great and it arrived sooner then expected, make sure you have a metric wrench set and socket set, you will need 10mm, 13mm, 15mm, 18mm, and 21mm sockets as well as 15 mm wrench, plan on having a crow bar, screw driver, air rachet, and hammer. A good size jack, 1.5 ton. And jack stands.plenty of light and lastly a 12 pack of brewskis!! Also note if your planning for a good size tire, my 275/70/R17 don’t run anymore!