


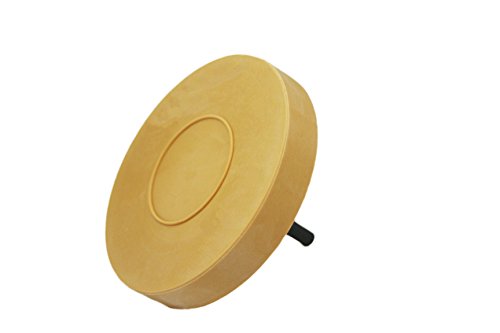
- OBLITERATE DECALS: Use the ABN Rubber Eraser Wheel Adhesive Remover with Adapter 1-Pack to remove any vinyl, decal, graphic, double-sided molding tape, striping, and trim on your car, truck, or similar vehicle; 4-inch (10.2cm) diameter (larger than others!); Molded rubber medium density drill attachment tool with a stop use line; For use with electric drill with maximum 4,000 RPM (best results between 1,500 and 3,000) (Not for use on lacquer coatings and not effective on some reflective tapes)
- BETTER DESIGN: Solid round design is larger in size than other discs which makes this wheel fast, easy to control, plugs up less during use, and stays cool
- SAFE: Will not gouge or scratch acrylic enamel or urethane paint work; No need for dangerous and harmful chemicals; The wheel has a durable construction that withstands up to 4,000 RPM; The included 5/16” 24 hardware makes it compatible with any standard drill
- EASY TO USE: Apply light pressure starting at the top of the decal and moving side to side, or for faster results, use entire width of the wheel without tilting or angling; Remove any residue with appropriate mild solvent; Always use proper protective equipment when using power tools
- CONTENTS: Package includes (1) 4-inch round decal eraser wheel and (1) 5/16” 24 thread drill adapter arbor
-
Information
-
Twitter
-
Pinterest
-
Youtube
-
Facebook
Ruby Mejia
GREAT PRODUCT
Makes debaging so fast and easy! Took me no time to do my badges on a few cars! Easy easy easy! Fishing line first to cut the emblem from the adhesive - then this on a cordless drill. 5 minutes. Tops! I had it on the fender of my friends car for about a minute and it didn't do anything to the paint. The wheel was a little hot - the fender was warm - no damage, so using this on your car WILL NOT DAMAGE the paint.. that 1 minute test we did proved that - as you should not even need to be in the same spot for more than 3-5 seconds before it's done it's job! GREAT PRODUCT~
Les Davis
Does not damage paint
I used this to remove the 3M double sided automotive moulding tape from my car's side skirts. It worked perfectly! I used a DeWalt corded drill and spun all the pieces off. I was originally using a plastic chisel, then a wood chisel, goo gone, heat etc. This did the trick in the end and saved me a TON of headache. The only major downside is the amount of rubber eraser scraps you get after having a go at it. It will get everywhere and require cleanup. The eraser takes a little getting used to, but once you get the technique down it is hands down worth the purchase!
Olabiyi Olugbenga Damilare
Worked as advertised for a third of the cost.
I've had experience with the 3M brand version of this when I used it to remove the door guards on my old Silverado. This worked just as well if not better than the 3M version. I have a 2017 White Silverado that I wanted to delete some emblems on. I read a review that said that this product stained a white car yellow and thought with that low price it's worth a shot. The first thing I did and I would recommend to anyone is try it out first on something that doesn't cost over a thousand dollars!!! I tested it on my washer and dryer first. They are white so I figured it's a perfect lab rat. It didn't leave any yellow marks so I moved up to an area on my truck that rarely gets seen, the inside of my tailgate. No yellow marks, we're good to go. All in all I like the product, it was inexpensive and did the job. If you're looking at removing your emblems or leftover adhesive off of any painted surface get this it makes it so easy. Below is a list of other useful things to get the job done. Hair dryer or heat gun Fishing line (it doesn't have to be braided) WD-40 or gunk off or rapid remover A good car wax Go slow and take your time and have fun.
Alecia Rakes
Worked
I had a double (silver and red) 1/4 inch wide pinstripe down the right and left side of my black 09 F150 Screw cab ford Tk. I never liked it but was apprehensive about removing it. I saw this on Amazon, watched a few u tube videos of it being used with success.---What I did--- I used a plug in drill. I taped up the geared chuck with duct tape just in case I got too close to the paint. I also put 1 inch wide masking tape on each side of the stripe (1/2 inch above and 1/2 inch below the pin stripe) to keep the erasing area to a minimum of 1 inch and a guide. I worked a 6 inch area at a time. As the stripe disappeared I moved on. Fender-door-door-pillar-rear panel. Wiped area with rubbing alcohol to remove residue. I used a liquid white rubbing compound by hand lightly over the area removing any light scuffs. I then removed the masking tape from above and below where the stripe used to be. I hand applied a liquid cleaner/polish/wax to the area. I hand buffed this then applied the cleaner/polish/wax to the complete side of the F150 buffing again. I looked very hard and could not see where the stripe had been. No damage whatsoever to clear coat/black paint. I highly recommend your product. I used about 15 to 20 % of the eraser wheel total.
Hafeez R
Ineffective.
Junk. Didn't work at all for the left over double sided tape on my Excursion. Tried it on the body and the trim piece itself and it just doesn't do anything. Update... was using this on a very tired old drill. Popped it onto my new Dewalt and it went to town on devouring the left over tape and adhesive. Highly recommend now and would really recommend over the similar one by 3M that costs more.
Julita Lomalio
Works flawlessly.
Chemical engineers are remarkable, who ever designed this little wheel should be heralded and loved by the masses. This just flat out works. With this one wheel, I was able to remove the pin striping from my one ton Dodge king cab truck, and still enough material to remove a 3 foot by 4 foot faded vinyl graphic from the nose of my travel trailer. Whether the surface is steel or fiberglass this takes the vinyl off with no damage to the paint underneath. I found that a plug in drill worked the best to remove the material, more consistent than a battery drill.
Tara Muşîr Hormzyar
Works great, used a dozen.
I used these to remove my RV vinyl adhesive graphics. They work well to do so. I would agree with another reviewer who said that they do leave behind a yellow mark on a white surface. I was able to remove that yellowing with rubbing compound but that was a step I had to take anyways in order to finish my project of removing all of the oxidation on the side walls of my RV as well. After going over all of the surfaces with rubbing compound everything turned out just fantastic. There used to be Graphics all over the area where you see white. The green area is paint. I also used it to remove a dealer sticker off the bumper of my car and it worked great and did not blemish the clear coat at all nor did it leave behind a yellow residue or any residue for that matter. This is a sacrificial tool and makes quite a mess that is no big deal to clean up. For the price you can't beat these. The quality is consistent from one wheel to the next as I used 12 to complete my project. I found it unreasonable to consider purchasing a more expensive and like product. I am really happy with how my project came out in the end and I would not have been able to achieve it without using some sort of tool like this.
Axad AR
The Eraser Works
The Eraser worked as advertised. I had large body side stripes on each side of a '95 Nissan pickup and I had worked on several occasions with a heat gun to get only a little off at a time. Finally I got so tired of burned fingers I just left a huge portion of it. I put the Eraser in the drill and 20 minutes later it was all gone. The striping was applied when it was new, on top of clear coat. On one of my fenders I had the drill running at high rpms and I did get some heat discoloration to the clear top coat. Of course the paint is 22 years old and it doesn't matter. No instructions come with the eraser so keep the drill rpms medium to low, take your time and be ready to clean the adhesive off with some specialized cleanser.
Anthony Armstrong
Perfect for Vinyl stripe removal on fiberglass boat!
I am a first time user of an eraser wheel to remove vinyl striping on a 35+ year old fiberglass boat. I had remove 75% of the 2 inch wide vinyl using the "heat gun method", but it left behind a thick layer of goo. Acetone and a lot of elbow grease was needed to remove it. This method only worked where the vinyl was intact. Where the stripe had cracked and deteriorated, the heat gun method was impossible. I have not used the "name brand" product, but chose this one based on reviews and reasonable price. I was not disappointed. I donned a pair of safety glasses, a long sleeved jacket, grab my cordless drill and attacked the remaining vinyl strip. WOW! Minutes later, I was half done. The processes leaves a lot of vinyl flakes and lots of eraser residue (like a pencil eraser, but on a larger scale). Most of the vinyl flakes landed on the concrete floor and were easily picked up with the shop vac. The eraser reside stuck to the fiberglass, but was easily brushed away with a terry cloth. The vinyl was a blue color and the fiberglass was white. There was some color streaking in blue, but I did not see the yellow discolor mentioned in another post. Once the reside was brushed away, I used a light acetone wipe down to finish. The blue streaking was easily removed with nothing but the mildest scrub.
Gurwinder Kaur
Sun crusted RV decal muncher must have tool!
i've tried the solvent, razor blade you name it. This thing eats super old sun crusted decals, graphics unbeliveably fast. very very pleased with this tool. I can see it will wear quick as chards of decal and rubber are everywhere which is to be expected. The smell is actually pleasant when tearing up decals, dunno if that was something they where working on in the rubber compound or not. still learning the tool i think faster but not full drill speed is best and it doesn't like pressure let the tool do its magic. I've been trying to hold it flat on the face to keep the wear even accross although i start diggin in on a decal with the outer edge then roll into full face and really tear them up. You can screw around with hair dryers razors and solvent til you're blue in the face, but this thing is certainly the CORRECT tool for the job especially for old suncrusted sharp hard jagged decals that are impossible to remove by tradtional means.