

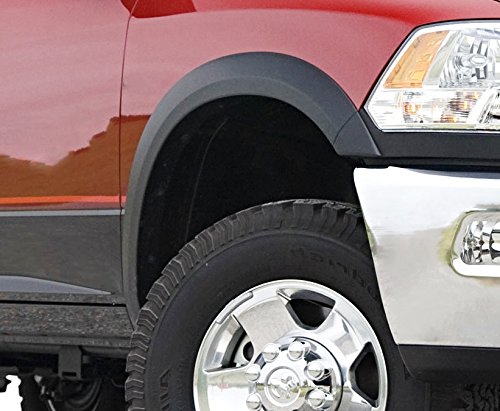
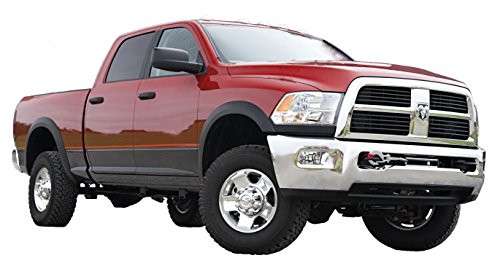
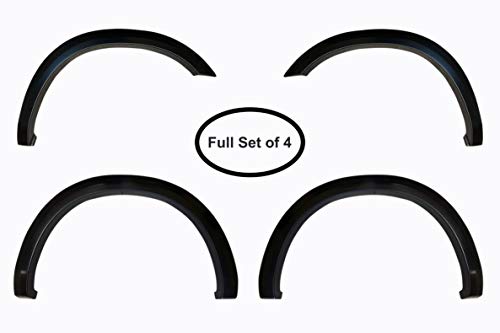
- Full 4 Piece Set of Fender Flares. FITS 2010-2018 RAM 2500/3500 (EXCLUDES ALL DUALLY MODELS)
- Constructed with lightweight, tough, durable, and impact resistant plastic composite. Heat and cold resistant
- 100% UV protection against cracking and chalking. Black Light OE Satin Textured Finish. Paintable without pre-sanding or pre-treating
- Come with necessary installation kit and installation instructions. May not fit if other accessories are installed which may get in the way of the Fender Flares (i.e. mudflaps, body molding, ground effects, etc.)
- 24-Month Warranty against cracks, warps and manufacturer's defects
-
Information
-
Twitter
-
Pinterest
-
Youtube
-
Facebook
December Joy McGowan Herrera
Love lT
These look great on my truck
Ahmar Khan
but these fit just as good as OEM and seem very sturdy
I was skeptical about buying these and was considering the $300 plus Mopar flares, but these fit just as good as OEM and seem very sturdy... fits the body lines perfect on my Ram 3500.. Only pain was drilling holes, but no big deal..
Kay Stansberry
Good deal for the price
They fit my 2017 Ram 2500 CC needed to drill holes in them to make them work the pre/marked spots were only close at best, since I drilled The first one I figured I'd install them so far so good. been on the truck for about a year an a half an still look new
Michelle Gloria
Five Stars
EZ install an fit great !!
Marchell Magarro Aquino
Looks amazing!
Fit perfectly!
Ajit Ojha
GREAT LOOKING FENDER FLARES
Fits as they should, faitly easy to install but the places marked for the holes were off and of no use.
Lori Dunn
Easy to install
Easy to install, took about an hour, removed screws that hold the plastic liner under rockets, placed the flares over the rockets, marked the hole with a sharpie, took a drill, drilled the hole and screwed then back in. Flares have marks for the holes, few holes didn't allign, but that's no biggy.
Britteny Forbush
Nice product. Excellent fit.
The flares have excellent fit with the body lines. Install was relatively easy. The front flares have 2 holes pre-drilled, the rear flares have no holes pre-drilled. There are marks on the flares for drilling the holes, but I suggest you don't drill all the holes using the marks. I drilled the holes in my flares one at a time while mounted to the body. I found most of the manufacturer's marks for the holes just a little off, and some hole marks in the wrong place. Doing it while on the body makes a nice tight fit. Be careful not to let the drill pop through and hit the screw hole tab on the inner fender or it can rip it out of the plastic. All you need is slow drill speed and a bit of pressure to push through the plastic and leave a nice clean hole. The only place on these flares that the fit was a little off was at the bottom rear of the front flares. The material doesn't quite go down far enough to catch the bottom-most screw. In this case you can leave that screw in the factory place and add a self-tapper screw just above this point (see picture). The self-tapper screws are included with the kit. The 3M tape on the back of the flare was applied about 1/4 inch from the edge. When mounted I was able to see the tape through a small gap between the flare and the paint. This might prevent the damage others have seen, not sure yet but time will tell.
Crystal Miller
Trial fit before drilling any holes!
These fit my 2018 Ram 2500 Crew Cab with a 6ft. bed. All Ram badges/decals including Cummins badge remained in place. Did not use any supplied screws from the manufacturer. Clean you fenders prior to trial fitting! The flares come un-drilled so you have to do some work. They have markings where to drill but you should trial fit first and verify marks are in the right location. Each flare is marked for wheel well location but you can figure that out easy enough. When you trial fit you will find out how they fit the wheel well and also where they fit into the fender panel grooving near the both ends of the rear flares and the back end of the front flare. There is a raised area on the flare that must fall into the body panel groove... you will see. Do not remove the 3M adhesive backing until you trial fit and drill all holes! When you are ready to install just pull a small section of tape off each 3M adhesive strip and let it come out the top side so you can remove it once you get all screws in place AND the alignment in the panel grooves are dead on! Install all screws and tighten just enough to get the flare in place then remove the 3M tape strips and finish tightening. Push on the flares to help the adhesive to stick! That's about it... They look nice on a bright white truck.
Travis Tmac Kemp Sr.
Keeps rocks from chipping the paint
They fit perfect