

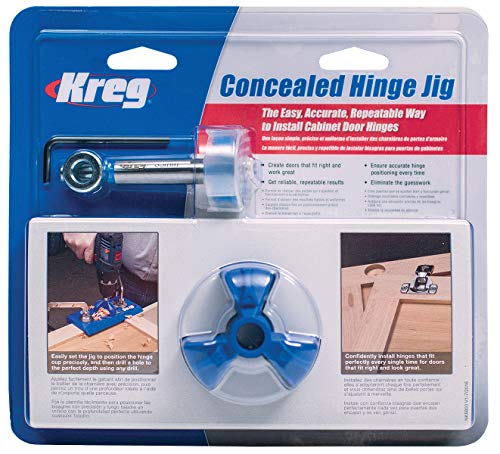
- Make cabinet door installation easy! Get drill press accuracy with any hand drill
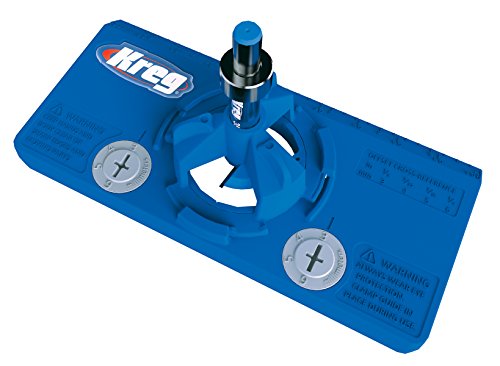
- Accurate hinge positioning with built-in indexing tabs
- Repeatable results with built-in measuring scales
- Reliable drilling with bit guide and stop Collar
- Simple to use with any drill—no special tools needed
-
Information
-
Twitter
-
Pinterest
-
Youtube
-
Facebook
Usman Jehan
Great Jig
Cool tool. I made some custom doors to go on an Ikea Besta unit. The unit holds my IT equipment and I needed the back and front to be open for air flow. So I built some white oak doors that will have honeycomb mesh. This jig worked perfectly. Make sure you take 15 minutes and thoroughly read the instructions and do some dry runs. The only problem I had was with the mm adjusting for the center of the hole, I measured off some existing Besta doors and hinges I have deployed, but the design of the hinges has recently changed.
Wendy Perez
Huge Time Saver
I've had a number of Kreg products, and I really enjoy using all of them. This jig is no different. I was building new cabinet doors for my kitchen and needed to mount some European soft close hinges. I had made my own jig to do these for other cabinet doors and they just weren't as accurate as I would have liked. Using this jig, every door and every hole is drilled exactly the same. The forstner bit stayed sharp drilling 2 holes in all 19 of my cabinet doors which were made from poplar, including some extra holes for mockups. I would absolutely recommend this, especially for the DIY guy that may not have access to a drill press or a larger jig.
Lisa Laws Peaks
I didn't have any issues with the bit getting dull, so maybe they fixed that.
I was a little worried after reading the reviews about dull bits, but I decided to try it anyways. I made 12 holes in oak and my bit stayed sharp. I did baby the bit, because I was worried. Backing it off and blowing out the chips a couple times per hole and going easy on the speed/feed rate. Heat from speed/feed rate kills bits. I think the people that had issues knew what they were doing, so they probably really did get a bad bit. Even with the extra seconds spent being cautious with the bit I was able to knock out 6 doors in about 30 minutes, including learning time. Made it much less stressful than using a template and free hand drilling.
Joy Campbell
Great tool
This works great. I don't have a drill press and I was worried about how I was going to change all my cabinets over to concealed hinges. Using this jig mad that a piece of cake. Just get the measurements from your hinge documentation and set this to match. Clamp it on the door and drill the holes. I've done over 10 doors so far, and they have all worked perfectly. You need a fairly beefy drill to cut the center hole, but that's my only caution.
Tami Chalakee
Great product and easy to use
This is a bit more expensive than other options but it's definitely worth every penny. This is the first time I tried to install a compact hinge. This made so easy. The default setting with 5 mm probably should be set to 3 mm instead. For the first time DYI user it's probably best to look up a few videos on how to measure the overlay, how to adjust the hinge, how to measure the spacing between the left and right side of cabinet doors. These are more important. In case you have already drilled the holes and can't change that, you may downsize or upsize hinges to fix the problem. I bought 1/2 compact hinge and had to get a few 1/4 hinges to close the gap. Fortunate the hole for the hinges should be the same.
Gary Layne
Nice jig for hinges
This jig saved me a lot of time. I had 40 hinges to install. One of the complaints others reported was the guide holes for drilling the mounting screw holes was not lined with metal. I listened and instead of using it as a drill guide I place 2 finishing nails in the holes and gave a small tap with a hammer and then drilled using the indentations. My jig shows no wear now.
Ishaz Fwie
Great tool
Purchased this jig to cut 18 holes in 6 doors. Love it. Fast and very simple to use. Home woodshop use. This is so simple to use and every hole is perfectly cut and located. Nothing to complain about. Other reviews note that the bit is crap and that after a few holes, it was dull. I know what drill speed to use for a 35mm forstner bit and used vacuum while drilling so the hole was always clean. My bit is ready to drill plenty more holes. I didn't experience this issue. Had to make a few test cuts with my hinges prior to starting on the doors to insure the settings were correct. My hinges called for a 5mm setback but while testing, 4mm worked better. No big deal but it's a good idea to test on scrap wood prior to drilling the doors. Set the depth guide on the shallowest setting and that worked perfect with my hinges.
Gary Jimenez
A must have specially if you are an amateur!
It takes the drama away from making doors! It was my first attempt to build doors and it worked! This tools made everything seem easy!
Gia Papiashvili
Indispensible For Hinge Install
I am in the process of replacing several old flat slab laminate kitchen cabinet doors with Shaker style MDF doors I had made to measure from an online shop. This Kreg jig is an absolute must for installing the Euro style hinges. Don't even think about free hand drilling the holes for the hinge cups. Tip: It's very handy if you have access to 2 power drills. Keep one drill with the hole boring bit on it; keep the other drill loaded with the small drill bit for the hinge screw holes. It's a pain to keep switching between the two bits if you only have one drill. I keep my vacuum cleaner next to my work bench and use the hose attachment to suck out the sawdust and cuttings after each hole is done, but before I unclamp.
Murtaza Kothari
Great jig- really a big help for mounting euro-style hinges
I wanted to replace old ugly hinges with nice recessed soft-close European hinges, but the woodworking required was pretty daunting for someone who doesn't have a shop or tools. I read reviews on this jig and looked over the very detailed instructions online, then ordered it. I couldn't be more pleased with the jig and how well it worked! I replaced a total of forty hinges, on 20 different doors in a couple of days with this jig and never had a problem. The jig includes pilot holes for the mounting screws, and the combination of the large hole and two small pilot holes were a perfect fit for the Blumotion compact soft-close hinges that I used. After 40 hinges, the included forstner's bit was still plenty sharp enough to penetrate the hard oak of our cabinet doors. A couple of little issues took some care and attention. First, our hinges specified a depth for the 35mm hole of 7/16 inch, but the jig has a collar that cannot be set to give a depth of less than 1/2 inch. I wrapped a piece of electrical wire between the collar and the jig to decrease the hole depth to about 7/16 inch, and this gave fine results. Second, our hinges called for a setback from door edge to center of the 35mm hole of 20.5mm, but the jig's setting of 3mm for the offset to the edge of the hole resulted in a bit more than 21mm setback. Also, the door edge was not flat, and the jig did not extend to the widest part of the door profile. The error resulting from these two issues was about 1 mm, and this was small enough to ignore since the hinges allow for ample adjustment to compensate. Before you try this job yourself, make sure that you have a good worktable and enough clamps to secure the door to the table and the jig to the door. Take your time and measure for every hole twice. You don't have to be a well equipped woodworker to install these hinges.