


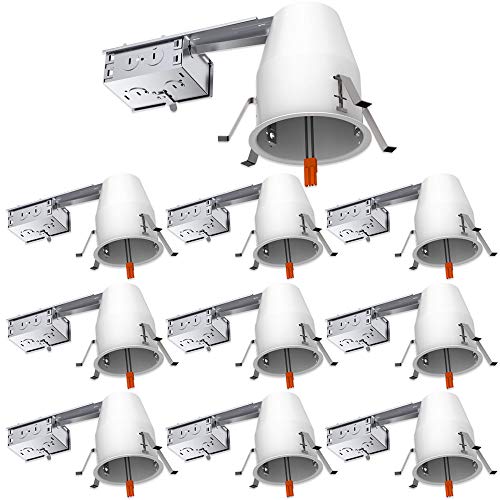
- Top Rated 4 Inch Remodel Can
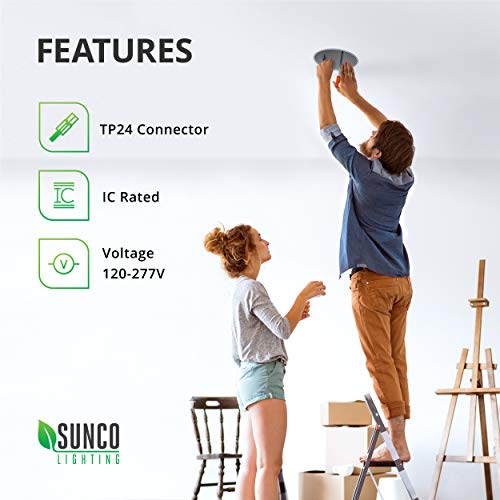
- ✅ AIR TIGHT & IC RATED - Sunco's remodel cans are airtight and thermally protected and designed to be installed in the ceiling surrounded by insulation. Sunco's cans won't overheat and cause a fire in the roof or overhead joist space. Airtight design keeps air conditioning or heating from leaking out of the home through the housing.
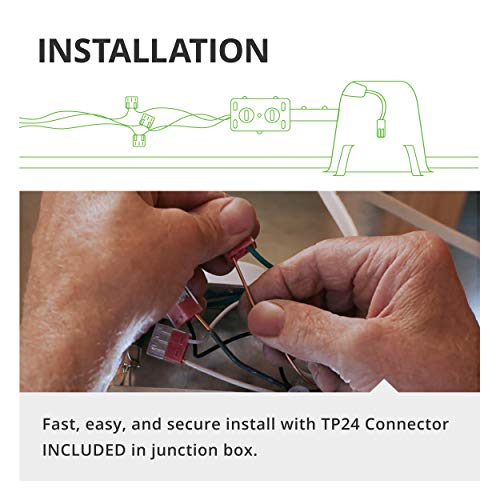
- ✅ SIMPLE INSTALL - Follow our easy instruction guide for a fast and secure setup! Sunco's direct wire remodel cans with junction box are installed to the framing with the bar hangers (prior to drywall). TP24 connector included.
- ✅ UL & TITLE 24 - We uphold the highest standards for all our products by testing each product for optimal performance and safety. Our remodel housing are compliant with Title 24 energy efficiency standards.
- ✅ SUNCO BENEFITS - 10-Year Warranty! Sunco is proudly based in the USA, offering quality products at affordable prices backed by industry-leading warranties and knowledgeable support specialists.
-
Information
-
Twitter
-
Pinterest
-
Youtube
-
Facebook
Serrina Randolph
... and I do have to say they are far superior to any other brands for the price point
This is my third time using these cans and I do have to say they are far superior to any other brands for the price point. There are nicer cans out there but for about $10 a can these things are hard to pass up. I highly recommend using a 4-1/8" hole saw, removing the 4 clips, installing the cans in your drywall, then re-installing the clips. Don't use the foam around the perimeter of the can. Makes for a nice airtight fit if done that way. Edges can be sealed with acrylic caulk if needed. Due to the construction these cans are very fast to wire up. When time is money these cans pay for themselves!
Robbie Martinazzi
Great recessed cans for remodeling projects
I installed nine of these cans in our kitchen for a remodel we are undergoing. I used a 4 1/4 inch hole saw from Harbor Frieght to cut the holes in 5/8 inch sheet rock ceiling. You can cut the holes by hand using the template that comes with the can. I did cut two holes by hand and decided to speed things up by using the hole saw, much faster and makes a perfect hole every time. I found out that a 4 1/4 hole size makes installing the clips much easier. I removed the clips, placed the can in the hole and then put the clips back in one at a time. It was easier and faster that way. The quick connects make wiring the cans easier as well. I will buy these cans again. Tape comes with the cans that you use to make them air tight after the clips are in place and wiring us complete. I ordered the 4 inch Sunco LED 4000K lights to go into the can. My wife loves the look and brightness. We already had some six and 4 inch recessed lighting in other rooms that are original to the 1983 house, but these new LED lights are much more attractive and brighter. I'll be changing out the older lights for sure.
Tyana Smith
great product
These were very easy to install. It comes with a template to place on the ceiling to cut around. Before receiving the cans, I purchased a sheet rock cutting tool to cut round holes but would not have needed it- a simple sheet rock saw or serrated knife would have worked fine. You just strip the wires about 1/2 inch and plug them in. I replaced overhead kitchen lighting, four flourecent fixtures (8 tubes), and was planning to use eight 4" fixtures. I found that 4 fixtures was plenty, even dimmed to about 80%. I bought the brightest color sunco lights as recommended for kitchen, but if doing it again would probably buy one shade warmer. The wiring was already there and it took me less than an hour to install all four fixtures. One caveat, make sure you have enough clearance above your ceiling 5.75", the height of the can- and around the hole - 12" in one direction, and about 2 inches all the way around the hole so the the clips can spread out. Since I have a bunch extra, I'm looking for other place in my house to install them.
Dhonna Ricohermozo Rodriguez
Big value for the bucks!
Good quality recessed cans, very similar to Lowes and Home Depot brands. Easy to install and wire. The best tip I got was to remove the 4 spring clips before installing the can in the ceiling hole, then inserting each clip. By doing that, the drywall does not get gouged and the cans fit very snug against the hole. Each can comes with foam tape to help make the fixture airtight. I'd but these again.
Beth Conklin
Cheap, easy, and effective!
I have a 1970s vintage lake house to remodel. Lots of cheezy light fixtures - globes, spots, tracks - so I needed a quick fixture replacement AND something to allow me to go LED in the process. These Sunco 4" LED Can Housings turned out to be PERFECT for my job. I selected the 4" size since most (if not all) of my ceiling fixture J-boxes are in 4" holes. Once I got the fixture down and the J-box out of the way (which is the only "hard" part, and that's not so bad...) it was just a matter of reaming out my ceiling hole just a bit. I pulled apart one of the Sunco housing assemblies so I could use just the can part for the hole fit. Once the hole is ready to go, just choose a knock-out position, insert a suitable wire clamp, feed in the wires, and push connect into those cool little WAGO-type wire nuts they provided. Super easy! I found it easier to leave the little can clips out while I pushed everything up into place. Make sure you get some clearance if you're up into some insulation. The clips are tight already and will get hard to snap if you get something under them. I selected the Sunco 4" LED lights to go with these housings. They "plug n play" into the can and push right into place. Flip on the AC and admire your work! The pic shows one very sketchy spotlight neatly replaced in about 30 minutes. And I'm kinda old and slow! So there ya have it! I'm buying more! You should check them out too!
Raluca Luiza
As advertised and was delivered two days early. No ...
As advertised and was delivered two days early. No standard bulb socket so it will only take a 4" retrofit LED "bulb" and is therefor rated for IC. IC stands for Insulation Contact. Big HD stores want 23-26.00 each and can only be purchased though their online only site. Sunco will be my one and only from now on. I am a remodel contractor.
Pankaj Kumar
Easy change out!
Replace my 6" recessed CFL fixtures. Remove the can portion of fixtures, disconnected the romex wiring from the j-box on the old fixture base, connected the romex to the new fixture, and while leaving the old base in place, added the new can. Added an led fixture (went with 4000 lumens cool white for the kitchen, added a dimmer switch (3 way) and the wife is happy with the new lighting. The only surprise was the blown in insulation the came out of the ceiling upon removing the old can!! What a mess. Nothing a little vacuuming didnt solve!!
Poe Zarni Kyaw
Perfect For What I Needed
I purchased 2 packs of these for my remodel in my kitchen, den and dining room. Instead of going with a kit, I chose to purchase the individual cans so we could pick and choose different retrofit lights w/ trim for the different areas they were being installed in. Contractor had 18 up and connected in no time. He used the sticky labels included so that I could see excatly where they were going and we were able to make a few adjustments prior to cutting the holes. He said they were a breeze to connect. I was able to purchase the eyeball and down light retrofit LED dimmable light kits for them. Would highly recommend.
Doods Jet Cunanan
Great Can Lights
Just installed 7 of these units in our drop ceiling in the kitchen. Since I was going to use 4" LED bulbs, I was able to install directly in the insulation. This made the job very easy. The hardest part was pulling the wire between fixtures, especially around corners. I did get 3/8" wire clamps (Plastic) that I put into the punch-outs to hold the electrical wire securely. I cut out the holes using a 4.25" hole saw (with plastic dust catcher). I then removed the clamps that hold the can to the ceiling to install the fixture. The 4.25" hole was a perfect tight fit for the fixture without these springs clips. I then reinstalled the spring clips and pushed them in and against the ceiling to hold the fixture perfectly with a tight seal. Very happy with the product and a great improvement to the lighting in our kitchen.
Bettyk Miller
Easier to install than the Halo cans from Home Depot ...
Easier to install than the Halo can from Home Depot and Lowes. Wire clips made installation quick. Only complaint is the rubber gaskets for the latches are hard to work with. UPDATE: 8 of 10 cans are installed and wife is very happy. Only problem is she wants about 40 more installed around the house. re-ordering today...