


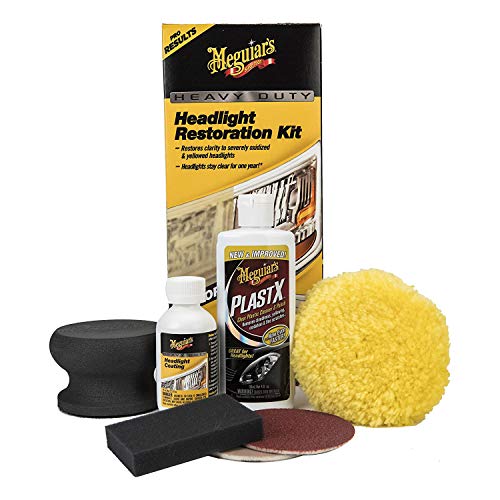
- PROFESSIONAL RESULTS: Cleans oxidized, yellowed and hazy headlights
- REVOLUTIONARY COATING: Protects against yellowing and re-oxidation of headlights for up to 12 months
- HEADLIGHT RESTORER: drill powered polishing combines with sanding for outstanding results
- CRYSTAL CLEAR HEADLIGHTS: Enhances visibility & safety for night driving
- MAKES HEADLIGHTS LOOK NEW: professional, clear finish to heavily oxidized or cloudy headlights
-
Information
-
Twitter
-
Pinterest
-
Youtube
-
Facebook
Santos Ferrer Ytzehr
Wow! this is how a headlight kit is supposed to work!
Perfect. I owned a 3m kit previously, but the sanding is necessary, in my opinion, presuming that your lights are pretty messed up! Mine were really badly damaged very hazy, not just a light haze. So the velcro pad and the quality 1000 and 3000 wet sanding disks were very effective. WET sand it like the directions say. The plastic polishing compound gave me a mirror finish using my corded dewalt drill. sealer was a nice touch. This kit rocks and will get the tough job done. The 3m kit was's t powerful enough.
Laura Harris
and tape around the headlight - you'll be glad you did
So I did the online research and watched videos and decided on this kit because of the high reviews, the ergonomic handle for the manual sanding pads, and the drill-operated polishing pad. It still takes some "elbow grease" but not as much as might be needed with other kits. Open the hood to save the paint on it, and tape around the headlight - you'll be glad you did. Use a spray bottle - you cannot use too much water. After you polish the headlight and are washing it free of polish residue, be sure to wash the car underneath the headlight as you don't want to leave that residue that dripped down the car and you can't wash the car for at least 24 hours after applying the clear coat that has to cure. It took me approximately 1 hour total (both headlights). I realized in hindsight that I rushed too much on one of the headlights, but it's only noticeable upon close inspection. MUCH improved and if I have to do this again in a year or so, so be it and I'll know better not to rush those areas that didn't appear to need restoring.
Harry Howard
Easy to do
Well, I think the picture speaks for itself. Easy to do. Came out so good. Had to heavily buff the lens. Can't wait to drive at night.
Joe Farrell
writing titles is the hardest part of a review
Well, this was WAY easier to use than I thought it would be. I did two cars in about an hour, and the results are fantastic. Per the instructions, you need a drill, a soft cloth, tape, and window cleaner. The box has none of these items. To summarize the directions: 0. You apply tape to the sides around the lights to protect the paint. (Not really needed if you're careful.) 1. You scrub the headlights with water, first with the 3000 sandpaper on the hard foam handle (it's velcro), and then with the 1000 sandpaper. Easy to put on and take off the hard foam handle thing. Wipe off. Your headlights will have a white cloudy film. 2. Use the drill pad to apply the polish. This gives it the clear look. 3. Apply a sealant by dripping onto the provided soft foam pad and then wiping on. This is so easy, and looks so good, I can't believe that expensive auto washing places don't offer this. Or anyone, for that matter. If you're going to pay someone to wax your car, this will provide way better results, and it's basically the same thing. But once you find out how to do it yourself, you don't need anyone else to do it, because it's so easy. I also had plenty left, so it should last a while. If I have to do this every year, it's worth it.
Lai Yin Han Oo
Skeptical at first, but color me impressed with the results!
I'll admit, I wasn't confident in this product when purchased (the heavy duty version). I've dealt with yellowing headlights for years on a 15 year old truck. I used the 3M system a while back and it worked well, but it took me over an hour per headlight and they were yellow again in less than a year. I wanted something that would be a little quicker and liked that Meguiars had developed a special coating to help keep the yellowing at bay once the yellow had been removed. I was skeptical about the hand sanding. The 3M has drill attachments and figured that doing this by hand would have sub-par results...boy was I wrong. This kit is very simple to use. Instructions are laid out well. Took me only about 15min per headlight and looked great before I put the final coating on. Now they look brand new. I don't know how long the results will last, but b/c it was so simple to use it would not be a hassle to do it again in a year. It would be nice if they just sold the sanding pads, since it is a bit of a waste to buy a whole kit again (the 2 liquids, the buffer, and the sanding handle could all be used many times...just need new sanding pads). I would recommend at this point in time. *********** UPDATE 11/27/18 Lights still look fantastic! I just clean them on occasion and wipe with a plastic UV protection spray and they still look as good as the day I sanded them. Still recommend!
Doris Aiken
Excellent results with a little work
My 12-yr old daughter and I took on this project a fine afternoon to bring the headlights on our Honda Odyssey back to their former glory. The kit comes with two sanding pads and a hand sanding pad, a polishing wheel designed to attach to your drill, a small bottle of PlastX polishing compound, and a small bottle of protectant fluid. I would say it's enough for about three sets of headlights. The sanding is little bit of work but not too bad. We first taped off the painted areas around each light with some painters tape. A spray bottle of water kept everything wet as I sanded. After the sanding was done, we wiped them dry with a microfiber cloth and then broke out the corded drill. At this point, the headlights look hazy and frosted. After the polishing step, you can really see the magic happening. Lenses are really clear and I am happy. After cleaning up the rest of the compound, the final step is applying the protectant liquid. Be careful with this stuff because it runs easily and feels like glue on your hands within a minute. The liquid hardens into a clear film and completely sets up in 15 minutes and then you can pull off the tape, scrub down the front of the car, and admire your work. Really looks like new again and I'm expecting it to last for about a year before doing it again.
John Theos
Worked better than I could ever imagine
Worked better than I could ever imagine, I have tried other products in the past and have been very disappointed. I have even paid shops to do the headlight treatments and they came out looking just a tad better than when they went in. But with this stuff I followed the directions as is and it made the lights look like new completely blew my mind.
Nicole Zipf
Amazing product, not only works, it works with minimal effort
The previous owner of my car had taken it to a dealer to get the headlights 'polished', living in a desert area, this is common here as the sand and UV take a heavy toll on the headlight covers. The dealer cleaned them up to the condition pictured and said that no more could be done! I bought the car and refused to buy new headlights at $256 each, without trying to refurb them myself. WELL....with doubt in my mind, I purchased this kit and I honestly could not believe what 5 minutes per headlight, work could achieve ,that a dealership could not! In all honesty, the supplied wet and dry sandpaper did most of the work, took the oxidation off in seconds. The polishing compound just made the cover shiny again. If that wasnt enough, the kit comes with a UV blocking clearcoat, so your results will last a very long time!! So the kit was, cheap, very effective, gave me almost instant results AND came with everything I needed (except a drill) all in one box! If you cant tell, I am very happy with this purchase, definitely recommend, please see pictures.
Jennifer Long
Wow! Amazing results - no photoshop required.
Usually I expect a certain amount of lighting or camera filter ‘magic’ to be used by product manufacturers to showcase the product as favorably as possible; but after giving our heavily oxidized and cloudy headlights on the family hauler a treatment with the Meguiars heavy duty kit; the results were exactly as advertised. No faking it; no exaggerations; no camera tricks. If you take the time to apply each step thoroughly with the proper elbow grease; the reasults will amaze. The real magic is in the plastix polishing compound. I believe moderately cloudy headlights could just use that to restore; however if you are starting to see yellowing on your lights the extra sanding passes provided with this kit are absolutely worth the effort to fully restore your headlights. Highly recommend this product.
Jacqueline Norris
Very good results with enough patience.
December 2018 update: The headlight has definitely returned to its previous discolored state. Had to double-check the product description to see how long the manufacturer expects the results to last, and it sounds like they're spot-on with their "up to a year" projection. I'll use the remaining product for another restoration attempt and see how we do for round 2. Definitely not a permanent solution, but still cheaper than a new headlight assembly. This kit worked very well on the cloudy headlight on my 2008 Acura RDX. I was genuinely surprised at how well this turned out, even after reading positive reviews. I spent maybe 60-90 minutes on the project overall, most of that on the first sanding stage as there was some residue or oxidation that was tough to sand down. If you have moderate to heavy oxidation I'd recommend buying a coarser grit sandpaper for the first stage (as others have recommended). I made 4-5 passes with the first sanding pad, rinsing after each pass to check for a consistent haze. I've attached before and after pictures. The before pic is slightly washed out due to glare, but you can get a decent idea of the difference. The previous owner replaced this car's other headlight. I can still see a difference between the restored headlight and the newer one - the restored light has a very slight yellow tint but you'd never know if it wasn't pointed out. Seems like there's plenty of the final coating left over for another treatment in 6-12 months; I hope this restoration lasts a long time. Edit: Forgot to add that I used an 18v cordless drill with a 1400 rpm max speed for the polishing stage.