

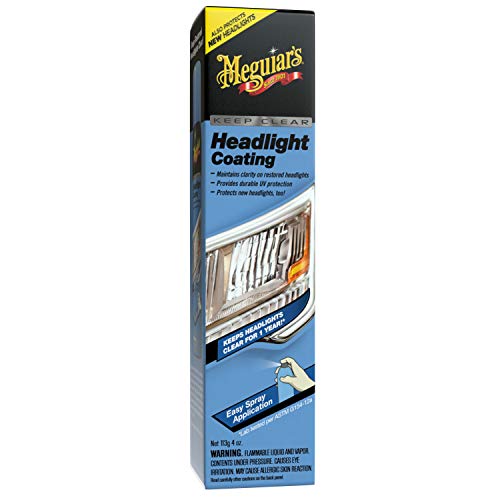
- CLEAR LIGHTS: Maintains clarity on new or restored headlights
- UNIQUE FORMULA: Proprietary headlight coating provides durable UV protection
- A NEW LOOK: Helps keep new headlights looking like new
- LASTS ALL YEAR LONG: Provides headlight clarity for up to a year
- EASY TO USE: Convenient aerosol spray application
-
Information
-
Twitter
-
Pinterest
-
Youtube
-
Facebook
Natasha Lee Aiken
Good protectant, easy to apply, albeit a little messy.
I applied it yesterday, and after 24 hours of drying, it definitely seems to have created a nice hard protective layer on my headlights. Applying it is very easy, just open your hood to protect it from overspray, then mask off the remainder of the adjacent painted areas. Then simply spray your head lights in a nice even side-to-side pattern, just like spray painting. This spray will create huge clouds of vapors as you spray so make sure there's nothing nearby you don't want hard transparent specks stuck to. I realized an hour after spraying that my glasses had some specks of what is most likely this material.
Linalyn Ramos
The clear coating is the key!
This is a two year re-do of my 2011 Rav4. I used a kit from Mother's back then with fair results. This time I made my on way with the help of Meguiar's clear headlight coating. I have helped quite a few family members, friends and neighbors restore their headlights and come up with my own system. It's really no different than polishing your auto or for that matter anything painted...Its all about sanding and how thorough you do it. Folks who say they did their lights in thirty minutes to an hour but didn't get good results, you get what you put into it. Auto restoration can take years and body prep consumes most of that. I start with 400 grit on my 3" drill pad and alternate between drill and hand sanding till I can no longer see into the headlight, the outer surface is completely removed. Remember to keep your drill at a slow speed and smooth back and forth, up-down motion. Burn marks are difficult to remove. Clean with a wet rag, dry and look for any missed areas, re-sand if needed then switch to 800 grit. Simply repeat what you did with the 400 grit till the 400 scratches are replaced with the 800. Just remember, do not get aggressive with your drill...it will make for a bad day! Now we get into wet sanding starting with 3000 grit and the magic begins. Keep the headlight and drill pad wet with your spray bottle. It will begin to slurry and the headlight will start to clear. Stop to check your progress, at this stage its easy to see spots you may need to hit again. Your headlight is probably better now than when you started. Some kits, like the 3-M come with a finishing buffing compound (no clear coat) and supposedly your done, well, your results will be less than satisfactory at best. This is where I move to 4000 grit and repeat what I did with 3000. The headlight is now even clearer but still not like the day you drove it off the showroom floor. I add the 4000 grit just because, you can achieve close to the same results with just the 3000 grit. It really doesn't matter the bran of clear-coat you use long as it states it has uv inhibitors. I use Meguiars for its conveyance and I can do two vehicles with one can. The clear coat is what gives you the longevity. Yes, you can stop with the buffing compound but it will not last. Once you see the effect of the clear coat...you will see! The difference is stunning. First two photos are "before," next is after the 400 grit, fourth is after 4000 and finally after the Meguiars Clear Coat, the end results. I spent ruffly three hours and a six-pack of Coronas!
Mark Grisham
it is totally clear when sprayed on the polished headlight and it cured nicely.
After several sanding, polishing, and regular application of a UV protection creme did not keep the head light from re-haying, I thought I would give this clear coat spray paint a try. The result is good so far... it is totally clear when sprayed on the polished headlight and it cured nicely. I sprayed three times on each headlight. Only time will tell but just want to say that it looks good so far.
Mariyam Faisal
Works great so far!
The factory clearcoat/sealer on my 2010 Genesis Coupe had worn off and the plastic had started to get oxidized and hazy. Cleaned it off with polish and then sealed it with this stuff. I’m actually really surprised how clearly and evenly it applied and how easy it was. Looks fantastic afterwards and I’ll definitely use this stuff again! It also smells kind of like an orange creamsicle when you spray it, but that’s just the probably cancerous stuff so no big deal.
Lauren Gilliam
Cheap and easy way to protect your restored headlights.
Just used this as well as the 3M 39008 Kit to restore my hazy 4runner headlights. After using the 3M kit, I just sprayed this on as directed and it made it look even clearer than before. I did 2 coats with 5 minutes in between each. I will try to update this review in a year with updated pictures of how well it has held up.
Merlys Francis
Scotty Kilmer approved
After restoring my headlights 6-8 times, I was looking for anything to make lasting results. I went to YouTube and found a video endorsing this stuff and thought it was worth a try. It's too early to say if the results will last, but the clarity of my lenses is shockingly good. There's a clarity I just couldn't get in the past. I hope this will be the product I was looking for.
Christopher M Mccard
Finishing touch step - easy to apply
Please keep in mind this is clear coating to protect your headlamps from clouding or clouding again after you've polished them. It is not meant to be a polish and clear foggy or scratched outer headlamp lenses. If you have headlamps that aren't clear you will first need to get a kit to fix the damage and make them clear again. I use a meguiar's kit myself. After you have them clear you will apply this product. In my experience, living where the sun is pretty brutal, clearing headlamps with a kit only lasts a few months. This clear coat is supposed to keep the lenses clear longer. A year according to the label. It was easy to apply, I used some blue painters tape and newspaper to mask off the headlamps. I applied according to the directions on the can. It went on easily without dripping after a few medium coats. It dried pretty quickly and looks nice and clear.
Becky Elaine Lathan
Best UV protector spray ever
This spray is absolutely amazing, it both protects and prevents. I restored my 2006 f150 headlights and sprayed this on (spray nozzle is flat and goes vertically, also smells good though the respirator?) Them after a full sanding. About 6 months later they still look great with no haziness or yellowing. I used the rest on my mother's 2013 crv for protection (the headlights were already fine, this is to prevent and damage). Recently I started restoring a lot of headlights for friends, family and coworkers, and have used the whole can since (the spray can lasted about 7 vehicles with 3 coats a headlight) I recently purchased it again from Amazon since the auto parts stores do not hold them, I love this product and works exceptionally well.
Joy Descallar
Went on clear, I think I know why others are getting foggy result.
After reading several comments of this going on foggy I was worried, I believe I may know why. I think the trick to getting it to go on clear is to spray from very close about 6 inches away and put it on a little thick. Spraying from too far will not allow it to make a smooth layer. a few seconds after spraying it on I watched the coating self level itself and it dried perfectly clear. I also did 2 passes for each coat. Or 6 depending on how you count it. 3 stripes from top to bottom 2 times in row. Then repeated 4 mins later. I restored my lights with 3m drill kit and applied this after cleaning with rubbing alcohol. It looks fantastic! No frosty look.
Evaristo Rios
The Best Product for clean the headlights i ever tried
I used this product after try some others and this is the one that had the best results, i used it after this one Turtle Wax T-240KT https://www.amazon.com/gp/product/B001TI5IIQ/ref=oh_aui_detailpage_o02_s01?ie=UTF8&psc=1 The Turtle Wax restorer is a great product but the final steep the coating doesn't work as i expect, left a lot of leftovers from the cloth on the surface, and wasnt so clear as i expect, so i remove it and after clean it again using the turtle wax product, as final step for coat the light i used Headlight Restorer Kit from Meguiar's and wow the results are really impresive. You need to apply first one thin coat let it dry and later another one more generous and you start to see how becames transparent. The capacity of one container will let you able to coat 4 lights, says that last for more than a year, so you will be able to have your light clear for 2 years or more, i applied this like 4 months ago, and still appearing as brand new. Amazing product, totally recomend it