


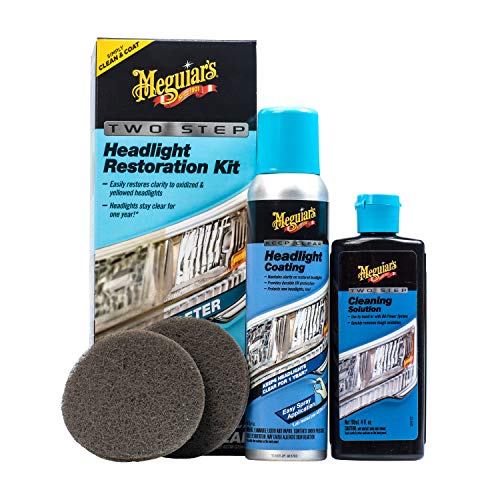
- RESTORE HEADLIGHT CLARITY: Quickly and easily restores clarity to oxidized and yellowed headlights
- YEARLONG PROTECTION: Revolutionary coating protects against yellowing and re-oxidation for up to 12 months
- ONLY TWO STEPS: Simply apply the included cleaning solution, then the headlight coating – no drill required. Makes removing oxidation, cloudiness and yellowing fast and easy while providing brilliant, lasting clarity
- BETTER VISIBILITY: Enhances visibility and safety for night driving
- NO DRILL REQUIRED: Delivers crystal clear finish without sanding or the need for a drill
-
Information
-
Twitter
-
Pinterest
-
Youtube
-
Facebook
Lily Savage
Seriously good results with the G2970 Two Step Headlight Kit
This review is for the G2970 Two Step Headlight Kit. I wasn't expecting the final results to be as good as the manufacturers video but I was pleasantly surprised with the final results. I added a little bit of water to the cleaning compound and spent a good 7-10 minutes scrubbing each headlight (2012 Acura MDX has large headlights) and wanted to be sure I did a thorough job. Wiped it clean with some wet paper towels let dried it with a cloth and then gave it two healthy coats of spray. Lights look almost good as new. Brand new headlights were $800 for the pair so this was definitely money well spent. I'll repeat the process in 12 months if necessary, but can probably wait longer since the car gets waxed every few months. There seems to be enough to do three vehicles. TIP: tape a garbage bag on the front quarter panel and cut out the shape of the headlight before applying the spray as to not get it on the vehicle's paint.
Siyathemba Mangwana
Super easy to use and works great!
I did a ton of research and ended up buying this kit because of the ease of use. Many of the others require a bunch of time and additional steps, but this kit worked great for me. I even have more than half of the product left so I will be able to use it again. I just need more of the sand paper discs. Highly recommend, my lights look brand new! My only tip is not to rush it. I spent more time on my first light and less on the second light and the second light didn’t come out as good. You can’t see how you have done until you are totally finished with it and by then it’s too late so take your time!
Veronica Guizar
Wow, SO Worth It.
Wow--this stuff is basically magic. Some people say they bought sand paper to go with this. Don't do that. At least to start. First just use this normally and see what it does for you. Here are some thoughts: DEFINITELY TAPE. Don't skip the step of masking taping up around your headlights. It doesn't take that long. Use masking tape, painters tape, that kind of tape. DO IT IN THE SHADE. Definitely do this project in the shade. The reason is that it is so much easier to see if you need to clean the lights more before you spray the coating. In the sun, it will look cleaner than it will in the shade. It's not the end of the world if you do this in the sun, though. I did for most of the process and it looks awesome. YOU NEED TOWELS. I used two full size towels doing this. You're using the towels for buffing off the cleaning solution and for drying after you clean the light. You need separate towels for those two things. SCRUB HARD. Put some elbow grease into it when you're doing the Cleaning step. DON'T WORRY ABOUT PERFECT. Great news--you can do the Cleaning step over and over until you think you got it all clean. When you finish applying the cleaning solution and it dries, buff it off with a dry towel. If you still see darker spots, clean those spots more. HAZY IS CORRECT AND WEIRD. The weirdest thing about using this stuff is that after you've cleaned the light, it will not look clean. It looks hazy and sort of like it has condensation on it. This is the way it is supposed to look. You'll see. After you buff off the dry cleaning solution, you'll see that the light looks clean but hazy. That's exactly what you want. The next step is magic so get ready. SPRAYING THE COATING IS MAGIC. The best step is spraying the coating on the clean dry light and it magically turns clear and incredible looking. So satisfying.
Cheryl Hasiak
Easy, effective, saved me over $1000. Works exactly like it says!
I love it when a product is easy to use and works exactly as advertised. The headlights on my Lexus LX 570 were lightly oxidized all over with heavy oxidation in a few spots. A new pair of headlights would have been well over $1,000, so I began researching multiple ways to clean the headlights. I tried all the home remedies, toothpaste, Magic Eraser, Etc, with no success at all. I was about to try the wet sanding technique, when I stumbled upon this product. I've been using Meguiar's car care products for over 20 years, and love them, so I figured I would give this a shot. So simple and fast to use. First, use painters tape to mask off the area around the headlight. Then, using the provided sanding pad and liquid polish, I spent about 10 minutes per headlight polishing, then wiping clean, then polishing, then wiping clean. I did this three times using medium pressure, all by hand, until the entire headlight had a frosted / foggy look to it. Then, I used a trash bag, with a hole cut in it to cover the area surrounding the headlight. Since you are using a clear spray paint, you don't want to get any overspray on the areas around the headlight. I covered the rest of the areas around the front of the car with towels and blankets. Two easy coats of clear spray paint, and the headlights look as good as new. The spray painting is easy, with no drips or runs or orange peel. I'm terrible at spray paint, always over or under spray, but this turned out perfect. Can't recommend this product enough.
Jacob Yeet
Easy to Use and Worked Great
My 9 year old SUV's headlights had started started to slightly cloud over. I followed Meguiar's instructions closely, with the exception of using the same application pad on both of the lights. Mind you, the lights had only minor clouding and were not yellowing. Buffing only took 3-4 minutes per light. The entire process took me less than 3/4 hour to mask and treat both of them. In addition to using masking tape around the lights, I also taped some newspaper onto the surrounding area to insure none of the clear coat spray got on the paint. The results were very satisfactory, and I still have enough buffing compound, clear coat and another pad to apply again if needed in the future.
Evaristo Rios
Follow the Directions, and You Can't Go Wrong.
After reading the reviews here I went with this restoration kit, and it could not have gone better. Followed the instructions and did one light at a time, and the photos speak for themselves. This is a 2003 Honda Accord, and the lenses look as good as they did out of the showroom. Be sure to read and follow the instructions, and have faith. After two rounds with the cleaning polish things didn't look that much better, but the "haze" was even and not as yellow. When I wiped it down with the damp cloth, dried, and still....it didn't look right. BUT, as soon as you apply the second step - the clear coat? BOOM. Instant perfection. Dries, add a second coat, and you're done. I took my time, did each light twice with the cleaner before applying the clear coat, took about 40 minutes. Better yet, both cleaning pads rinsed out easily, and I have more than enough left to do this again (if needed), in a few years. We'll see how it looks - clear coat says good for one year.
Jessie Phillips
2 Step AWESOMENESS
I did a lot of research before deciding on this brand. I've seen both bad reviews and good ones. I have to say though, this was an excellent decision. The package came in and of course, i read all the directions before use. I scheduled out a few hours of time for myself to complete this task because i read one of the reviews mentioning that you get what you put into it. Instructions were easy to follow. I used this and had my headlamps done in 40 minutes. I will say, you will have to put some work into it (elbow grease) or you'll only get maybe half the results and it may take longer. I did side to side and didnt act like it was spun glass. I noticed a difference in the top section first because that's where i started. It WORKS!! I have never used anything so easily to fix my lights. I've tried a few different things and they never even came close to what this product did for me. I was amazed to see how well it worked. I wish i had used a before picture because it is a dramatic difference. These lights look almost new.
Jordan LovesteslaforEva Guy
Great product!
My 03 Ram had horrible oxidation on the lens and my lower fog lights were actually brighter than the headlights for a long time. I didn't know there were three levels of this product, i mistakenly got the middle version when i should had purchased the Severe version. It did work very well after a couple applications and then the seal spray cleaned it up pretty good. Will know how well it works when i return to work this week. Definitely recommend this product! My Headlights were almost useless, let it go too long and was about to order new lights when i decided to try this first. Glad i did, saved me some $$$ i otherwise would have spent. Meguiars makes awesome products! (Didnt take before pics so posting after the fact seemed useless)
Teresa Venegas
Nice 💪🏽💪🏽💪🏽
My first headlight restoration and I’m very satisfied... The first thing I did, was the tape job (tape not included). Then I went to work applying the rubbing compound with the supplied pads (2) that came with the kit. In between applications (I used 2-3 application per light) I wiped off the haze from the rubbing compound. Wiping off the haze allows you to see how far you got and how much more is needed. After my last compounding and last cleaning of the haze, I used a damp soft cloth to make sure I got off all the haze from the compound and dried it with a dry cloth. I also let it air dry for a few minutes. Once I was sure it was dry, I gave the lights the first coat and waited 5 mins. Then I gave it the second coat. It dries in like 5 mins. And cures with in 24 hrs. I didn’t do both lights at the same time. I actually did one light at a time. It takes about an 1.5 hrs total. I didn’t even time my self. I was just taking my time. This kit was perfect for my head lights as mine didn’t have/ had the beginning of yellowing. In other words, was not in horrible condition. I definitely would recommend! I was lookin in the market to purchasing some new head lights but after the purchase of this restoration kit, I need to look no more!!!
Misty Rene Freudenberg
Best part is the finishing spray. Good results. Hybrid technique described here.
This worked for me, but I combined items in two kits to get a good result. Neither were expensive. After reading way too many reviews, I decided to use a modified method. I'll describe this hybrid approach below. The headlight lenses on my 2008 Honda CR-V were not too bad, about half was moderately oxidized. I double masked the area so that I didn't damage the adjacent painted or plastic parts. First, 3/4 inch tape to get close, then 1-1/2 inch over it to protect it and give a bigger area for final masking (spraying). Step 1: I wet sanded the light first, starting with 400 wet sandpaper that I had, then moved to the 600 and 1500 from the kit, using some 1000 that I had. I think you really only need to use three grits, and if the lights are only lightly oxidized, start with 600. Remember to always sand with a circular motion. Wearing rubber gloves make all this easier. Keep splashing water on it to remove the residue before continuing to sand. As others have noted, you'll see the yellow residue of the oxidation running down as you sand. When the residue turns to white, then you have removed all the oxidation in that area. Some areas will need more sanding than others. Be careful next to the masked areas. When done, rinse it and wipe dry. It should look like a nice even frosting on the surface. Note: if the oxidation is really light, you may be able to get away with just using the cleaner, but the cleaner is only a light rubbing compound. You've got to remove the yellow oxidation. Step 2: I polished it with a foam drill attachment from another kit (Mother's 07251 NuLens), using the polishing compound from that kit. Perhaps I could have skipped this step and gone straight to the cleaner (try that next time). This changed the frosting to a haze. Maybe next time I'll try the drill attachment with the cleaner. You can also do it by hand. If you use something on a drill, use it on a low speed. Going too fast at the same spot (and I can tell you it doesn't take much) will melt the plastic and cause marks which are hard to sand out (I had to go back to step 1 in an area). I used a cordless drill on the low speed. (Note: I did not use sandpaper on the attachment with that other kit. I think that would have been too aggressive and left bad circular scratches. I did it by hand. It's some work, but you can more easily control how much you sand when doing it by hand.) Step 3: Use the cleaner with a soft cloth. Go over the whole area with a circular motion. Rub off any remaining residue. I splashed water on it again and dried it really well. The light should start to look clear, but not perfect, still a little hazy. Step 4: Add newspaper or plastic to the masking tape. The spray is not directed, it comes out in a wide pattern, and there is a lot of overspray. I wouldn't worry too much, but you'll want to protect a foot or two. It's actually better if there is a slight breeze, as it carries the overspray away from your car. Spray a nice even coat on the light, overlapping each pass. Not too much or you'll get drips. The spray is very fine and it goes on easily. You'll be amazed how the spray makes it shiny and clear. Let it dry 5 minutes and do it again. Let it dry 10 minutes and carefully remove the masking. You're done. I just did it today, so I can't yet tell you how long this lasts. If I'm lucky, I can update this in a year and report that it still looks great. Some kits contain polish only, and I don't see how it can get completely clear and last for a long while without this protective spray. There is plenty of spray here, enough to do this process a few times. Lots of cleaner too. Both headlights took me about 2 hours, including set up and clean up. If you can remove the whole headlight lens from your car, then do this and avoid all the masking. Just remember to tape the bulb openings and don't let water inside your lens. If I was ordering again, I would only buy this kit along with 400, 600, and 1000 wet sandpaper. Hope this helps!