
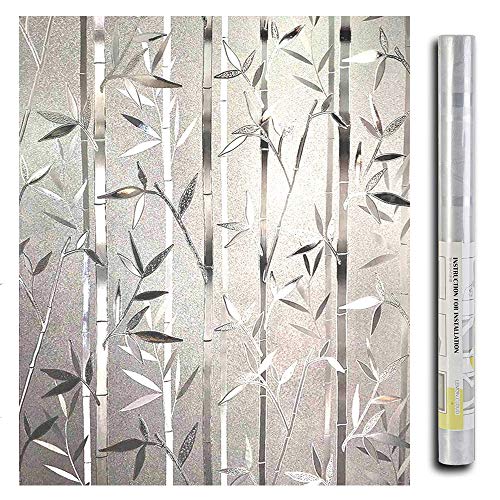
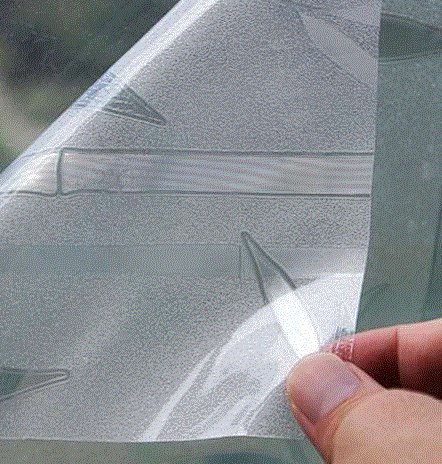
- GLUE-FREE STICKER:By using technology of static,the window film can stick to the glass without any glue,so it is easy to apply,and reusable.
- EASY REMOVABLE WINDOW FILM:It is very easy to remove the window film without any damage to itself or any stain on the glass either.
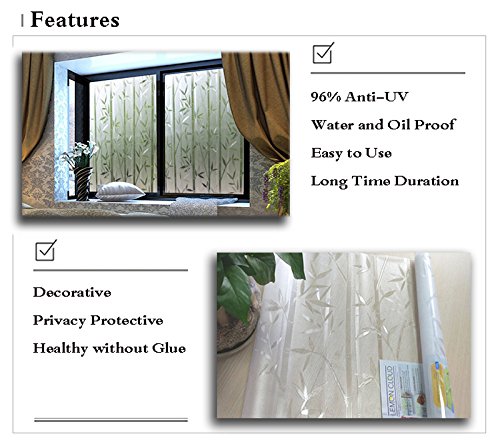
- ANTI-UV WINDOW FOIL: 96% of UV Rays Resistance.Also help to keep warm in winter and block out heat in summer.
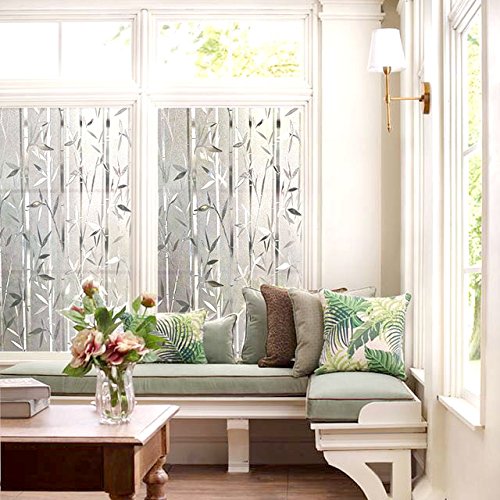
- DECORATIVE WINDOW CLINGS: Decorate the bald glass with different patterns on your options,and you may change it easily anytime.
- WINDOW CLING SIZE: 17.7In Wide By 78.7In Long Per Roll(45*200CM)
-
Information
-
Twitter
-
Pinterest
-
Youtube
-
Facebook
Chetan Anand Singh
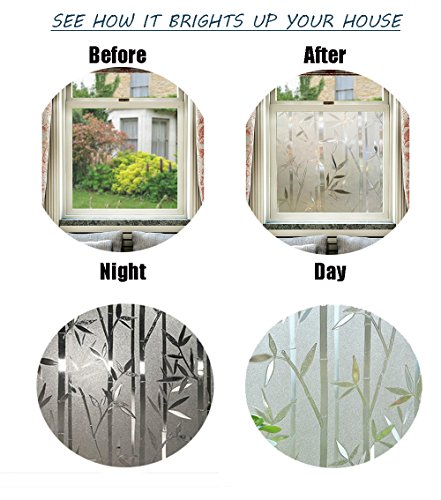
the design is cut so that when the sun shines through some of the leaves look like prisms. I really LOVE it
I have these over my sliding glass doors from my kitchen to my outside porch and everyone says it puts more light in the room, you can't really see much more than a silhouette of me in the evening, the design is cut so that when the sun shines through some of the leaves look like prisms. I really LOVE it!
Shannon S Green
Upside down bamboo!
A very nice product. Good preparations and following the instructions very carefully will really help. Clean throughly, have your water, cutting tool and scraper ready, and you'll be good to go. If it's a larger window I highly recommend getting two people to do it together. Be sure to go back about 15 minutes after installation to check for air pockets that need to be dispersed. And..before cutting make sure you have the bamboo oriented correctly. My window now has upside down bamboo shoots. lol
Quintin Yates
it is awesome, you can stand right in front of the ...
it is awesome, you can stand right in front of the door with the privacy film on it and you can see a shadow, but you can not make out a face or who is standing there .... easy to apply and as long as you follow the directions there are no problems with the film staying on the glass ....
Phil Will
Have both privacy and light
As an apartment dweller with first-floor windows right on the street I wanted a bit more privacy. I installed this on the lower windows only, and it looks great. I now use the horizontal blinds on the upper windows only. Installation: • I bought a window cling installation kit https://smile.amazon.com/gp/product/B002YXPITY and if I had a plant mister, a sharp blade, and a plastic paint scraper I may not have needed it, but it was a good purchase. • I used a yardstick to mark my dimensions and draw the cut line (with dry erase marker, on the removable side), then carefully cut with scissors. I did not do the oversizing-and-trimming-with-blade once installed, and the slight gaps at the edges aren't a problem. • The first one I did wouldn't lay flat at top and bottom; the second one I flattened with books for 30 minutes after cutting, still the same; the third one I used weights on the books, same thing. However, after it dried I ran my fingers along it, and it's now sticking down and looking fine. • When you apply this it can slide around a lot, and that helps get it into exact place (and if you cut it too big, you can get two sides correct by sliding it and then only have to cut the other sides). I now feel like I can leave my Venetian blinds open on the tops of the windows (so I can see the sky and city lights). The attached image was taken early in the morning; it looks even better with the sun shining on it later in the day.
Shauna P Green
Durable, easy to install heavy window film
I have installed window film before on my large sliding glass windows, so I learned, you can never use too much water....spray baby spray! Make sure the windows are absolutely clean before you try to attach the window film, as any grease or dust will leave air bubbles in your finished product. I first use Windex then follow-up with a vinegar/water solution to clean the windows. Even though Im only 5'2" and my reach is short, I have found it much easier to install the film by myself. I use painters tape as my second set of hands, to keep the film in place. I put several strips of painters on the front, top edge of the Film, attach it to the top window frame. This way I can check and make sure I have the film lined up with all edges of the window. This way, I can preposition the film, and adjust the tape as needed before I begin pulling the plastic backing off the film. (Dont forget, you will need to remove the plastic backing of the film, peeling it down little at a time, as you adhere the film to the window) Use a spray bottle of water and spray the window all over. I Peel down the plastic backing of the film approx 12 inch from the top, then I spray the back of the film with water, and carefully adhere it to the window. I keep pulling down about 12 inches each time, wetting the film and rewetting the windows, always checking the alignment of the film and making any corrections as I go. Once I have completely attached the film, then I spray the front of the film with water and start squeegeeing from top to bottom, then from center to outside edges. (during this part of the process you can make little adjustments in the film alignment). Once the film is aligned to the window and correctly placed, I use a new x-acto blade or straight edge razor blade and begin to carefully cut off the excess film from around the edges of the window. I usually cut the film just short of the window seal/caulking edge, otherwise, the window seal can prevent the film edge from adhering completely, This allows for the water to be completely squeegeed out . By wetting the outside of the window film, as you squeegee all the air bubbles and water bubbles out of the film, it keeps the squeegee from dragging on the the film and stretching it. Great Product!, lets the light in and keeps prying eyes out. I highly recommend this product, good quality.
Antoinette April Chase
They are astheticly pleasing. I appreciate being able to ...
They are astheticly pleasing. I appreciate being able to move them around, that they arn't permanent.
Erika Miller
Great Product!
I absolutely love this product. I was worried about the quality because of the price but I was pleasantly surprised. Strong thick plastic film with a great bamboo design. Installing was very simple only took me 10 minutes after I measured it out. Follow the directions step by step and you won’t have any problems. No air bubble and is very secure to the window.
Waji Faizy
but it looks fine. easy to apply
looks lovely. I ended up putting it upside down because of needing a straight edge to combine two sheets on one large window. but it looks fine. easy to apply. Would have been nice if a squeegee was included. Did okay with ruler, but squeegee better to get water bubbles out.
Siyathemba Mangwana
The technique of simple and easy application. Very pleased with this purchase
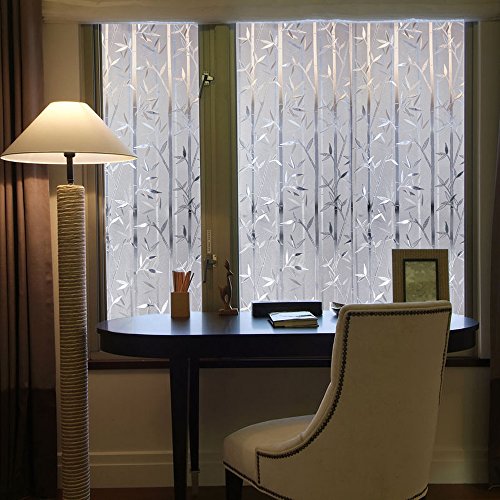
Ideal to complement any space where you want privacy while maintaining natural light. The drawings are soft, refreshing and combine with any decoration. The technique of simple and easy application. Very pleased with this purchase.
Hani Jasmin
Lets in Light
This frosted window film was just what we were looking for. Before, we felt like we were in a fishbowl and the anyone walking or driving by our Florida home was able to see right through to the pool and canal beyond. The pictures shows from inside the house after only one window as completed. Already you can see that we have MUCH more privacy now that both sides are done. Yes, I'd rather the glass itself was etched, but this solution saved a ton of money and looks very nice.