


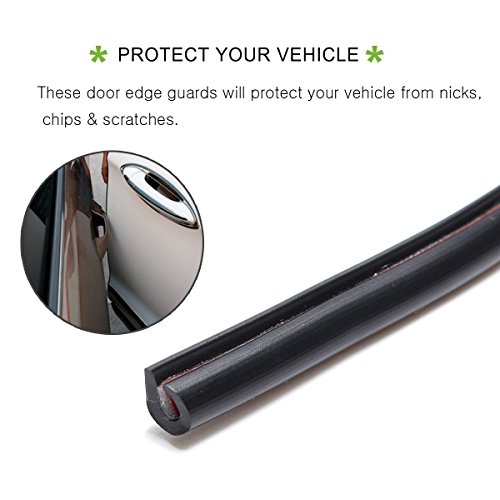
- ☘FITMENT- Rim thickness: 1 mm( 0.04") . These door edge guards will protect your vehicle from nicks, chips & scratches, make sure it is suitable for your car before purchase.
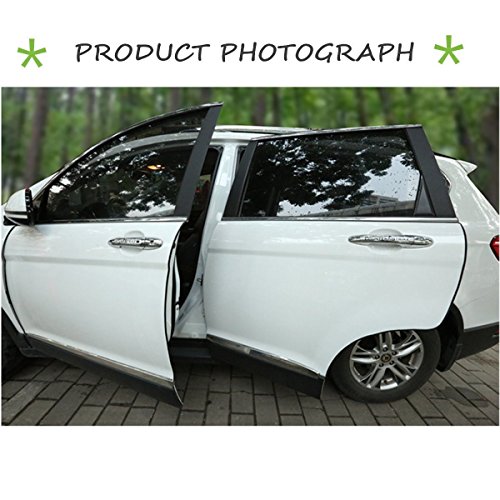
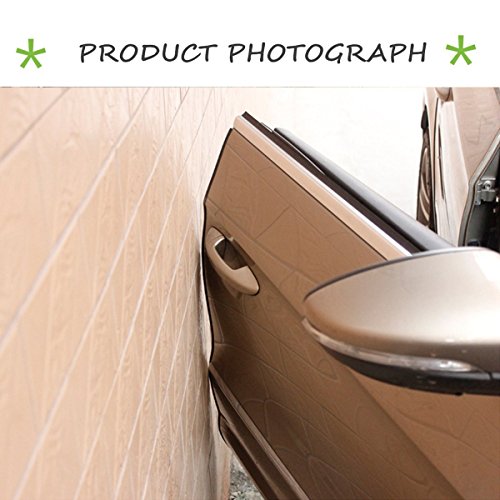
- ☘INSTALLATION PLACE-In the metal edge of the car body between the car door and car body. In the external edge of the car door and more. The adhesive tape is designed to paste on the inside door edge, therefore it will not leave any residue on the outs.
- ☘MULTIFUNCTION-Also can be used to cover any sharp or dull metal edge, window seal or in crafting. There is an adhesive inside so it does stick but the thickness and size are smaller that most may want.
- ☘ADVANTAGES- Waterproof, isolator noise, corrosion resistance, high temperature resistance, wear resistance,anti-aging,UV resistance.
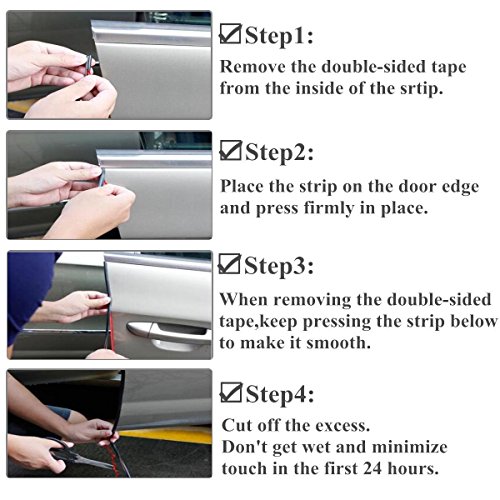
- ☘EASY TO INSTALL - Just push on the rubber seal above the install place. Note - Clean the door edge and make sure it is dry before install; Let the lining dry up by itself and do not get wet for at least 24 hours. Email us if any displeasure, we will try our best to solve it until you are satisfied.
-
Information
-
Twitter
-
Pinterest
-
Youtube
-
Facebook
Sophie Cigleris
Looks nice, and installs easily
Just what I needed. I attached door edge trim (from a different company) on my Honda Element and it's only starting to loosen now, 9 years later. So I wanted that same protection for my new Volt. And for the cars of people who park next to me--because I'm thoughtful like that. :) This MATCC brand is even better than the old type in terms of aesthetics. It is much slimmer, and looks like it came with the car-- creating an even black trim line all along the edge of my doors. I even had enough left over to do the hatch bottom. I'm not sure the paddle is necessary but after I pinched the whole thing into place I gave it a once-over with the paddle along the outer edge and the inside edge, pushing with my fingers to get it all perfectly even. I hope it holds up!
Marissa Simons
Much better than the cheap stuff at the local auto parts stores
This is the best door edge molding I have used. It is much better than the "C" channel plastic or rubber kinds you find at an auto parts store. It is very important that you apply this guard correctly. The instructions attempt to show you this, but it is hard to get the idea from the pictures. It's also hard to explain, but I will try. I recommend you peel back only a small amount of the tape covering the adhesive to start with. Carefully apply this prepared section of guard with the tape on the back side of the edge you are covering. On a door the tape will be on the back side of the door. Now that the guard is anchored in place you leave the tape alone and continue to apply the guard to the door all the way to the end (wherever you want to stop). Make sure the guard is pushed all the way onto the edge and that the back/front of the guard is where you want it along the edge. Now.,while holding the guard in place with one hand you can grab the bit of tape cover you removed earlier and pull it strait down (parallel to the guard) as you use your other hand to press the guard into the door from the side. This way the adhesive is exactly where you want it when it first touches the surface. This will give you excellent results. If you remove the tape and then try to put the molding on the door the adhesive will make contact before it is in the correct position and you will get a wavy appearance to the finished project. You should also make sure the adhesive and tape is intact/usable along the entire section you are about to apply. I had a small section right in the middle of the guard where there was no adhesive at all. I hope all that made sense. It's one of those things that you could show in a few seconds but is hard to convey with words.
Doris Ramos
Great product - highly recommended!!
I bought this to replace the existing hard plastic edge guard I got at my local auto parts last year. This trim is actually real rubber and is considerably more pliable. There is an adhesive strip which adheres to the inside of the door and the rest wraps around the edge. Easy to install and looks good. So far it has stayed put. The adhesive from the previous edge guard started oozing out around the edges. It was sticky and getting on your hands when you opened/closed the door.
Angela Brawley
Looks great!
Very neat, in fact it could be quite a bit broader and would still fit nicely and be easier to install. The little applicator is unnecessary - easier to put on with your fingers, small fingers! It is enough for four doors with some left over. I really wanted it for the bottom corners of the front doors but the metal trim on that part of my doors is such that this trim is too small.
Yoseph Shiferaw
Putting this on was.....
This took about sixty minutes to put it on. It's a work out:) Buy it and you'll see even with the yellow handle applicator. You literally have to split the rubber in two and just when you think you have it on securely, it pops off so take it slow when trying to put this on the door. It eventually fits but it is super snug:) Looks sexy when it's done but my little fingers were fried after completing the task. Steve Austin, Texas Progreso, YUCATAN, Mexico
Neil Bell
Great product, recommend it highly.
I got tired of trying to "touch up" the door edge's of my black Honda Ridgeline. Hitting a concrete block wall in my garage, ( one car,) with the driver's side doors, it always showed up as white scratch's. The door edge guards side the trick. Had a little trouble getting the red inside "tape" out to get it on, but it works!!
JUlz QuiNonez
Best I've Ever Used
I used this one roll to do both doors on a two-door midsize couple, and 4 doors on a Kia Soul. It's rubber, so it adheres to the curves very well. It's not real deep, so it fits nicely onto the small lip of the doors, and works great! WAY better than the plastic ones I've bought from the auto parts store all of my life.
Cesar Medina
The product was easy to install
Works well. I have not installed it had an edge guard on my cars before so this is the first time. We park next to a rock wall and sometimes donk! The product was easy to install. The trick is to peel a little of the tape install a few inches then peel some more, cut at the end. I didn’t think there would be enough for all for doors (mid size SUV) but there was with some left. This is a product which has to be reviewed over time to see how it holds up so I’ll update in a few months. For now it’s a five star product price, installation and final results were all good.
Arannaom Ierubara
Better than expected
Actually better than expected. If you apply it correctly, it comes out great. Put it on the surface without peeling the adhesive. Once in place and smooth, pull off just enough to peel back and get a grip on the adhesive backing paper; slip that section back on while gripping the paper; then just pull the rest of the backing off while keeping the material in place; just pinch it to ensure adhesive contact. It has been on for a month and is still perfect. Update - This also works as a great trim for the license plate if you do not want to use one of those plastic frames.
Trisha Redlund
nuts like her mom can't see in front of her
I should of got these long time ago my wife don't pay attention to where do gets opened...nuts like her mom can't see in front of her..I even put a strip on the edge of the hood...cause rocks and when I open hood now I have something there so I don't dig my fingers or nails has a good fit and feel to it