

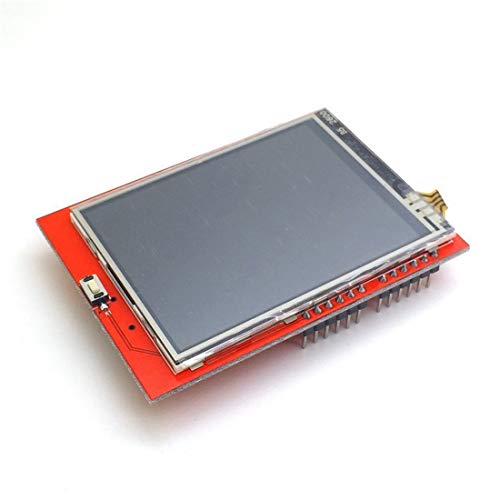
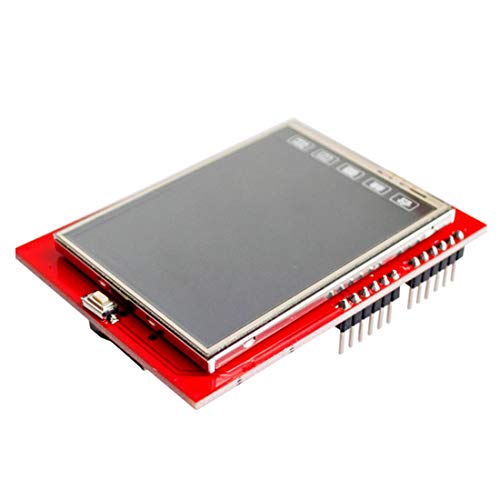
- 2.4" diagonal LCD TFT Touch Panel display
- Bright, 4 white-LED backlight, on by default but you can connect the transistor to a digital pin for backlight control
- Colorful, 18-bit 262,000 different shades
- 4-wire resistive touchscreen
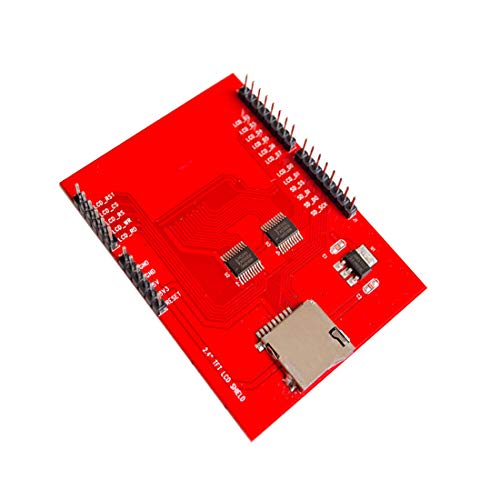
- 8 bit digital interface, plus 4 control lines
-
Information
-
Twitter
-
Pinterest
-
Youtube
-
Facebook
Kara McKinney
No documentation, but it works well once you find/install the appropriate libraries.
There is no documentation that comes with the display itself, but it's not terribly hard to do a little searching to find the drivers that work. Numerous reviews on here mention the MCUFRIEND.kbv library, which I used and it works fine. Note that you'll also need the Adafruit GFX library installed, as well, since the MCUFRIEND library relies on it, plus the Adafruit Touchscreen library if you want to be able to read touch. All can be installed from right inside the Arduino IDE, it's not necessary to install a .zip from the Github site. Once installed, it was relatively painless to get the demo file running on a MEGA2560, a Due and a Teensy 3.2 that's on a Sparkfun Uno shield adapter in short order. It's worth noting that getting the touchscreen calibration demo to work on a 32 bit board is a pain in the ass, so I used the MEGA to run the detection and calibration for the touchscreen pins, and the calibration works on both the Due and the Teensy - I've posted the calibration results for this board below. In my photos, from left to right are the values from the graphicstest.kbv example file, starting with the MEGA2560, Due, Teensy 3.2 stock clock, then overclocked to both 96 and 120MHz respectively. You can easily see the jump in performance from the 8 bit MEGA to the 32 bit Due. The final image is from the testcard.kbv demo file. Compared to SPI, the parallel interface on this board is fast and it responds well to boards with faster clock speeds! If you really want to get the most out of this display, I highly recommend going to a 32 bit board. Calibration result for this board: TouchScreen.h GFX Calibration Making all control and bus pins INPUT_PULLUP Typical 30k Analog pullup with corresponding pin would read low when digital is written LOW e.g. reads ~25 for 300R X direction e.g. reads ~30 for 500R Y direction Testing : (A2, D8) = 25 Testing : (A3, D9) = 30 Diagnosing as:- XM,XP: (A2, D8) = 25 YP,YM: (A3, D9) = 30 ID = 0x9341 cx=143 cy=113 cz=518 LEFT, TOP, Pressure cx=155 cy=496 cz=375 LEFT, MIDH, Pressure cx=145 cy=874 cz=200 LEFT, BOT, Pressure cx=522 cy=123 cz=541 MIDW, TOP, Pressure cx=518 cy=878 cz=342 MIDW, BOT, Pressure cx=897 cy=121 cz=607 RT, TOP, Pressure cx=886 cy=492 cz=530 RT, MIDH, Pressure cx=888 cy=869 cz=463 RT, BOT, Pressure MCUFRIEND_kbv ID=0x9341 240 x 320 //use the following two lines for touchscreen values in the MCUFRIEND example files const int XP=8,XM=A2,YP=A3,YM=9; //240x320 ID=0x9341 const int TS_LEFT=113,TS_RT=923,TS_TOP=93,TS_BOT=898; PORTRAIT CALIBRATION 240 x 320 x = map(p.x, LEFT=113, RT=923, 0, 240) y = map(p.y, TOP=93, BOT=898, 0, 320) Touch Pin Wiring XP=8 XM=A2 YP=A3 YM=9 LANDSCAPE CALIBRATION 320 x 240 x = map(p.y, LEFT=93, RT=898, 0, 320) y = map(p.x, TOP=923, BOT=113, 0, 240)
Ricardo DA Figueiredo
Works well - once you locate the proper libraries.
This unit comes with no documentation and there is no website to get a tutorial. This is supposed to use IL9341 driver, same as found in the well documented Adafruit TFT displays, however it does not work if you try to use the Adafruit_TFTLCD libraries and examples - blank backlight screen ad the diagnostics also fail to id the chip. Good news is that it works perfectly well with MCUFRIEND_kbv library on github. The display is also much faster than with the Adafruit displays that use SPI for data transfer. The 8 pin data implementation on this chip uses a large number of the digital pins but the tradeoff is that the display speed is much faster.
Klara Podres
Worked immediately on many Arduinos. Stellar value!
Go to GitHub and download MCUFRIEND_kbv library, then unzip the file and place the folder into the libraries folder where your Arduino IDE is installed. This lcd touchscreen works perfectly using the MCUFRIEND_kbv library. I tested this on a Hiletgo Arduino Mega, Uno, and an Italian Uno as well. All worked perfectly. This little touchscreen is an amazing value and I will be ordering more. Having a shield is a lot cleaner than wiring a separate lcd.
Kristy Stamper-Hannah
Very Responsive Touch Screen
Display worked perfect! No dead pixels, backlight was bright and touch screen had minimal lag and was very responsive. Recommended if you need a touchscreen.
Gurwinder Kaur
Good
Received as advertised
Eclipse Oya Vault
Five Stars
Exelentes productos
Shannon S Green
Five Stars
Good display
Preethii Kuumaar Patnaaik
キャリブレーションが必要でした。
買ってから暫く眠らせていましたが、やっとのことで動かしてみました。 他の方のレビューやWebサイトの記事の通りにライブラリをインストールしてみたところ、スケッチ例の中のTouch_sield_newを動かしてもタッチパネルが部分的にしか反応しないので悩みました。 Touch_sield_Calibr_nativeを動かして、画面表示に従ってハイライト表示のマークの中心を6か所順番にタッチすると、キャリブレーション結果がLCDおよびシリアル出力に表示されました。 表示に従ってTouch_sield_newのソースコードの中の設定を変更すると問題なく正常動作しました。 ライブラリを使うとグラフィックやテキストが自在に表示されるのでとても便利です。
Malcolm King
PICマイコンからも動かせる
当方、安価で入手性の高いPICマイコンを多用しており、 この度はPICマイコンからも動作させられるディスプレイを探していました。 結果、こちらのディスプレイであれば何とか動かせそうだと判り、皆様のレビューを参考に、Arduinoのドライバのソースコード、ILI9341のデータシートを入手し、PIC32MX向けのドライバを作成、無事動作に至りました。 PIC32MXを60MHzで駆動し動作させたところ、全画面の塗りつぶしに0.1秒程度。 8bitのパラレル接続で、さほどピクセル数の多くない画面であるため、 用途を欲張らない限りは必要十分な速度で動作していると考えます。 全ては試せませんが、私の知る限りILI9341のデータシートに記載されているコマンド通りの動作をしており、 思った通りの動作を楽しめる1パーツでした。
Elfaris Zaki Sirgyous
Raspberry Pi Zero Wに使用しました。
綺麗に表示しています。レギュレーターを内蔵しているので電源は5Vで使用できます。パラレルなのでGPIOを最低12Pin使います。Raspberry Piの場合アナログポートが無いのでそのままではタッチパネルが利用できないので注意が必要です。しかし安価で表示だけでも良いと思います。