
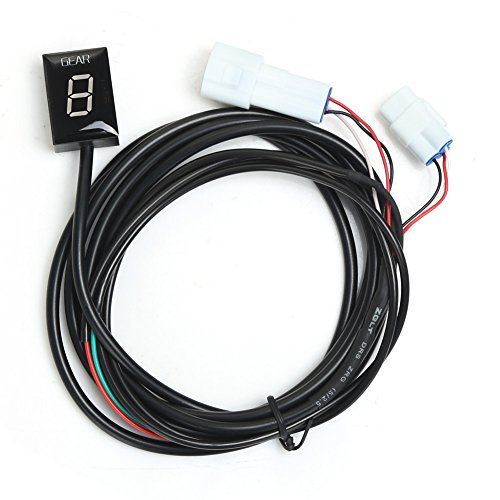
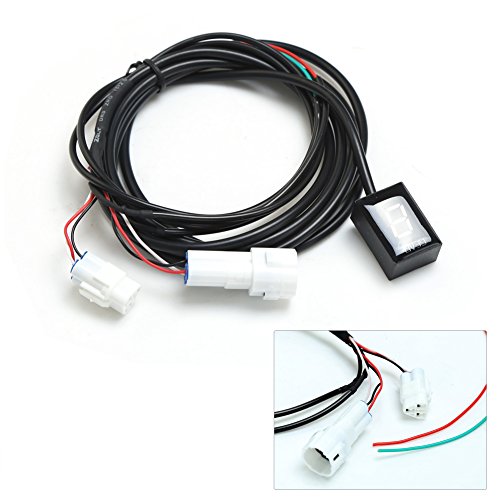
- Easy Installation: Original motorcycle with reserved socket for quick connection, other wires need connect according the instructions,No need cut lines.Paste it around dashboard with double-sided adhesive tape
- Super Waterproof: This motorcycle LED gear indicator is waterproof,even soaked in water would be fine.So don't be afraid of rainy days.
- No Damage: This Gear Indicator reads only ECU data of motorcycle , won't cause any damage, gears will display once the engine working and clutch released.
- Perfect for Riding: Regardless of novice or veteran,wrong gear selection will causes a setback, affecting comfort and even damaging the gearbox.
- Best Aftersale Service: If you don't know which model suit your motorcycle, where to install,or purchage wrong model,Pls feel free to contact us!
-
Information
-
Twitter
-
Pinterest
-
Youtube
-
Facebook
Linda Patero
Installed on 2018 WR250R
Works fine on the WR250R. The installation instructions are a little generic so here are the basic steps - for a WRR. 1. You will need to remove the seat, plastics on both sides, and unbolt the gas tank. You don't have to disconnect the tank, but you will need to lift it up to thread the cord underneath it. 2. Find the Speed Sensor 3-pole coupler on the left side of the bike (see pic). 3. Unplug the 3-pole Speed Sensor and simply plug the device 3-pole connections into the proper male/female ends to basically "splice" it in. 4. Find the break light switch (also a 3-pole coupler) (see pic). 5. Going towards the front of the bike, the 3 wires coming out of the coupler will be covered by a plastic wrap. You will have to cut open the plastic wrap to get at the BROWN wire. 6. Tap the Red/Black wire from the device to the BROWN wire with the plastic wire taps included. Though it says you have to strip the wire, you do not have to with these wire taps. 7. Locate the ECU o the top of the bike towards the read. It will be the plastic connector with tons of wires coming out to it. Locate the ORANGE wire that will be all the way on the right side of the bike. 8. Tap the Green/Black wire from the device to the ORANGE wire using the plastic wire tap. 9. The tough part. Thread the device through the bike and up to the dash such that it is secure and won't be tugged on. There are different routes you could take. I went under the tank, through the frame, up the left side with the wires there, then crossover to the right side of the dash. There wires are all PLENTY LONG, so you will have to be creative on how you fold up the slack and secure it with zip ties. The only issue I had here is that the actual indicator is kind big for fitting through some tight spots. 10. Put your bike back together and follow the setup procedures. I did it on a stand, but you can also do it while riding. It works great and I would buy it again. The only negative is that it is all one piece. I have seen others where the display piece is a separate connection to the rest of the wiring/connectors - that would make it easier for threading through the bike.
Lori Ann Whitaker
Great bang for the buck upgrade, but instructions need some improvement
Great product, but instructions are incomplete. I had to look at the other review here for complete instructions. Even still, the splicing to the cam position sensor wires needed to be switched in my case. Aside from that, the product has worked fantastically after a quick initial calibration. I use this for racing on my R6 and it helps greatly any time your pace gets disrupted and you need to double check which gear you're in. Keep in mind it doesn't always update the gear instantaneously since it's based on a calculation between wheel speed and engine speed, but it's the best you're gonna get on a bike that didn't come with a gear indicator from the factory.
Natasha Lee Aiken
and some extra wire will make it a cleaner install and easy to set up
To be honest, I was a little skeptical about this unknown brand, but decided to go with it because it was half the cost of the competitor. It was plug and play and took no more than 1 hour to install and route the wires. Things to note for is a soldering iron, rear stand, and some extra wire will make it a cleaner install and easy to set up. Not enough to take 1 star off. Also to note for those who aren't familia with this. This is not real time as the factory unit that come on a later model. It will only show what gears you're in after you let off the clutch lever. The Healtech one works the same way and this is just as good. Had this for 1 month now and it is standing up very well with rain and bike wash. Will give an update should it fail.
Shauna P Green
Much needed upgrade for a Yamaha FZ8
Super simple, yet effective gear indicator! I wish I would have done this years ago! Pros: - Installation was actually quite simple. 2 plugs and 2 wire taps. - Display is nice and bright, easy to see in the day or night. - Gear indicator changes almost instantaneously once you release the clutch (not when you change the gear physically) but that's OK for me. It's fast enough. - I run mine inline with my speedoDRD (speedo healer). Mine installed harness -> speedoDRD -> Gear Indicator -> speed sensor. Speed appears consistent as before. Cons: Instructions don't really clarify which wire to tap into for a Yamaha (FZ1, R1, R6, FZ8, etc), but after watching a YouTube video, I found that it's the grey wire on the harness side for the signal (colors swap on the sensor side). Nothing worth losing a star over. The power is just any switched power wire. No problems there. Overall, I'm totally happy with this gear indicator. I've put about 300 miles testing up and down, skipping gears, etc, and it's been dead on every time. Absolutely worth the money if you are missing a gear indicator on your motorcycle (and it's less than half of other brands out there!) Hopefully it'll last. For now, excellent product!
Elisabeta Ioana Covrig
Still not working *update...IT WORKS NOW*
***UPDATE 2: they’re customer service reached out to me several times with videos and instructions and they kept following up with me, Which is why I’m giving them 5 stars. The product itself works as expected BUT installation is NOT plug n play. The splice connector things they send with it, don’t work.. and I found one of them hasn’t even cut the cable sleeve so there wasn’t a connection to the camshaft sensor cable... that’s why it wasn’t programming. I actually spliced it and used electrical tape.. plugged it back in and it worked right away. Programmed it in 2 mins!!! *** Instructions are not very detailed for install to begin with. Installed it thanks to the help from other reviewers... but have yet to make it learn the gears... all I have is a blinking light and that’s it. UPDATE: still haven’t been able to make it work.... so irritating!!!!
Sajid Shah
It's pretty much a Healtech and worth it
I installed this on my FZ6 without any problems, it took me maybe 2 hours and I REALLY took my time. I can't tell a difference between this and a higher end one. I even watched a YouTube video of someone installing a Healtech one on an FZ1-N and it was pretty much exactly the same. Hopefully it holds up, and even if it doesn't I will end up with another one on my bike 👍
Judi Wagnerfoxthomas
Half the price of the big name, same product literally!
I installed this on my 2009 Yamaha r6. This is literally healtech disguised as idea. The indicator down to the wiring are the exact same. The instructions are definitely the same. The only diff is, this unit is less than half the cost. I highly recommend this if your looking for a gear indicator. Save the money and get this. It is the same thing!! Follow the instructions for an r6, they are 100% correct.
Kolby Cook
Five Stars
Easy install, works great! They actually helped me install this and their response was prompt. Thank you!
Bryan Soon
Works great with my 2016 FZ6R but wire up instructions are bad. Calibration after install easy.
I won't repeat the instructions another FZ6R user put on here, but just follow it and you will be up and running in no time. The display is clear and bright and works very well with the gear count. Yes the it's a delay if you shift slow or hang onto the clutch longer then needed. It's because the electronics determine the gear by engine rpm and the speedo. Slipping the clutch or anything other than full release of the clutch will cause a delay in the display. Clutchless shifting up and down the gears and the display never missed a beat.
Gurwinder Kaur
Excellent for newbies
This works great with my R6. Easy installation and setup. The only thing is instruction on wiring. I looked on youtube on which wite to use.There is only 2 wires to choose from. So it's one or the other. Brown or grey. If I'm not mistaken it was the brown. It's a little laggy on the shifts up and down