


- DURABLE FRAME: Durable PVC plastic frame is great for withstanding UV exposure, and the telescoping tunnel fits wall thickness 4.75 in. - 7.25 in.
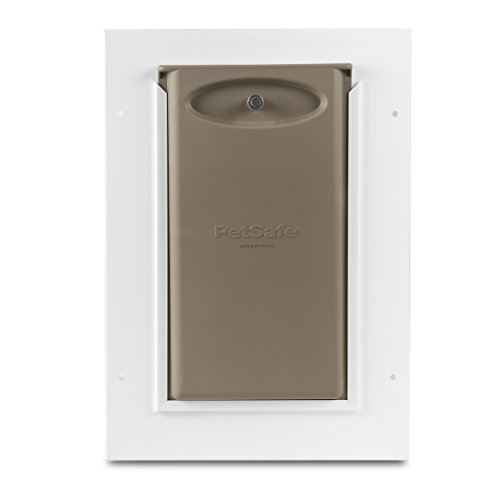
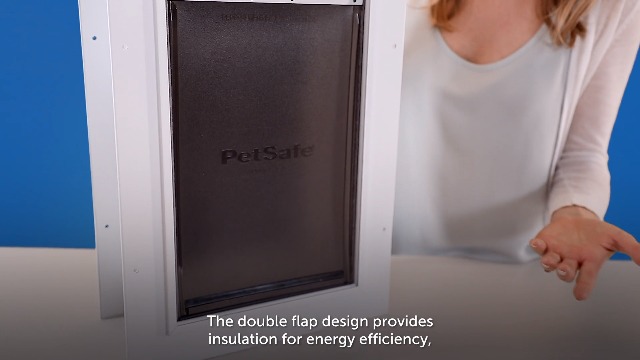
- DOUBLE-FLAP DESIGN: The pet door has two replaceable flaps that help keep out weather and provide energy efficiency
- CONTROLLED ACCESS: The slide-in closing panel is provided for added insulation and control of your pet's access
- EASY, DO-IT-YOURSELF INSTALLATION: Installs into several wall types including all types of siding, stucco and brick; cut-out template and step-by-step instructions included
- PET SIZE: Recommended for pets up to 15 lb.; pet door flap opening measures 5.25 in. W x 7.5 in. H
- PRODUCT SUPPORT: PetSafe brand's U.S.-based Customer Care experts will be glad to help; call Monday through Saturday at 1-800-845-3274
- EXPERIENCE: PetSafe brand has been an industry leading U.S. manufacturer of pet behavior, containment and lifestyle products since 1991, helping millions of people and pets each year
-
Information
-
Twitter
-
Pinterest
-
Youtube
-
Facebook
Tiffany Marie
Decent wall install if done right.
Cut out your hole and frame up a hole like you would for a window installation. This gives you a secure place to screw the door frame to and makes it nice and solid. I was able to work with a current stud and build around that. Planning down a few 2x6 (or 2x4 depending on your wall cinstruction) boards around the other sides to get a snug fit. This way you can staple the inside plastic walls of the door to the studs all around the inside. Then use a wide duct tape to seal the seam. Remove the exterior siding and mount the door frame right to the wall, the 4 screws will all secure tight into the studs you just boxed in. Then J channel around the frame, replace trimmed and cut siding to fit, then chalk J channel to the frame for a weather tight seal. After all done, I carpeted the interior frame to hide to duct tape. I removed the interior door temporarily so the dog would get used to going through it easier. It takes a bit more force to push through 2 door flaps. The second flap seems only necessary during winter months.
Gia Papiashvili
Easy installation, great directions, well packaged.
great product. easy installation, good video on their website/youtube explaining installation. I installed through an exterior 2x4 wall with stucco exterior. The alignment tool (cardboard box you place in the wall and drill from inside out to line-up outside template) worked very well. i used a sawzall with a diamond blade to cut the stucco. I decided to put a 1x4" in the wall underneath the dog door to give it some support. Otherwise, I think the dog would be afraid to step on it. came with lots of screws and even toggle bolts. about the only thing you'll want is some caulk around the outside frame if exposed to the weather. mine goes to a covered porch, so I didn't bother. tip #1: make sure that the two halves of the dog door are really lined up with each other before final mounting. If they are slightly shifted (left/right) of each other, the edge of the inner flap will rub on the outer frame and may not fall back into place once the dog goes out. Tip #2: to get your dog trained to go through a double flap, take off the outer flap for the first week or two until the dog is comfortable going in and out, then reinstall it.
Jessica Bell-McLean
Easy project and a great use for all the tools sitting in the garage!
Overview Please note this could be a project for ones not handy with a saw, screw driver, ruler and pencil. If so Amazon can reach out to a handyman service in many areas that can do this type of install for you. I found the supplied instructions to be very easy to follow along with the included cutout helps a lot. . The total install time was less than 3 hours, this time included a 30 minute trip to the hardware store and 10 minute cleanup. Pet training was extremely easy, we worried about coming home to a house full of poop and pee! Great Features We picked this model due where we wanted to install it, its size and features. We were only looking for one with a closing door like this one has, along with DUAL magnet flaps to keep out unwanted critters. We were looking a RFID locking door but due to price and not finding one that was dual flaps this fell out as something we truly needed. Tools and supply’s recommend Screw driver, drill, level, saw, ruler, pencil, 2x4 depending on your wall thickness, Window/Door spray foam, extra screws. Installation The size you need is 17 inches high and 12.5 inches wide. In my project I wanted to know if it was going to fit between the window sill and baseboard without cutting them. The supplied instructions included a cutout that was easy to follow. These are the steps I took, Feel free to use this to determine if this a project you feel you can do yourself, if not feel free to ask questions for more clarification. 1. I started from the inside due to the window as it was a very tight fit in the location we wanted to use. Use the supplied cutout to mark your hole with a pencil and level to verify before cutting with a drywall saw. Keep supplied cutout for the exterior wall as well. 3. Push the insulation to both sides of the hole, the only insulation removed should be where the hole was cut. 4. Make sure Doggy door fits in hole properly before adding 2x4, if not extend cuts into the drywall as needed. 5. Cut 2x4 to add at drywall edge. This is used to strengthen the drywall, and add bracing to attach the door. Screw each place, notice holes for doggy door and avoid same placement. 6. Use your drill and make two small holes from top most corners starting from the inside these are used to mark the exterior wall. Use these holes to line up the cutout and mark and lines on the outside. 7. Verify everything is level and marked lines are easy to see. Cut hole from the exterior the installed 2x4 will also help be your guide depending of the saw you are using. Remove exterior hole cut and verify everything is square and the telescoping door fits in nicely. 8. Use extra wood screws to attach exterior wall to added 2x4s, notice where screw holes are for doggy door and avoid using same placement. (Two people can help for the remaining parts but not required) 9. Install Doggy door exterior side first and screw in place loose enough to verify inside piece will fit nicely. If not extend hole as needed on exterior wall. 10. Attach interior doggy door but do not screw in internal side yet, move as need to make sure everything fits up nicely including interior walls of the doggy door. 11. Add spray foam in gaps between doggy door and drywall and between 2x4. It is very important to use spray foam specifically for Window and Door and not expanding foam for large gaps. 12. After Spray foam is in place secure interior side of the doggy door and get ready for doggy training! Dog Training We have a Basenji, if you are not familiar with this bread they are extremely smart and very self-sufficient but stubborn at times. We worried about this in her training. PetSafe had us covered on this and supplied multiple methods for training your dog quickly. To our surprise our dog was using the door herself within 2 hours after install. So well in fact, that two days later when building the doggy house I couldn’t get her away from my work area! Pest Avoidance One thing I really like about this doggy door is the grey plastic closing door that keeps out unwanted critters out of your house, by temporarily closing the door from use. PetSafe also sells a second one if needed for interior and exterior opening. I find this to be a CRITICAL item that is lacking from many other doors in this price range ones less expensive. Additional idea’s for your project. Add a doggy on the outside to give your dog a nice place to “Dog Out” While also adding an additional level of protection from the elements. Granted my dog simply jumps on top and looks out rather than sitting on the inside but that’s also the bread!
Sarah Guerra
Here Kitty, Kitty!!!
The cats are getting adjusted to the "new" door we installed in the wall. Unlike the old door that had a solid plastic swing door, the door in this unit is a heavy duty, flexible plastic with a relatively strong magnet. The cats had occasionally caught their paws between the solid door and the edge of the door in old unit. That can't happen with this design as the swinging doors are flexible. We have removed the second door inside the house until the cats adjust to the new flexible door and the "tunnel" through the wall. One cat took two days before figuring it out. The second cat took 4 days - just learning today. I am confident the third cat will figure it out soon. After all three are freely coming and going through the door we will install the second door - probably in about a month. I was worried that the new door would not keep out the cold/heat/wind, but it appears to be very well made and of decent quality. With only one door installed, it seems to be doing a good job keeping the weather elements outside. We've had temps in high 30s at night and over 80 during day and the cat door does has not contributed to any noticeable temperature change in the room. Also, Cat #1 is a very large cat and has no problem using this door.
Davey Abu Dhabi
My husband comes up with some pretty crazy ideas
My husband comes up with some pretty crazy ideas. His latest home project idea was to install a dog door - in the family room. Basically he's tired of the dogs doing their business all over the yard and wanted to restrict them to one area. In order to accomplish this, he said he needed to cut a hole in my wall - WHAT?!! Ok, after a brief freakout, we did the research and chose the Petsafe pet door. Because we have rottweilers, we ordered the large door. I have to admit, when it arrived, I thought there is no way the dogs will fit through that! (They do but more on that later). The instructions were excellent, including templates to help you cut the proper hole and place the door. My husband and my teenage son did all the work on this one. And I have to say, it looks fantastic. I love this door because it has 2 flaps which really helps keep the weather out. It made it a little trickier at first for the dogs to understand to go through it but they eventually figured it out. I had to hold open the flaps a few times to show them that they could also come back in that way. The flaps remind me of those windows that have the texture on them which makes it so can't see through them. The light comes through but it's not liking I'm looking at my yard through the hole in the house. The size is perfect and all three dogs fit as long as they go through one at a time, which is a concept they don't always grasp. I have two puppies and momma dog and all can navigate the door easily after some practice. A side note - we did have to put in a step on the outside of the house as it was a little to high for them to jump both out and in. This has been a successful project and I am very pleased with the PetSafe pet door. The quality of all of the components is excellent and the door as a whole will last a long time. Oh and it comes with a metal plate that you can slide in either in the house or outside. We're not using it but it looks like it would pretty easy to use if you ever wanted to close it temporarily.
Loretta Church
Good setup, but definitely not puppy proof and expensive replacement flaps.
Overall, this product is pretty solid. The only metal part of the product itself though is the frame right around the flap, don't let the "aluminum pet door" title fool you. The interior connector piece itself and cover are all plastic. Just make sure you don't over tighten it. The flap is fairly durable, but the magnet on the bottom of the flap.... definitely not puppy proof. My corgi had both flap magnets chewed off within a week or two. Now I don't have a proper seal and I don't feel like spending $30 for two flaps just to replace the magnets, that's a little too expensive considering I paid about $68 for the whole package. All in all it's easy to self install depending on what type of exterior material you're going through. I'd recommend this for someone with a senior dog, but not for anyone with a puppy. I'd stick to metallic or solid type door systems. Update. 4/9/16 Contacted the company to register my product and explained the problem with the puppy tearing the magnets out. They were happy to send me two replacement flags as a courtesy replacement and recommended a few ways to prevent him from chewing on it again. Thank you for your great customer service even when it was no fault of their own! Now 5 stars due to the outstanding customer service!
Bunny Bugg
Makin' my life easier!
I have five cats. They are all rescues and love every one but to let them in and out all the time was a hassle. This has been a blessing. Made of quality materials and looks good inside and out once installed. We've had it now a couple of months and have had some heavy wind and rain and nothing has come in nor does it make any noise from wind. I did take off the inside flap because my older cat wouldn't go through both, he is very stubborn. I may have to put it back on for winter, but we will see. I also love being able to close it off completely with with hard cover that just slides in from the top.
Derek Hall
like most of you
I'll admit, like most of you, I was weary of installing this in my wall. I bought a brand new house that has exquisite brick and interior work. I fearfully purchased the product and then hired a very trusted contractor to install it. I could not be happier with the outcome. It is a well made, well price per door. The safety/closure panel works easy and fast and my dog loves the door already. Pros: -Price -Clean look -Efficient design -Seals shut easily with magnets -Easily locked Cons: -Potential draft when windy
Jessica Schoenfelder
Keeps the heat out really well. My dogs learned how to use it quickly. They love The freedom
Absolutely fabulous doggie door. We live in Phoenix Arizona and it got up to 124 Degrees this summer. It kept almost all the heat outside because of the door flaps, which is what I was hoping it would do. This is the first door my dogs have had. It took me about two hours of coaxing off and on to get them to go out but once they did three or four times they were loving it. They absolutely love the freedom of getting up early in the morning and going out without having to wait for us. Also my cat Is very curious and he will poke his head through one flap but with There of been two he doesn’t get very far through. If you’re looking for a doggie door I would definitely invest in this one. the door flaps are heavy and the base is solid metal. We didn’t have any problem with the dogs being burned going in and out. It kept the heat out really well. It was an easy adjustment for my dogs. We have two dogs one is a Cavalier King Charles spaniel mix she’s about 10 pounds and the other one is a lab mix he’s about 70 pounds. They both go through with no problem.
Ayesha Ashraf
wall doggie door
I ordered this door to install myself. The installation requires some knowledge of carpentry as you have to cut through the wall. The door itself is perfect and easy to install once you cut the dimensions into the wall. My 2 dogs that previously rang a bell hanging on a rope to be let out, learned very quickly to use it. The double flap keeps the cold air out even in march in new jersey. I would not recommend this sized for a large dog such as a golden retriever or a dog of similar size. get a taller wider door for such a pet. My dogs are 25 pounds and 19 pounds and it is perfect, a beagle and a jack russel terrier. It comes with a solid slide in stop if you choose to lock the opening either from the outside or inside. I recommend this product. after much research this was the best value for money. Here is a little help if you are going to do it yourself. A-It fits between 2 wall studs that are 16inches apart. B-use a stud finder to determine where the studs are inside the wall. C-make sure that there are no wires or pipes in that area. you can cut a small hole and check. D-Make sure that the bottom of your hole is high enough above the grass, ground or deck so that water or rain will not come in when it accumulates in the area. E-Mark the hole to be cut with the cut out paper they provide. F- Cut the sheet rock with a small sheetrock saw make the cut slightly larger that the paper cut out so it will fit easily. G-Remove the sheetrock and the insulation inside the wall. wear a long sleeve shirt and gloves for this part. H-Drill holes on the exterior wall plywood corners fron the inside of your house. I-Connect the holes outside with a marker, pencil. J-Cut the opening with an electic saw and remove it. K-Install one side of the doggie door and have someone help on the inside by fitting the other side. Once it is flush with the ouside wall screw it in L- do the same inside. M- The flaps have a magnetic catch in the bottom to keep them closed once the pet walks through it. Good luck with the project, I hope this helps, or at least will help you determine if you can do it, or want to a handyman to do it.