


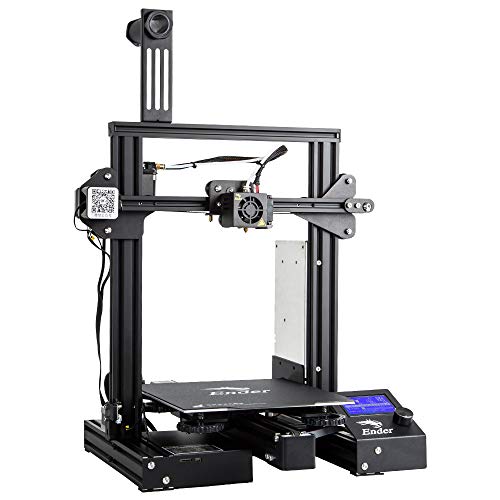
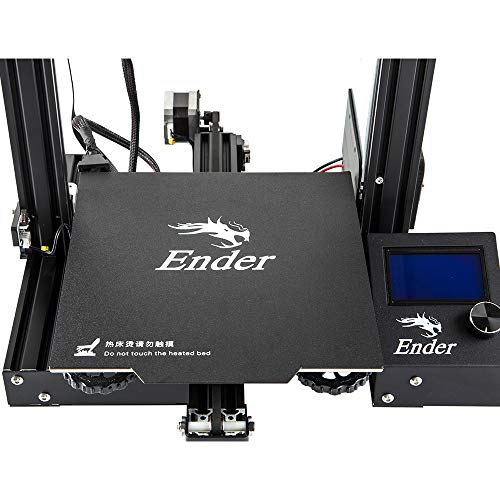
- CMAGNET BUILD SURFACE PLATE: Provide all-round protection to your 3D printer build plate and ensure consistent temperature throughout the build surface. Easy to remove the printing models after cooling.
- SAFE POWER SUPPLY: Ender 3 Pro comes with a UL Certified power supply, protecting your printer from unexpected power surges, that can heat the hot bed to 110℃ in just 5 minutes.
- RESUME PRINT FUNCTION: Ender 3 Pro can resume printing from the last recorded extruder position after suffering unexpected power outages.
- SEMI-ASSEMBLED KIT: several assembled parts This easy-to-setup kit comes partially assembled, allowing you to learn about the basic construction of 3D printers as you finish putting it together. A fun STEM educational experience in mechanical engineering and electronics.
- WHAT YOU GET: Ceality Ender 3 Pro 3D pinrter, 12 months warranty, lifetime technical assistance and 24 hours professional customer service.
-
Information
-
Twitter
-
Pinterest
-
Youtube
-
Facebook
Nadine Dauphin-Simmons
Great beginner printer at an outstanding price
As a beginner printer, the Ender 3 line is extremely popular right now. And for very good reason: * Excellent price point puts the base model under $200 and the "pro" model under $300 * Outstanding print quality that rivals much more expensive printers * Strong, growing community - just search Thingiverse for "ender 3 mod", or visit the ender3 subreddit. Some things to note: * Don't struggle through the build instructions in the box. I used the 3D Printed Tomb of Horrors build video on Youtube, but there are other build guides out there too. One thing I really liked about the build video I referenced is that he walks through not just how to set up each step, but clearly demonstrates it and explains *why* he is doing so. He also performs a couple of additional steps that are not in the included instructions, simply because they're easier to fix while building the printer than after it's already assembled. * One of the nuts on my bed rollers came loose after a week or so, allowing the bed to become unstable and causing some prints to fail until I figured out why. Make sure to check all screws, bolts, and nuts periodically. * The nozzles that come with the printer are great for general-purpose printing, but try other sizes too - the quality difference between the default (0.4mm) nozzles and a 0.2 nozzle are amazing. * For your first few prints, practice by making some of the upgrades from Thingiverse.
June Kiker Poston
great customer service!
UPDATE #2: New printer working great! No issues. Customer service was awesome! UPDATE: Despite having some issues with the first printer I am going to try again and its mostly due to the great customer service from Comgrow3d. The customer service has been great, they have tried to work me thru the issues and then when I wanted a replacement there was no hassle at all. I will update later when I get the new one and whether or not the printing errors get solved. ORIGINAL I am having nothing but problems with this printer. As soon as I got it, i had problems printing from the micro sd card... would print for a while then stop suddenly like it was finished but it would only be partway done... I tried a different sd card but it did the same thing... I then hooked it to the computer and got some prints out of it but now it prints for a little while then freezes the entire computer up. I reinstalled the Cura slicer but still get same results. I am tired of spending more time trouble shooting than printing! I have had this since November and I have maybe 5 complete prints out of this!
Joy Descallar
Excellent starter (and beyond) 3D printer
I am completely pleased with this printer and don't see spending more money would add any value or improve prints, all around excellent. Product arrived perfectly, excellent packaging, all parts included, no hardware issues. This is my first 3D printer so I want anyone new to 3D printing to have a realistic perspective. I have been printing jigs and parts useful in my woodshop and a few things for the printer itself. I had early success then lots of issues getting prints to stick then reached a plateau of excellent success with limited issues. Bad prints early on can just be stopped and restarted with the main screen. What to expect: • A steep learning curve, documentation is ok but doesn't address everything, lots of mistakes and plenty of solutions you gain quickly from just doing it. • Take the time to assemble the printer, square up the frame parts and review a couple assembly videos on youtube. They help to ensure early success in printing. • Remove and clean the magnetic sheet with warm soapy water to remove any grease or dirt. Then carefully dab to dry and don't touch the surface to avoid finger oils. • If the magnetic sheet lays flat but is crooked, that is ok and affects nothing. I had to trim each side of the sheet by 1/8-1/4" to avoid it touching the Z rails but it lays dead flat. • Bed leveling and a clean bed are two of the most valuable checklist points to make in printing. Early on I was cleaning the bed with acetone and isopropyl alcohol but since I just now use soap and water to clean it, I have had so many successful prints and have not removed the magnetic sheet at all, just use the spatula. No finger oils, no need to clean, and all the plastic comes off. • Use a feeler gauge 0.004" (1.0mm) and level the bed all around so the tip just touches the gauge but doesn't press hard because you can actually push the bed down and then it can spring back and be too close to the tip. Stay with 0.2 or 0.3mm layers in Cura slicing software early on (upgrade the software to current version). I think a feeler gauge is better than paper since paper can be compressed, fractions of a paper thickness can be the make or break it in successful prints. Home the head, set the bed just below it, disable the stepper motors from the Ender screen, then move the head around and begin to level the bed with the gauge. you can do the 4 corners only about an inch in or you can also check many other spots on the bed to ensure the bed is flat too with no cupping. • Prints can take a very long time so correct setup and first layer adhesion are so critical to success. • Cura defaults sometimes work and sometimes don't, but custom settings make for a much higher success rate of prints adhering to the bed. *** The first layer is absolutely the most important layer. *** If it is not perfect or near perfect then prints will most likely fail in many ways, lifting up at corners, shrinking, popping off, skipping, spaghetti mess etc. • Default print speed needs to be slowed down for the first layer. I am using as low as 15-20mm/s instead of the 30mm/s default. Go into preferences/settings/setting visibility and make some settings viewable in the custom window. 50mm/s is a decent normal print speed after initial layer. Top/bottom shell thicknesses can help add strength to many needed prints. • Experiment with infill. 20-50% is common unless 100% fill is needed for a solid. Higher than 50% doesn't really help much unless going full solid. • Supports do help but are not necessary for every part with small hangovers unless you require a flawless print versus a shop needed print. • Add a few extra lines for skirts to 5 which can aid in seeing any priming issues and early leveling issues. Brims are good for narrow and tall prints. Rafts can help with unique shaped prints for early layer adhesion and build. • Cura will remember the settings from the previous print so you don't have to start from scratch every time with settings. • When a print is done, Cura puts in the gcode that the steppers are disabled so you can move the head or bed, but don't move then around fast if they are not disabled. Print an extension for the spool filament from thingiverse, it will help to keep the filament at a better arc and out of the Z lead screw. Changing colors is simple, heat the tip up, then remove the filament and push in another color. The skirt/brim etc will prime the color so the part will be solid to the new color. A solid table surface is good, nothing flimsy or wobbly. Included spatula is excellent, sharp and removes prints very well. Buy some full 1kg spools of colors you like and also try some test colors which come in small loose spools about 50g. I printed a small spool to hold the test colors which helps while printing so filament can spin smoother. I am running the printer near non stop. I have many more dozens of things I want to print and just waiting to get through them all, at which point I'm sure to have added many more. Have fun and create. Plenty of free files for printing, millions are out there. Yeggi.com is a great 3D print file search engine, along with myminifactory.com and thingiverse.com
James Lee
Ender3 Pro = Nice upgrade.
This printer completely met my expectations. I had a bad first experience in the 3d printing world with the mendelmax2. It was just too finicky to get setup and printing properly. This thing though lives up to the hype. Largely pre-assembled except from the vertical elements. It really is very well thought out. If you have any experience with 3d printers, you'll find this simple. If you're not mechanically or electrically inclined, it will take you longer because you're surely being overly cautious. I got the pro version with the upgraded power supply and the cmagnet build surface/plate. My #1 complaint with my MM2 was bed leveling and print adhesion. It was like voodoo. But this cmagnet plate, printing PLA is a dream. Prints stick to it like glue and when they cool, they literally peel right off. Bed levelling can be a tad frustrating and as many have reported, there is some production issue with a plate that isn't perfectly flat. I suspect that has something to do with the way the y-carriage is attached below and causing a slight bow in the bed plate. I could be wrong, but that's my guess. Regardless of the cause, mine still prints very well with stock parts. Right out of the box. Just level the bed and start printing. I'm still in the tweaking phase but am very happy with the out-of-the-box results so far. As others have mentioned there are a couple of tiny quirks you want to address and print solutions for early on. -The z-axis coupling takes some fiddling to get it lined up right and not binding the leadscrew at the top. -The eccentric nuts that tighten the wheels around the printer need your attention to fully dial it in and remove any wobble. -some kind of filament guide/barrier needs to be printed early to keep the filament from rubbing against the leadscrew and getting grease on the filament. Also print the filament guide arm for attachment to the 2020 extrusion early. -search youtube for teaching tech's calibration video. It's a MUST to get your numbers for your printer and filament. Once you have those, you have a starting point to tweak from. This really is a phenominal printer for less than $300. I'm embarassed to tell you what I spent on it's predecesor which rarely worked right. I'm spending WAY more time printing and tweaking models and then printing some more. I can recommend this printer without hesitation.
Beatriz Madero
solid little Printer
I am a first time 3d printer owner, and this printer came highly recommended... and I have to admit while most of the problems I have had have been simply due to my lack of experience... I was frankly shocked by the lack of support from Creality. the magnetic mat is cool, but got scratched thanks to my improperly leveling the bed, I just wanted to order another one to replace it... so I sent an email to Creality Customer service. a day later I got a reply from Shirley Zhang saying "Thanks for your email. Sorry, we do not have replacement magnetic print beds for the Ender-3 pro." that is ALL she said.. no reference or suggestions just... 'nope.. we don't have them' I asked where I might be able to find a replacement part and Shirley wrote back saying "Thanks for your email. we provide one year warranty of the printer, if the parts are damaged when you received, you can contact us to solve it. but the factory does not provide extra replacement parts to sell on our website. please understand" so no, I do not understand... this company makes a product with parts that will easily wear out and you cannot buy a replacement... I will attempt to find a 3D printer company that stands behind their product. good bye Creality. UPDATE: changed to a 5 star for two reasons, first aside from the problem with the magnetic mat the printer has been fricking awesome and I want no misunderstanding I recommend the printer... second, when I reached out to Creality which is of course the brand of the printer and they refused to help I was appalled, however upon seeing this Comgrow reached out to me and is taking ownership of the situation. so thank you Comgrow!
Jenn Wilson
Great support from Comgrow
*Update. Take care putting it together and it will work. *Update. Comgrow support has bent over backwards to help make things right, so I'm going to up the rating a bit to 4 stars. Over two months in and I'm finally getting prints that are acceptable. To get there I've: 1. Printed Z axis stepper motor mount shims and added 4mm of additional paper shims. 2. Printed a Z axis bearing mount to stabilize the top of the work screw. 3. Replaced the extruder with an all metal version that Creality sells. Last week I contacted Comgrow support asking for help. I don't call support often. Usually you end up talking to a person who has no idea what they're talking about that has to relay every question to the mythical level 2 support, and this experience was typical. 48 hour turn arounds for answers to questions that have to be answered from China. After a few rounds, they gave up and offered a refund. Wasn't happening. I'd been working on this printer for two months and was not going to give up. In the end most of the issue was a really bad extruder design. Strangely enough, bad instructions from support pointed out the issues to me, and I finally figured out that the extruder had to be replaced. Once that was done the printer is printing beautifully. Going to install a BLTouch and upgrade the firmware over the holiday weekend and reverse some of the settings I've been using to compensate for the bad extruder. Great printer if you know what you're doing and understand how to adapt to the bad hardware. Z axis supports and the really bad extruder make that difficult. This printer does not work out of the box. It's going to take some effort and money to make it work.
Tonya Allen
Great Experience
UPDATE #2 - Comgrow sent me a new bed and it's perfect, I'm getting really high quality prints now. This is probably the best customer service experience I've ever received, the bed was shipped out QUICK and my problem was resolved very quickly. I'd highly recommend buying it here rather than anywhere else. UPDATE- comgrow reached out to me extremely quickly, less than a day and they are already sending me a replacement bed, updating my review to 4 stars because their customer service more than makes up for the issues I've experienced. Will change to 5 stars once I receive the new bed and it isn't warped. Original review- Was really hoping that since I purchased the pro version that the quality control would be much better overall from the manufacturer, since I am paying almost 100 bucks more for this model. But I quickly found out I was wrong. My bed is severely warped, and it's not even just in the middle like the regular ender 3s are experiencing. it's actually wavy, low on the left side, then higher 1 inch in, then lower in the center and then higher on the right side. Everything was loose on the pre built portions, I had to go through and tighten everything down again. Also the worm screw that controls the Z axis going up and down doesn't line up with the control arm, which causes it to bind really badly as it gets closer to the bottom. I I've tried to print 2 test dogs now that the printer has pre-loaded and it's downright laughable how badly it turned out... I really wanted to love this printer with all the people online talking about how great it is, and I went in knowing I'd have to tweak it a little. But these issues are beyond tweaking, this is just downright major repairs straight out of the box brand new...
JoAnna Wass
Excellent 3D Printer for the Money!
The Ender 3 Pro is a dynamite 3D printer. My first printer was an Artifex that cost me $1500 and can not turn out prints anywhere as good as the Ender. Once I got it assembled and calibrated I printed the test print dog that came on the SD card. Excellent print results! From there I have printed a number of upgrade parts (cable clips, extruder knob, and side mounting spool bracket). This is a workhorse of a printer! Assembly was made easier by watching a Youtube video by Tomb of 3D Printed Horrors. Refer to the video while building, and take your time. Once it is built nice and square, pull up the Ender 3 - Easy Way to Level Your Bed video from CHEP. Follow his instructions and you will be ready to print like a pro! Finally I would recommend you download a free copy of Cura. This program will take .STL models and slice them into g-code that your printer can use. PROS: low price, nice and stable design, active community with lots of upgrades to print or add on CONS: the mini SD card is a little fiddly to use, but that is a minor nuisance that can be upgraded away
MA RB HY
The Ender 3 Pro is an amazing 3D printer - Good value
This is my second 3D printer. The first one was a kit printer that took me about 5-6 hours to assemble. Once I had it built, it took me another 3 or 4 days until I had a decent print, and even then the quality was questionable. I spent the next two months buying parts and printing upgrades until I finally sold it to a friend who didn't want to build his own. When I got the Ender 3 Pro, I had it assembled in about an hour, following along with the Ender 3 assembly YouTube video by Tom Tullis. After one failed print (I didn't have the bed leveled properly), I starting seeing perfect prints. This printer is awesome. It "just works". After leveling the bed, the print quality is amazing. I have printed at .2mm and at .1mm quality and they both look fantastic. The layer lines are virtually invisible. I am running Amazon Basics Gray PLA (I'm having such good luck with that filament that I just ordered a 3 pack of white Amazon basics PLA) and it has perfect layer adhesion. All of my prints are solid and sturdy. I didn't know 3D prints were supposed to be sturdy because my first printer's prints were all delicate and fragile. I just thought that was a fact of 3D printing. I was wrong. These prints are solid (well, 20% solid, anyway) and durable. I highly recommend this printer to first time printer owners. Even though there's some assembly required (more than the CR-10 family), the community around this printer is incredible and the Facebook group has a lot of helpful members. The video that I mentioned above is really all you need to get started, but you can count on the Facebook group to help you if something doesn't quite work right. I haven't added any upgrades or printed any parts for my printer. It's printing perfectly as a stock printer. It even printed a ~36mm bridge without a noticeable sag. I did buy a Creality glass bed from Amazon, but I haven't installed it yet. I like the magnetic build surface and I'm not sure I want to lose it. There have been a few things that make me uncomfortable, but I've learned to work with them and they're not stopping me from printing or having a negative impact on my prints: 1) the X-Axis is uneven. I followed the instructions in the video to ensure that my X axis was level on both sides, but the screw holes on the printer that I got are just slightly off center. I have had to compensate by adjusting my bed higher on the left side and lower on the right side. That means that I have a tight screw and spring on the right side and a looser screw and spring on the left side. I think the only impact this has is that I need to level my bed more often than I might otherwise because the leveling screws on the left come loose. But, because the Ender 3 has large leveling knobs, it's very easy to level this bed. 2) Cura prints a line of filament vertically across the length of the build plate on the far left side. I accidentally let it start when my bed was leveled incorrectly and the nozzle dug into my build surface. I now have a permanent gouge in my build surface that holds plastic. It isn't affecting my prints, but it's not attractive. Don't expect to have a perfectly beautiful print bed for the lifetime of your printer. It's going to get marks on it. That's pretty much it. For the price, I don't think you can go wrong buying this printer. I certainly don't regret paying Amazon's price versus the overseas supplier (the shipping time for the other sellers was over one month). I paid the "get it now" tax and went with Amazon Prime shipping.
Missy Childers
Order a glass bed WITH your printer. Best printer for your money!
This is my first 3D printer ever. I'm a technician/ machinist for large format digital printers (5m wide). I have extensive knowledge of precise machine structuring and sorting out issues with huge machines for various printers but 3d printing was new to me. I decided on the ender 3 through Comgrow because of the fantastic customer support mentioned in reviews, my machine luckily had no issues other than a warped bed. This was the only issue I ran into. You can tell from unboxing and smooth assembly that the folks in charge of quality control are on point! A warped bed is not something to hold so much against quality control as I believe shipping had some to do with it. I made a reveiw video for friends interested and I've pointed them to Comgrow so they wont have any nightmares you may have seen going around. Be patient, and pay close attention to your first print! Level your bed,and check nuts and bolts occasionally use some hairspray or glue stick for build plate adhesion. Anyway after you receive this printer and assemble you will realize you received a good quality kit from a quality conscious distributor. All the vital parts for the frame are metal, aluminum extrusions are way better than plastic acrylic pieces, even the stepper motor brackets and carriages are metal everything is labeled and mapped out for you in a very clean cut way. The machine itself out of the box was mostly assembled, all the more tedious parts were already assembled for me just a matter of building it together, this is great for a first timer that is a hands on learner. Gaining a better straightforward understanding of this machine without headaches prepares the user for a more arduously skilled build as you've grown acquainted with the way the machine is SUPPOSED to work. The ender 3 in my opinion is a good machine for understanding how a good machine is supposed to work. Thanks Creality and Comgrow for making my experience pleasant. In fact, I will be ordering the Ender 5 in the next day or so of course from Comgrow. Good luck makers!