

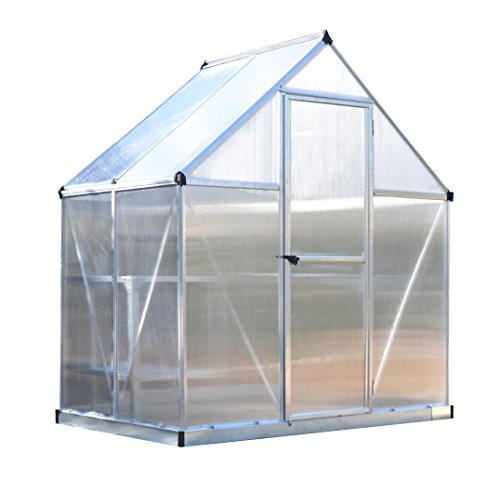
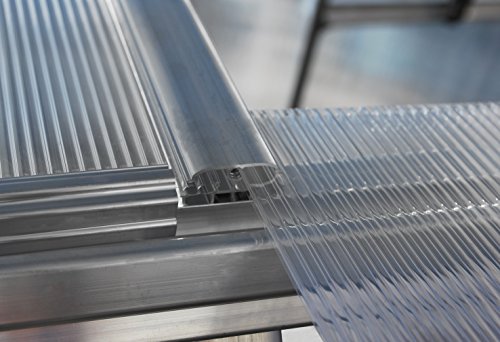
- 4mm twin wall roof and side panels - polycarbonate panels are virtually unbreakable and blocks 99.9% of harmful solar UV rays
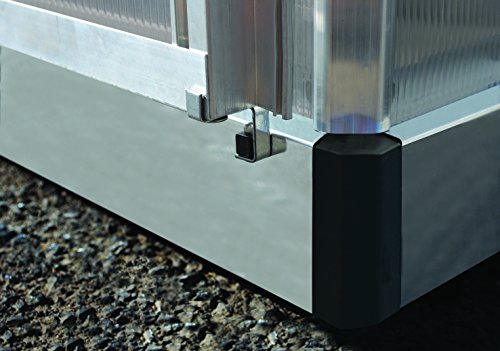
- Rust resistant aluminum frame powder coated green.
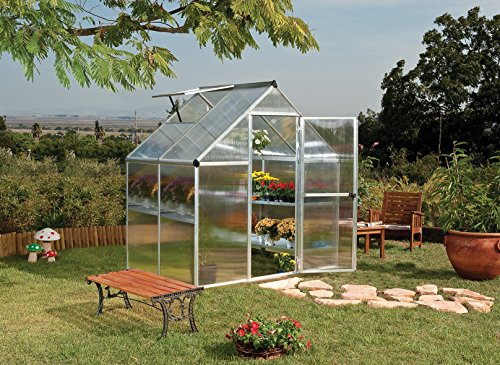
- 24 sq feet growing space and 6.5' of head room
- Includes adjustable roof vent, rain gutters, lockable door handle and galvanized steel base
- 10 plant hangers included which can be used to support vine crops, hanging baskets or used to install shade cloth to the inside frame of the greenhouse
- Snow load: 15.4 pounds per square foot
-
Information
-
Twitter
-
Pinterest
-
Youtube
-
Facebook
David Silver
Satisfied with this purchase!
Purchased this greenhouse in 2015. Installed on simple treated 2x6's set into the ground. Leveling them makes putting up the greenhouse go better. My husband put this greenhouse up alone in 2 days. Did most of the work one day and added a few finishing touches 2nd day. We rent so installation could not be any more permanent than that. It has done the job well though. We added 2 automatic vents on roof and one shutter vent at base on one side to give good ventilation. It has done well in all seasons in Buffalo, NY weather which can see some pretty substantial snows. No issues on it taking our weather, the winds, snow and warm summers. So far we have not added the extra anchor kit although we had planned on doing so. Greenhouse has been stable and have not had any issues. Bought some shelving units and added a couple of the heavy duty shelves designed for Palram. We are quite happy with our greenhouse. Been 3 years and no problems. The only issue I had was with the delivery people who refused to unload it without assistance. I am a small woman and was home alone. I had to run to a neighbor's house and ask the gentleman there for help. He was gracious enough to help me and he was able to get the boxes out of the truck. Thank goodness for kind neighbors.
Watonia Downing
Good product for the price.
I received the item in fair shape, the box had broken open on one end but there didn't appear to be anything obviously damaged. Upon opening this it was quite an intimidating pile of parts. After perusing the instruction manual I laid down 4 2x6x8's and assembled the base of the greenhouse. Not trusting to manufacturer measurements I then pulled the lumber out and cut to length. I leveled and squared the base of the greenhouse then bolted it directly to the 2x6x8's. Easy start. Then the long assembly began. I assembled this alone with the recommended tools as well as a 10mm socket wrench, a flat tip screw driver and a step stool. The instructions were clearly illustrated and easy to follow. The only difficulty came when I discovered a piece was missing about halfway through assembly. There are two supports at the join for the roof beam, one above and one below it. Unfortunately the upper one was missing. Fortunately it was easy to manufacture a replacement with a piece of angle aluminum and a dremel tool. After that its just bolt after bolt. The panels were not exactly what I anticipated but they function quite well. A couple of the ones I received were damaged on one edge but that did not stop them from slotting into the frame and once they did so there was no damage visible so I assume they were within manufacturers tolerance. As you get to the end you appreciate that this thing was level and square, I can't imagine how much harder it would be to line up the parts if it was not started out that way. All in all its a good looking greenhouse, it was not difficult to assemble just time consuming. It took me approximately 14 hours to assemble. I would say it was a good value for the money and most importantly my wife loves it.
Yhumie Arevalo Chavez
Great greenhouse
Recieved greenhouse in March 2015. Prepared a level site to place greenhouse in April, I'm 54 and put it up by myself on a sunny, calm day. It took about 7 hours. Very pleased with it. I planned on using it over winter months so I did a lot of extras, I caulked all seams along frame. I also dug 3 ft slots around foundation and buried foam boards in those slots. This was to help with more insulation to keep ground freezing from creeping under. I added some foam strips along door to also aid in insulating for winter months. I have used the greenhouse very heavily thru all the seasons now. Spring for vegie garden seedlings, summer for house plants and flower gardens, fall for herbs and wedding flowers for a September 20th wedding, winter is here and I left a few herbs in to see how they would do. At this time I have Parsley, thyme, rosemary in it and they are doing very well. I plan to add a heater for next winter to grow more delicate greens. We just had our first snowstorm, 31 inches. I live in York County, PA. I was surprised to see that the snow never accumulated more than 3 inches at the most on the roof. The warmness inside kept it melting off which was great, I was worried I would have to clear off snow but never had to. See attached pix. The building behind greenhouse is henhouse and goose house, the snow was so deep we had to clear it off their roofs. I love the auto window opener. It works great. I also added a louver in back side to add more air flow over summer months and a misting unit with a timer I attached to shelves. I used regular garden hoses to attach to rain gutters and ran them in to 5 gal. bucket to collect water. I had cinder blocks that I turned on their side then used 2 x 4s to put on them for shelves. I am very happy with this greenhouse.
Hurraam Khan
Keeping your Greenhouse cool and This greenhouse made it through severe weather, high winds and large hail with no damage!
This isn't a review but an answer to a question that was asked by Amazon regarding adding another vent because of heat inside the greenhouse in the summer. I don't believe you can add an extra vent. What id did was purchased from Amazon a RoadPro RP8000 10" Indoor/Outdoor Dual Power Fan ($27.57), a ACOPOWER HY015-12P 15 Watts Poly Solar Panel for 12 Volts Battery Charging ($41.31) and a CUZEC 13.1FT / 4m 16 AWG Extension Cord Plug Socket with Battery Clamp 12V/ 24V Battery Clip-On and Cigarette Lighter Adapter ($12.99). I used large paper clips and a plastic zip tie to attach to the handle the fan to the green house door with the fan facing outward to push the hot air out of the top of the green house. I threaded the wire from the fan thru the opening of the palram plant hanger and inserted the hanger into the door frame to keep the fan from moving around when its blowing air. The paper clips allow you to slide the fan out of the way when you are going in and out of the greenhouse. I then plugged the fan into the cigarette adapter and attached the 2 alligator clips to the wires coming out of the back of the solar panel. I placed the solar panel on the south side of the green house tilted toward the noon day sun. The fan will come on in the morning when the sun hits the solar panel and shut off at night when the sun sets. it keeps the greenhouse 10 to 20 degrees cooler than it would without the fan blowing the hot air out. You can also turn the fan facing inwards if you want to use the breeze it creates to help with pollination of plants you might have growing in the greenhouse like tomatoes or peppers. I have attached some photos so you can see what i'm rambling on about. Lol It really does keep the temperature inside the green house from being much more than 6 degrees or so above the outside temp. Hope this is helpful One more thing i'd like to tell. We had severe weather with tornados large hail damaging winds here in northwest Iowa on June 29 2017. Our vehicles suffered close to $20,000 in hail damage. The roof to our compositions shed has holes golf ball sized holes in it. Everyones roof in the area had to be replaced, but my Palram Mythos green house doesn't show any sign of damage. No damage to the polycarbonate panels or the structure. The winds were well over 75 miles an hour with a tornado spotted less that a mile from where I live. This is one tough little greenhouse and the fan and the the solar panel also were undamaged even though the door to the greenhouse was open during the storm and the fan still works as does the solar panel.
Skippy El
something like "front view"
Putting this together....it'll drive you nuts! Palmram, would it kill ya to put SOME words in your assembly instructions, nothing spectacular, something like "front view" ? That being said, I live in Colorado Springs, where the weather is not so friendly to plants. Since I put this green house up in May of this year, it has weathered a hail storm that dumped one foot of pea-sized hail and a second hail storm that dumped quarter sized hail for 40 solid minutes! The hail was so bad I had to get my entire house roof replaced, a car windshield replaced, windows and a door replaced, the hail damaged some of the aluminum on the green house and caused some divots in the roof but it is still fully functional! It has also survived a few incidents of red flag winds! I placed a Velcro screen on the entrance and haven't seen any wildlife even close to it. I also went to the hardware store and got some things to keep the doors open in the strongest of winds (which I will include). Every plant (peppers, eggplants and tomatoes) in this thing is HUGE! Tomato plants are over six foot high and three feet wide. LOVE THIS THING!
Sohail Imdad
6 X 8 X 7 Palram Greenhouse is a Winner So Far
I have just finished construction of my 6 X 8 X 7 Palram Nature Series Mythos Greenhouse. It took about 6 to 8 hours working by myself. I am very happy with the result although time will tell if it is as sturdy and useable as it appears to be. I have a number of observations about the construction based on what I read in other reviews. I will add information about the function of the greenhouse after I have used it for a while. 1) Building the greenhouse using only pictures and no text in the assembly instructions is not as difficult as it might seem, although there were a couple of places where I would have welcomed some explanatory text. This was especially true from pages 28 to 34, creation of the triangular windows in the front and back. Fitting them precisely is very important. Providing verbal hints for framing them and keeping the parts together would have saved me some time. This part of the construction was the most difficult, but I did manage it. There is one typo on page 28, where the window is identified as part 581 but the construction clearly shows it is part 588. 2) Although two people doing the work will speed up construction, there is no place where two people are required. One person can do it successfully. 3) A great deal of time can be saved by placing the metal pieces in numerical order on a table or on another dry surface. Then, when piece 996 is required, you can pick it up instantly and not have to shuffle through all the other pieces to find it. It would not hurt at all if this was verbally stated at the beginning of the assembly instructions. 4) There are a few places where connecting pieces was very difficult. This was especially true of the long pieces that must be screwed together to make the frame of the door on page 56. Two long pieces must be pushed onto 1 very short piece that is screwed to connect them. A hammer and plenty of WD40 were required. 5) I built the greenhouse on a deck, so it was nice and level. You should not start this project unless you have a level surface. 6) The plastic finishing pieces are a nice final touch but pieces 343 at each end of the tie beam at the top on page 63 should probably be glued to the tie beam. 7) You should definitely get the Auto Vent Kit. It works well and will save your plants on very hot days. All in all I am happy with my purchase and look forward to starting seeds much earlier and keeping plants much longer.
Cory D Young
Fantastic little greenhouse!!!
I am so glad that I researched all of the greenhouses. Even though they all look similar...they are NOT. The Palram is the better quality greenhouse. It arrived in two boxes. My husband and I put this together over a two day period. The directions are somewhat hard to understand. Like 56 pages. There are pictures but no writing. Like a lot of items we've had to assemble, this one came in tons of pieces, both large and small, and some of the parts were not numbered. No parts were missing. I recommend that you lay everything out and pre read the directions, then re read them at the time of assembly. There is no flooring included, so you will need to figure something out. We got a load of gravel because I knew it would be high humidity and wet due to all the watering of the plants. We assembled the walls on the first day and the roof on the second day. On the very first night of completion, we had a high wind advisory and when we woke up, it had scooted about a foot across the gravel. We had planned on staking it down combined with strapping steel cable over the top, but had no idea we would need it the first night. Since then, we've added custom built benches, have screwed everything down, and staked it down with steel cables. Nice and sturdy now. We have had several high winds since it has been assembled with no problems. We haven't had any hail yet, but the plastic panels are bouncy, as if the hail could bounce right off and not harm them. There is something I did to keep the windows from rattling and possibly coming loose in a thunderstorm. I duct taped the perimeters of each twin wall panel, both inside and outside. Not only does it act as a caulking(waterproofing it), it is also very quiet now. When it pours the rain, the greenhouse does not leak. I don't know if it would have leaked or not without the tape, I just couldn't stand the rattling sound. I warn you that it will take two, possibly three people to assemble this greenhouse. The whole time we were putting it up, we kept saying how cheaply made it was and how we wanted to quit putting it together and return it for a refund so we could try to build one ourselves using wood, but once it was complete, it turned out to be very strong, and we both agreed that it had to be totally assembled before we could really appreciate it. I've been planting seeds since Feb 25, and am having 100% success rates with seedlings. I do not have a green thumb, and I've never owned a greenhouse before, but I feel like a pro already. This greenhouse will save you money and give you something creative to do... planting seeds and tending to them. It keeps me busy. One thing I have learned is that greenhouses do not stay warm overnight in cold temps. We put ours up in early February and have a little heater in there for the cold nights. Of course, during the days, it has been a learning game for me. Depending on sunshine and outside temps, my greenhouse has been up to 115 and down to 60 during the day. I bought the available shade kit and the available plant hangers. I also bought the Auto Vent Kit for the window, but sent it back because the one that comes with the greenhouse works much better. We built wrap around two tiered wood benches and I plan to use the greenhouse for storage during the winter months. Good luck to you all. I highly recommend this greenhouse. And remember, the smaller the greenhouse, the less your energy bill will be when you need to run a heater. I love my Palram Mythos 6x8 Greenhouse!!!!! Update: Well, we've had this greenhouse exactly one year and it is still as strong as it was the day we assembled it. The duct tape that is on the inside is still intact, however, the weather caused the duct tape on the outside of the panels to fray. I am gladly replacing the duct tape with flex seal spray in clear or another similar caulking. I just love this greenhouse. In the period of one year, we had snow, rain, high winds, many severe thunderstorms with hail with absolutely no damage to the panels. No leaking either. The door has remained strong on its hinges. It is still straight and the latch is still intact. The vent window is still straight and the vent arm is still strong. Update #2: March 2015. Its now going into my 3rd year/season with this greenhouse and it hasn't changed a bit since the day we put it together. We've had some severe snow storms. 10 inches in one downfall a few weeks ago. Last year,during a bad storm with gale winds, the worst that happened was the little window atop blew off. It was simple to put back on, as it fits on a hinge. I added insurance on the greenhouse for a few dollars a month, it is now insured up to 900.00 for any damages excluding wind. I've already had my seeds growing for a month. Still loving this greenhouse. Still recommend it. Update #3: February 2017. Its now going into my 5th year/season with this greenhouse and it is still fully intact. Nothing has changed. The original duct tape I placed around the plastic panels had decayed so I used the new gorilla duct tape that is available. Should last much longer than original duct tape did. Still loving this greenhouse, and still recommend it. My uncle purchased a little greenhouse similar to ours and it already blew apart. He should have bought the Palram!!
Fiona Mullins
Palram Greenhouse
This product is cleverly engineered and the directions are easy to follow. It took me several days to do the complete project but only about one day to assemble the greenhouse by myself. First, you have to determine what the house is going to sit on--they recommend a concrete pad; however, that is impractical for most people. I used eight foot treated 4 x 4 posts cut down to the size I needed--two of them are 8' and the other two are 68" and 75". The shortest piece fits between the 8 footers and the longer one goes at the other end of them. This makes the total length of the post frame about 8'4" and 75" wide. The frame of the house mounts in the middle of the 4 x 4 posts. The ground was not level so I found lowest point of the location which happened to be the west post. I dug out the sod for the post and got it level and then dug in the east post and got it level with west post. Then it was just a matter of digging in and connecting the north and south posts. Since I was doing this by myself, I used 90 degree brackets to hold the posts together while I was putting the matting down and drilling holes for and pounding in the rebar. I had the house frame assembled and I laid it on the 4 x 4s to make sure they were square as well as level. I put the rebar in at opposing angles so that the wind cannot pull the base loose. I used a wheelbarrow to haul the 1200 pounds of rocks from my truck in the front yard to the back yard where the greenhouse is located. I put down a 3 inch layer so that the inside of the greenhouse does not become a mud pit from watering. The greenhouse is well designed and although it appears flimsy during construction, it is pretty solid once it is put together. I ran into a single problem with a bolt that would not align up and I don't know why. Something must have shifted because all of a sudden it went together OK. The door was a minor problem as the hinges do not allow for adjustment. The door sagged a bit because of the way it is constructed which caused it not to open/close properly. I used safety wire and made a diagonal brace that solved the problem. I kept catching my toe exiting the building so I got my table saw out and out of three 2 x 4s, I made a little ramp which I painted red. It was a pretty good step down so I went to Home Depot where I found a 16 x 16 x 4 cement slab which worked perfectly as a stepping stone. The shelving is made with old 2 x 4s I had on hand and I bought some 6' treated fence pickets that I cut up for the top. I then covered them with plastic to protect them from water. Looking at the side view of the house, you will see a blue box on the inside which is an electrical plug box. I cut the end off of a heavy duty extension cord, drilled a hole through the 4 x 4 and ran the cord up to the box. When our limited cold weather in San Antonio sets in, I will run an extension cord out to the house and plug in a space heater on the inside. I caulked around the base as that appeared to be where the majority of air leakage might occur. I intend to keep my wife's outdoor plants in the greenhouse from mid November to the first of March. I also will be starting my garden plants from seed and I am going to try growing tomatoes year round. I will attempt to add some pictures so what I've said above may be easier to understand.
Yvonne Hines
Sturdy. Attractive. Well-designed.
I had my doubts. I was especially doubtful when it arrived and I saw all the pieces along with an instructional manual with no words, just pictures. Actually, that worked out pretty well. I don't like instruction manuals anyway. My wife and I spent about one full day putting this together. It has a lot of pieces but is well-engineered. This greenhouse (6X8) is a well-designed, sturdy, attractive piece of work. The door works very well with a latch and a magnet to keep it open or closed. The vent hatch is sweet (gets really hot in the sun). I built two 7' 10" wooden work benches inside to use for my seedling trays. It has rained twice in two days and this unit is tight. A couple of recommendations (hints) - these are included in the instructions but they bear repeating: * Don't tighten the bolts until you are done - you will need the slack. * If something doesn't seem to fit - don't force it. Step back and look more closely - you may find you made a mistake. * Most of the part numbers are embossed on the pieces but not all. Also note that 996 is also 669 upside down * If you don't love your partner or lack patience, I do not recommend building this together * If you have a few pieces left over, I did too. Hopefully they are extras. I recommend this unit for the price. I am 6'3" and can stand upright in the center of it - better yet, I bought a little wooden stool. Feb. 2014 - this greenhouse has now withstood several high-wind storms (winds in excess of 50 mph with gusts 70 mph) and four feet of snow this winter! It is amazing. No a problem in any way - delighted with this purchase.
Thet Myat
Ingenious design but first impressions were scary
I bought this a year ago but when I opened the package I was horrified by the number of parts and how flimsy it seemed to be. For various reasons I put of putting it together until recently. Several times I was tempted to just abandon it and maybe cannabalize the parts and make a cold frame. But I persisted. It's very windy here on the plains and during construction I reinforced the uprights with steel fence posts, horizontally with steel conduit and wired the "glass" in place. As I progressed the greenhouse became remarkably rigid. I was really impressed with the ingenious use of the extruded aluminum frame and the captive bolts. I often thought that the illustrations just did not make sense but then "ahaha" it all fell into place. I plan on leaving the steel fence Post supports in place, have used sheet metal screws to secure the panels and have used ground anchors and tie-downs. Belt and suspenders! Our average high wind here is 25 mph do we will see how it fares.