
- 【DOT Certification】 DOT 1202 SAE. All ISSYAUTO 3rd Brake Lights are DOT Certified
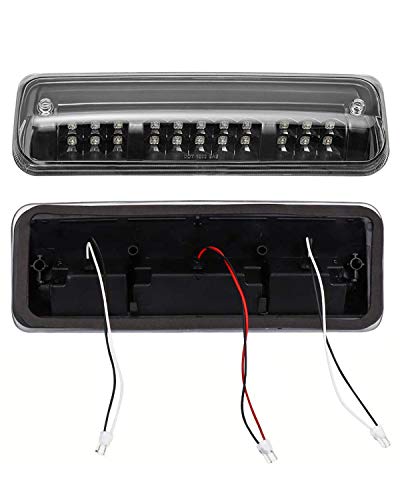
- 【Direct OEM Fits】2004-2008 F150 and Explorer ( This light has 3 plugs, not fits one plug models). For a better fit, it is recommended to use factory screws.
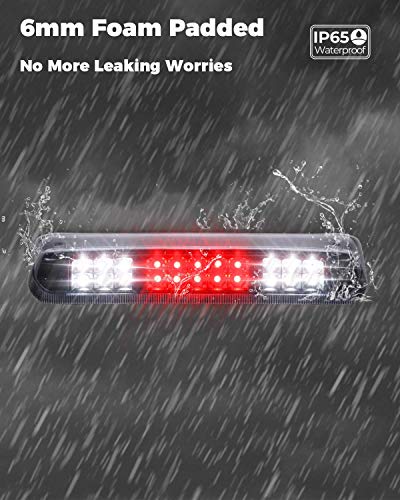
- 【IP65 Waterproof】6mm foam padded prevents water from leaking in. Make sure this third brake light will work perfectly in all weather.
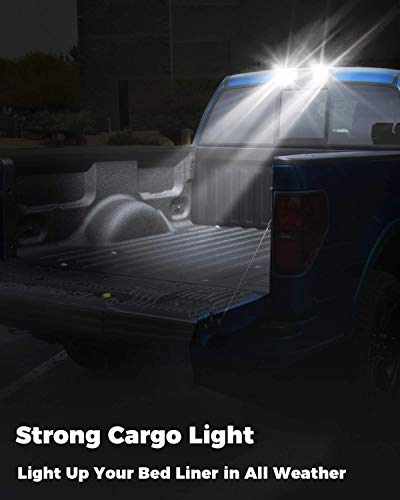
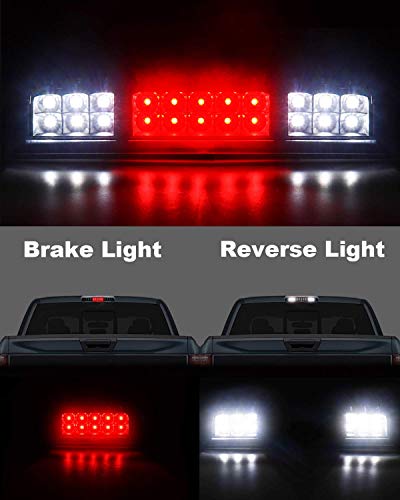
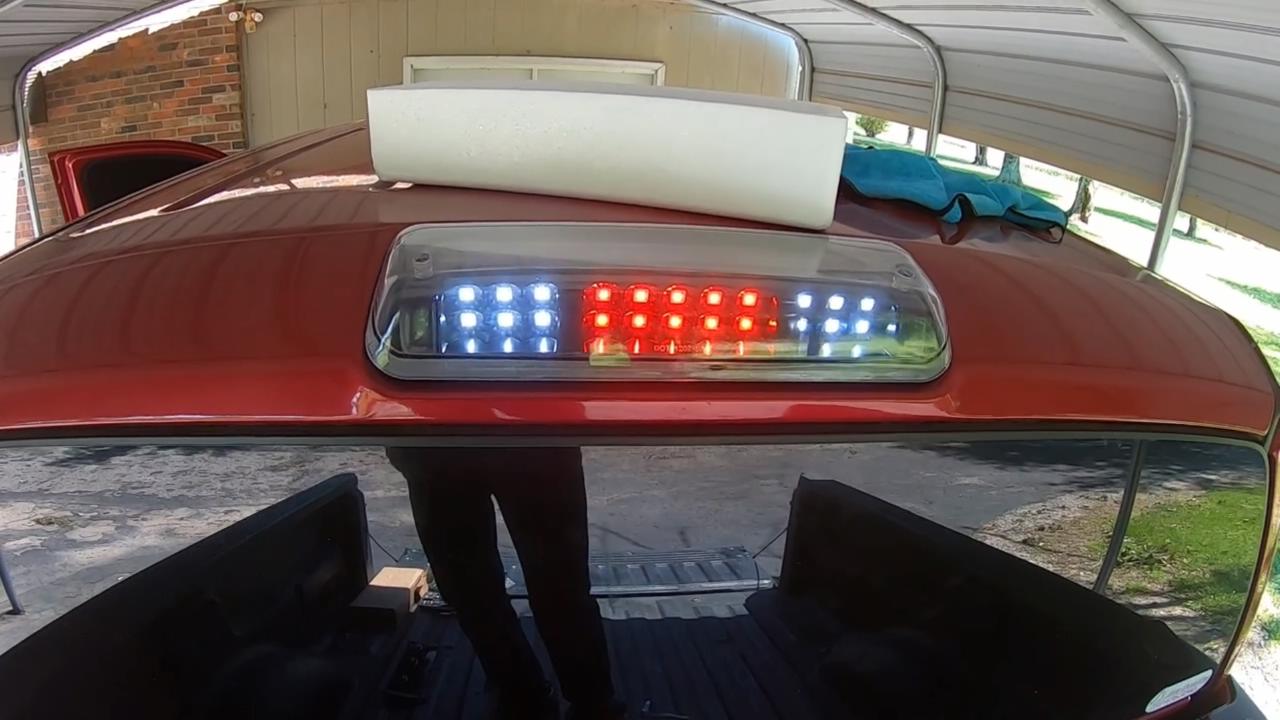
- 【Super Bright LEDs】Full LED light source for a great indication of brake and reverse to enhance driving safety. (10 LED for Brake and Reverse, 12 LED for Cargo Light)
- 【Durable Construction】Superior ABS Heavy-duty housings, ensure a great Impact resistance.
-
Information
-
Twitter
-
Pinterest
-
Youtube
-
Facebook
Melonie Moore
Looks great and works well if you install correctly!
Like many of you, I had a leaky third brake light in my 2010 F-150 Platinum. The rear section of headliner was consistently drenched and it was necessary to replace the lamp assembly. This one fit the bill and it turned out great. After reading the reviews, I figured I could help clear up some things. First off, the STOCK brake light assembly has three bulbs...note I said BULBS. The two outer bulbs (left and right) provide the light for the two outer cargo lights. The third, and center bulb, provides the light for the (red) center brake light. The way this connects to the stock wiring is easy. This unit has male end “plugs” shaped like the base of regular bulbs. You’ll plug those into the truck’s wiring sockets. You’ll remove the stock bulbs, one at a time (see below) and just plug the new unit’s male end into the bulb socket. Instead of bulbs in their sockets, this unit plugs in each socket to get the power...much like you do with miniature Christmas lights. When you go to swap out your stock light for this one, sloooow down and swap the wires one at a time. The NEW brake lamp has two leads that come out of it, with plugs that are in the shape of bulb bases. They just insert into the truck’s bulb sockets. That gives the new brake lamp it’s power. No need to cut and splice wires, use crimpers, etc. Just “plug” the new unit’s plugs into the truck’s “light sockets”. NOTE! This unit uses LED LAMPS. It does not have individual bulbs but rather one white LED strip and one red LED strip. So it stands to reason that you only need TWO connections: the socket that originally powered the third brake lamp bulb (center, red), will mate up to the CENTER (male) plug on this unit. (Makes sense, right?). But what about the truck’s two remaining wires, one on the left and one on the right? (These powered the two outer bulbs for the white cargo lamps). If you look at this brake light, you’ll see a wire/male plug that comes out of the right (passenger) side. Insert that plug into the truck’s RIGHT (female) socket. That leaves a bulb still hanging on the left (driver’s) side. Just remove the bulb and insert & twist that empty bulb socket into the left opening on the new brake lamp unit and you’re all wired up! That socket will be empty and held in place there in the brake lamp housing. Twist the other two connectors into the new brake lamp housing cutouts (sockets) just as they were when you removed the old one. Now check your connections. When you open the door or turn on the cargo light, the white LED strip should illuminate. When the brake pedal is depressed, you get the red LED strip. Again, the key is to remove one connection at a time and “match it” with the new unit. NOTE: This unit is NOT intended to be used as a reverse light. These trucks are not wired to use the cab (cargo) light as reverse lights. Reverse lights are located in the tail light assemblies. If you want this brake light white LED light to go in when reverse gear is selected, you’ll have to wire that up yourself. As far as the installation goes, note many people have broken their lamp assembly by over-torquing the screws. A couple notes here: - the screws that come with this lamp are NOT meant to be used to Install the light on the truck. They are machine screws, with nuts, and are just there to hold the lamp together in the box. Remove those screws and nuts and discard them. Likewise, when you remove the stock screws when you remove the stock lamp, KEEP THEM. They are sheet metal screws and necessary for re-installation. - Plastic is not meant to be “torqued down” under excessive pressure. Just “snug” them down. If you crank on them, you WILL break the plastic. - Yes, the gasket is thicker than stock. That’s because the thin oem gasket is the source of the problem with getting water inside the truck. Ford’s new gasket is thicker also. As such, yes, this new lamp will “stick out” from the truck further. It’s minimal, though. It doesn’t look bad and it’s par for the course to keep water out. After installation, do one last check of both the red and white lamps before proceeding to the next step. Here’s what I did to keep it fully water right. I bought some 100% silicone for my caulk gun. For my black truck, I bought black silicone. After removing the stock lamp, fully clean the area that was under the gasket and allow it to dry. I then applied a small bead onto the face of the gasket, which meets the surface of the truck. Slowly and carefully apply the lamp to the truck, making sure the round plastic protrusions go into the holes near the screw plates, allowing the gasket to fully mate against the truck. Silicone will squeeze out from under the gasket. That’s fine. Next, I squirted a little silicone into the screw holes so the screws and holes would be sealed. Now carefully insert the stock sheet metal screws into the holes and snug each one up. Again, you’re not going to crank on the screws, just snug them up. The gasket (and here, the silicone as well) will maintain a good seal. Lastly, I applied silicone around the perimeter of the installed lamp. Just enough to fill the gap! Use your finger to slowly smooth it out, all the way around. Don’t use too much and don’t get OCD on smoothing it out, because as it begins to dry, it won’t smooth well. Now let it dry. Don’t forget to apply some silicone around your satellite radio antennna on the roof as well! That’s a known source of leaking on these trucks.
Sheetal Barchha
As described.
It’s a nice piece but it’s not 5* worthy only because the foam gasket leaves almost a 1/4” gap between the housing and my body(Look at pics) I might have to figure out how to nicely fix that so it doesn’t leak and may hard wire the wires. 1/12 updated pictures. You can see the bad gap and ever. You can see the Stain lines that my stock brake light fixed because this doesn’t sit flush. Update: well after some research I’ve come up with that fords uodated the gasket with this style thick gasket. I live in Chicago and we had some rain and snow and no signs of leaking. I will up my rating to five stars. Thanks.
Kim Blair-King
Great upgrade with strobe module
Easy install, added a strobe module gs100a. The unit flashes white lights when in hazard mode/lifts up white when you open the truck or lock it. I didn’t know how I felt about it but overtime I’ve grown to like it. Overall pretty slick with the strobe module that cost $6
Simon Balzan
Excellent unit. USE THE OEM SCREWS!
I bought the 'smoked' color - which is really a black-out type of color - but I'm certainly not complaining. It looks great, with very bright red and white LEDs (red for brake, white for reverse or when turning on the rear overhead light for illuminating the bed). The only CON I found was the crappy quality of the supplied screws. I didn't exactly torque it down really tight, but it snapped the chineseium screw in half quite easily. It was easy to extract with pliers and turning, but I'd advise anyone installing this unit to simply use the factory screws that came out of the old brake light assembly. Aside from that little adventure, this thing is sleek, does its job, and has the nice little gasket to prevent leaks. I'd recommend. I figured 5/5 stars was sufficient even though the supplied screws were crap. It's a small inconvenience and I almost used the OEM screws initially anyhow. So now you know! ;)
Mariyam Faisal
Sleek looking!
This replaced the leaking third brake light on my truck. Mine is a 2010 f150 super crew cab. The installation of this light was incredibly simple. There are two prongs with bent wires. They dont look like the will work until you actually undo your third brake light. I reused the screws from my OEM in place of the bolts they provided. As well I used a clear RTV silicon to fully seal it up and endure no water will ever enter my cab again. Now, this looks absolutely amazing on my truck. Truly it does! However, it is not flush with the truck, like the OEM was. It sticks out about half an inch but is only noticeable from the side if you really look. As well, because of the darkness of it, its provides almost no light. Overall I am extremely pleased with this purchase. It took less than 10 minutes to install!
Haley Engelskind
Perfect fit! NO more leaks!
i don't know why others are complaining the foam seal is too thick, i love it this thick, that means i know it is going to seal 100% and it did a great job. It looks amazing, tons of light in the cargo area now and most importantly, no more leaking when it rains bc the old seal was worn out! 2009 F150 XLT, Supercab 5.4L V8, 2wd my current build below to help others wade through the mass of options out there. everything i have is 5 Stars rating from me. Headlights: https://smile.amazon.com/gp/product/B06XHCQ8KY/ref=ppx_yo_dt_b_asin_title_o02_s01?ie=UTF8&psc=1 Turn Signals: https://smile.amazon.com/gp/product/B07D55BMHJ/ref=ppx_yo_dt_b_asin_title_o02_s01?ie=UTF8&psc=1 Marker Lights: https://smile.amazon.com/gp/product/B07GRVN7R6/ref=ppx_yo_dt_b_asin_title_o02_s01?ie=UTF8&psc=1 3rd Brake Light: https://smile.amazon.com/gp/product/B077TSG3RP/ref=ppx_yo_dt_b_asin_title_o09_s00?ie=UTF8&psc=1 License Plate Lights: https://smile.amazon.com/gp/product/B07NF9RRQW/ref=ppx_yo_dt_b_asin_title_o02_s01?ie=UTF8&psc=1 Grill: https://smile.amazon.com/gp/product/B07N82H4M5/ref=ppx_yo_dt_b_asin_title_o06_s00?ie=UTF8&psc=1 Towing Mirrors w/ Puddle Lights: https://smile.amazon.com/gp/product/B01CHWZE9U/ref=ppx_yo_dt_b_asin_title_o01_s00?ie=UTF8&psc=1 Interior Door handles: Driver - https://smile.amazon.com/gp/product/B019IQ2ZL8/ref=ppx_yo_dt_b_asin_title_o09_s00?ie=UTF8&psc=1 Passenger - https://smile.amazon.com/gp/product/B019IQ30HQ/ref=ppx_yo_dt_b_asin_title_o01_s00?ie=UTF8&psc=1 Exterior Door Handles: Driver w/ keyless entry - https://smile.amazon.com/gp/product/B004135JZS/ref=ppx_yo_dt_b_asin_title_o00_s02?ie=UTF8&psc=1 Passenger - https://smile.amazon.com/gp/product/B004131QEQ/ref=ppx_yo_dt_b_asin_title_o00_s02?
Dawn Johnson
easy to install
The product was as described. There are no instructions as others have said. If your buying parts for your vehicle you should have a slight clue how to use tools and have basic mechanical ability. That being said the install should only take a few minutes. Remove the screws that are in it and use the screws from the light on the truck. Hold the new LED light next to the OEM light after you have removed the screws. Look at how the bulbs are arranged right to left. Twist and remove the bulbs from the old fixture. Take the 3 bulbs out and put them in your pocket. Hold the new fixture in place. Check that the wire ends on the new fixture plugs are routed up over the end straight. Plug them in where you just took the bulbs out of. Line up the notches and twist lock back in place the same way you took them out. I replaced it because I saw water running behind the OEM light and I like LED lighting. A bit pricey for what it is, but easy install quick shipping overall good shopping experience. Looks good on the truck and should keep water out of the cab. I didn't silicone the new gasket or put any adhesive on it. It is plenty thick so tightened it down well. Don;t over tighten or you will break the plastic. Go even amounts side to side. I would buy again (shouldn't have to if it lasts ) for my 2013 F150 5.0L super crew XLT.
Michael Catuiza
Nice product
This product was very nice would definitely buy again ..as others stated gasket to seal light is very cheap almost fell off replaced with weatherstrip and no leaks whatsoever..these are very bright leds they match my recon taillights perfectly..and looks nicer than recons 3rd brake light..you do not have to tap ,splice ,or solder they are simple to plug in took 30 seconds ...screws that come with unit are not for mounting purposes..they are provided to keep the unit together discard and reuse oem screws..do not over torque just snug them up.. mine did not crack I snugged up with light duty screw gun I recommend useing Phillips screwdriver... but my oem screw head stripped so I used a 6 mm. Socket to snug up .would recommend for the price it can’t be beat you won’t be disappointed .. Update : 1 month later and about 20" of rain later no leaks or yellowing.. lights are nice and bright ...the foam weather strip i used to replace is super soft and comformative it compressed to cabs mount perfectly and compresses super thin thinnner than oem gaket or gasket that fell off. When product arrived..would recommend .
Jean Tang
fit as stated
Ordered this because when I purchased the truck it came with a busted light on the top and water was getting in. Ordered this and actually came with 2 gaskets not sure why used a new one and saved the other, Everything matched up just fine . connections were tight and used a pair of pliers to push together. Dosen't seem as bright as the standard orig. light.
Aaron Dunning
2007 F150, easy, bright, I like the look and all.
2007 F150 This is my wife’s amazon account FYI.... Nice bright, looks good. Gasket is fine, no need to worry of that. Use the original hardware. The only thing I had trouble with was connecting the wires to the trucks end. It seemed to be that the connectors on the lights end we’re a little to big. So as you see in the video, what I did was use a pair pliers to gently squeeze the ends so they would fit into the socket. Then after that I wrapped with some electrical tape just as an added measure to make sure they stayed in place. Overall I am completely satisfied with this and now looking to change my tail lights.