


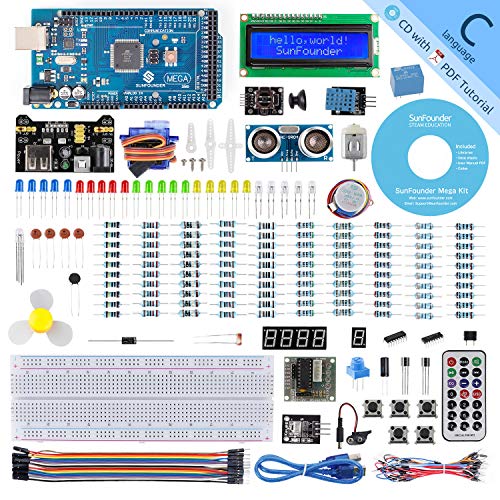
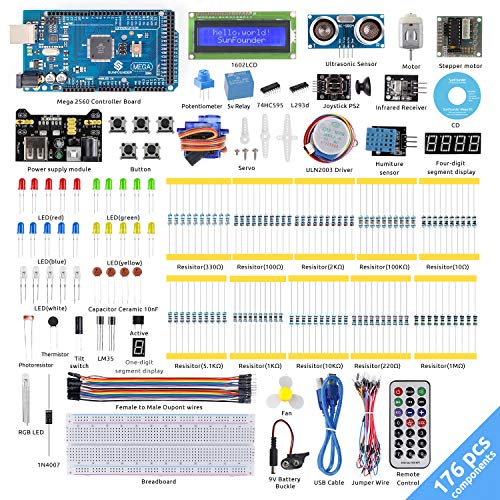
- Super Kit and Affordable Price - This is a complete arduino mega 2560 kit with more than 200pcs components for learners, the most economical way to learn Arduino, electronics and programming with the good price.
- Detailed Instructions - With detailed pdf tutorial in the CD, you can learn to code and program faster and easier with all the components.
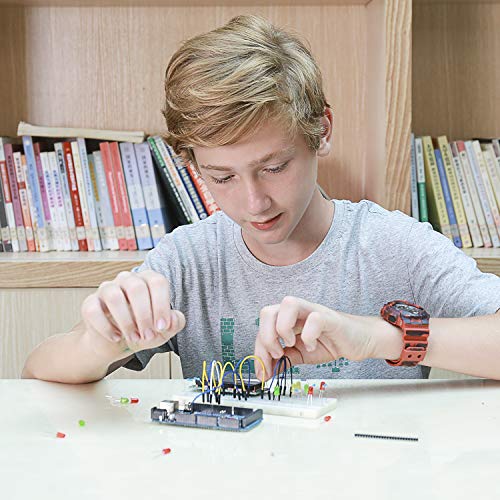
- 25 Projects Provided - As an upgraded Starter kit for arduino mega ,more than 20 interesting lessons are included. Allowing for a dynamic creative learning experience.
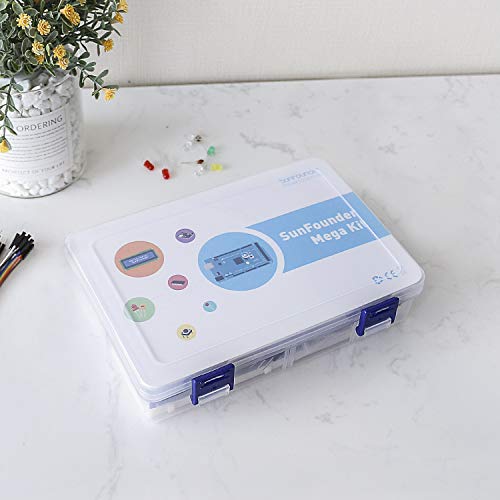
- Excellent package - A nice plastic packaging box is included for easy and neat storage, being a surprise when you receiving the product.
- Professonal Support - Sunfounder customer service team are always willing to solve any question from our customers, please refer to the URL and after-sales service email on the CD if you have any question, it will ultimately aid us in continually improving our products and services.
-
Information
-
Twitter
-
Pinterest
-
Youtube
-
Facebook
Vicki Boo
Great quality and value
Great quality and value. I needed about a dozen analog pins and three dozen digital pins, so this was really my best option. No issues with compatibility at all. Works great. Just be mindful that you need a USB-B plug for this. Definitely one of my better purchases. 6/5 stars.
Vincent Neron
Super is the right word
This is a deluxe kind of kit! I knew basically nothing about these, but purchased it for a family member who wanted to get started with programmable electronics. Turned out to be just the thing. The components are high quality and it is full of top shelf accessories to give great enjoyment to a beginner who wants to go straight to the good stuff. Instructions were clear, though one tiny quibble is that they don't describe well what the components do. But Google is your friend there, so it isn't a big deal. Very well-received gift. Spend the extra money to get this nice kit!
Shaun Jackson
Great family project!
Great product. We've had fun with it all weekend and will continue. What was going to be a father-son project piqued my interest as well and has no become a full family endeavor. I highly recommend it. We're just getting started so we don't know much about it but the included projects are great for starting out. There is some level of troubleshooting though- it's not perfect. The Fritzing software is fantastic, however some of the diagrams are not the best. The book is kind of worthless when it comes to it, but use the software and you should manage. The videos are nice but mostly out of focus so it doesn't give you the full effect.
Caleb Rawlins
Great case for the price
My RobotDyn Mega 2560 clone fits in this case perfectly, however the reset button on the board is not in the location where the reset button is on the case. That's okay though because once you add a shield to the board you can't get at the reset buttons anyway, no matter where they might be located. I didn't realize until after I got my Mega 2560 board that it has no mounting holes so a case like this is necessary. The case has ears for mounting it to something else, so it's a necessary accessory for the Mega board. As for the assembly, I used an X-Acto knife to peel the protective paper off - every workbench should have an X-Acto knife! Assembly was much simpler than many other laser-cut boxes I've built before, and the tolerances are perfectly correct, so the pieces don't wobble around as you're putting it together. I'm only giving it four stars because of the reset button issue. Followup: Another great feature of this enclosure is the top fits so that the Mega 2650 sockets are flush with the top, which is important when using shields. Other 2650 cases have raised tops so that the sockets are recessed within the enclosure making it difficult, or impossible, to plug a shield board in properly.
Christopher Fawcett
I used a small razor blade to peel it up on a corner then it peeled off rather easily. Overall this is a great product to protec
As others have mentioned in their reviews, this comes with a brown paper adhered to the acrylic which has to be removed. This is to keep the crystal clear acrylic from getting scratched during manufacturing and shipping and comes from the acrylic manufacturer. I would suggest removing the paper before assembling this because it is VERY difficult yo do once assembled. I used a small razor blade to peel it up on a corner then it peeled off rather easily. Overall this is a great product to protect your Arduino Mega 2560, weather it is sitting on your bench while working with it, or as part of the final assembly for your project.
Bhawna Masson
Great little case for the Mega
Great little case for the Mega. I keep a mega on my work bench with tons of other stuff, so I was looking for something to protect from a falling screwdriver or a DVM probe accidentally shorting it out while working on it. Case is pretty easy to put together (hint take off the protective paper first then assemble). Gives you access to all the I/O pins including the SPI interface. Doesn't prevent you from installing shields or use the rest button. Liked it enough to get one for my Pi as well. Great case
Kayla Clardy
Works as Advertised - Fits Elegoo Mega2560 R3 Perfectly
As many people start with, I too was a little concerned after reading the reviews. When I first opened the box, I immediately saw why someone thought it was not clear. The protective paper on the acrylic glass was shipped on the parts. This is to protect it from scratching during shipment. You need to peel off the paper before you assemble it. Secondly, the case is VERY snug to the 2560 and it took me about 20 minutes to adjust the connectors so that they fit through the cutouts. As you can see in the pictures, everything aligns perfectly. You can't "gorilla torque" the screws because you will snap the case. A little care and patience putting the case together will provide your Mega2560 years of stylish protection.
Malcolm Glover
Good value board
I have been using this board to control an automation system running 16 relays off of a rtc and several inputs for data logging. Also using the I2C to use with a tft screen. A couple months and so far so good. Good quality and a good price.
Deepika Gurung
Assembly a little tricky, but nice result
What you get: eight pieces of transparent plastic (Lucite? acrylic?), 8 small machine screws, 4 standoffs. Peel off the protective paper backing from each piece and dig in. Don't overlook the two very tiny pieces. One is a standoff and the other extends the Reset button. First minor hitch: I had to file down one of the alignment tabs on the back end piece: it wouldn't clear the Elegoo MEGA2560 PC board. Once that was done, everything fit together. I suggest you check each piece for fit before assembly. Also: I suggest you skip ahead and install the four standoffs and four screws to the top panel. You have to do that panel first to hold those two TINY pieces of plastic in place. Place the top panel top-down on a non-scratching surface and start in. The standoffs will help hold the sides while you finish up assembly with the bottom surface. The clearance cuts in the top panel fit very tightly around the peripheral headers. You may have to rock your Arduino board or clone VERY GENTLY from side to side to get them to fit flush. "Flush" is essential. Otherwise, the case will be distorted when you add the bottom and shields may not connect properly. After the board is fitted to the top, install the sides, noting that they have little "ears" that must fit against the top edge. Squeeze the front and back ends in place, affix the bottom side and -- eventually -- you should have a really nice looking case that holds the board securely with no play and no rattle. There is an instruction sheet with the obligatory number call-outs and arrows. But I definitely recommend starting with steps 9 & 10 on the top panel. The photo shows my SparkFun MIDI shield connected through the case to my Elegoo MEGA2560. Pin-out matched and the case doesn't interfere with access to the shield. Running Brendan Clarke's sequencer sketch as I write this. PRO: protects your Arduino MEGA2560 or clone from being shorted out by stray jumper wire ends: a big plus. Looks nice and "professional" when assembled. Shields connect with no problems, if you assemble correctly with headers flush with the case top. CON: not a big deal, but I did have to take a small metal file to one alignment tab on the bottom end. Everything else fit. The machine screws must by #6 or even #4. Can't count how many times I dropped them during assembly. But then, I'm no longer young. Holding the side and end pieces to the top while affixing the bottom takes both hands; you must be cautious not to let the board headers get out of alignment at this stage. Just take it slow and pay attention to all side and end pieces.
Walt Cosby
Excellent beginner Arduino kit
The best kit I've seen so far. Very well documented with the included DVD that contain detailed instructions to setup the board. The kit came with many accessories to constructs many projects. Each project came with very detailed step-by-step instructions. Each project explains key interfaces. Once you're done with all projects you should be able to build a very complicated project using the sensors, servo, stepper motor, etc.. I wish they would include some type of camera interface for visual projects. From a beginner's point of view this is an excellent kit. One thing that I found is that the resistors do NOT fit well in the breadboard (due to the diameter of the hole is much bigger than the diameter of the resistors). Maybe they can specify other types of resistors that would fit better.