

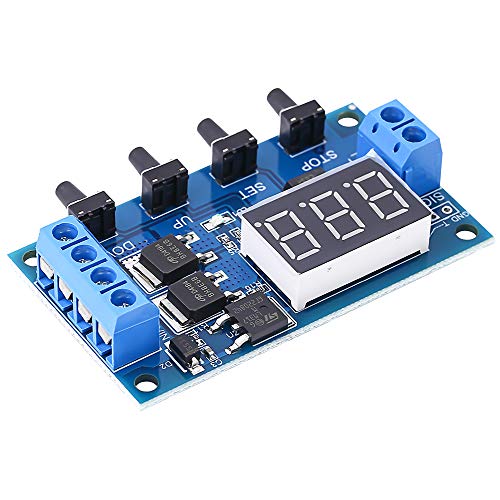
- WIDE VOLTAGE RANG & DUAL MOS OUTPUT: PEMENOL Timer delay operating voltage is DC 5-36V. Dual MOS design support more than 15A 400W output, suitable for most device. ❤️❤️❤️For detailed instructions, see the link: http://attach01.oss-us-west-1.aliyuncs.com/IC/Datasheet/13501.pdf
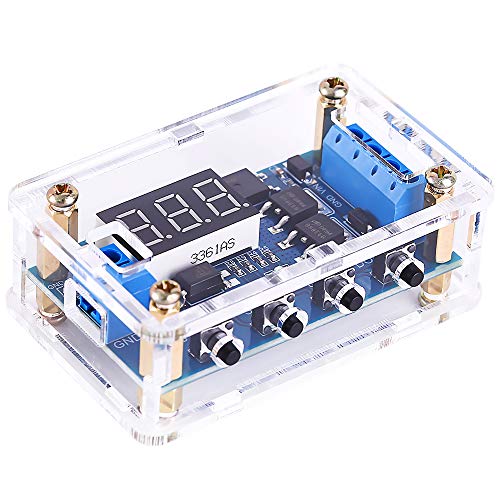
- POWERFUL FUNCTION: Our timer delay module function with timing, delay and cycle control, support high level trigger, achieving unlimited times of fast and frequent turning on/off the circuit. Isolator effectively avoids electromagnetic interference, no sparks and no noise,with longer life. Digital tube display show the current mode and parameters clearly and directly.
- SLEEP MODE WITH POWER OFF MEMORY: Without any operation after 5 mins, the digital tube display will auto off and all options setting could be saved automatically no worry about losing data (Wake up with any button). User can set OP, CL, LOP parameters independently.
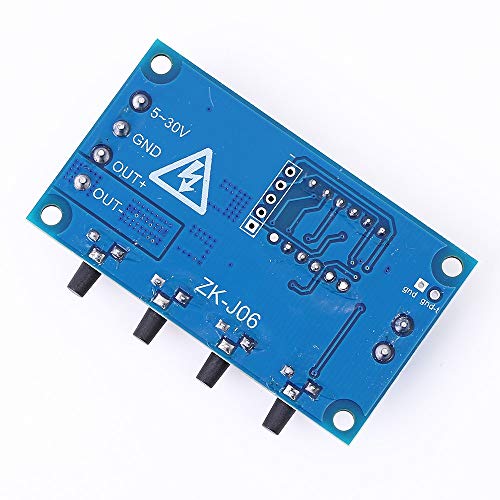
- SAFE USE: Reverse connection protection and Emergency stop function effectively prevents equipment damaged and user hurted as connecting the wrong terminals.
- APPLICATIONS: With time delay switch module, user can easily achieve to control the motor, light bulbs, LED lights, DC motors, micro pumps, solenoid valves, smart home and so on.
-
Information
-
Twitter
-
Pinterest
-
Youtube
-
Facebook
Sonni Hill
Great Product - Very Limited Documentation
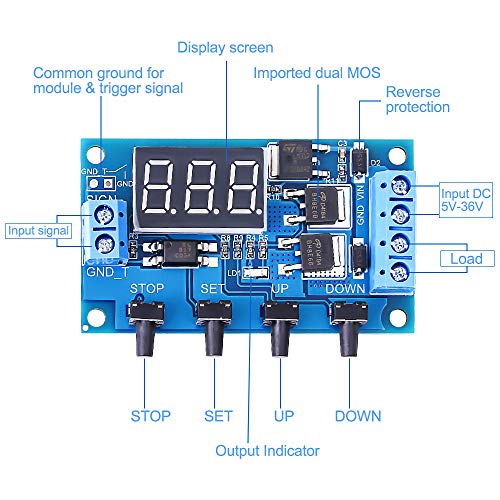
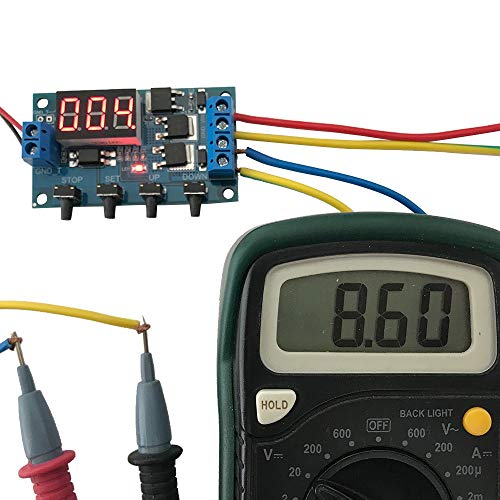
This unit works fantastic. I am using it to control the cleaning tissue on a DIY VHS cleaning machine and I love the flexibility of what you can do with it at the price point. The only downside I see is the lack of documentation and wiring diagrams. The text document they link to in the description is decent but does not detail any of the wiring information. One of the things I wanted to do was use a "Trigger" to activate and deactivate the cycle. After some research and trial and error, I have figured it out. I figured I'd put a diagram together to help other Amazon customers wire the high-level trigger so you don't have to burn hours of research. First, the basic difference between high level and low-level trigger is the way the device is triggered. High Level is triggered by completing a positive wire connection from a power source and a low-level trigger utilizes the ground wire for this; basically grounding out the connection. This is a very basic explanation. See the diagram attached for how to wire the high-level trigger. You can connect the ground wire and positive wire from the trigger to the input power connection on the PEMENOL unit but that is not suggested in the documentation. IMPORTANT NOTE - For the unit to work with the trigger used to activate and deactivate the units cycle you must select the P3.1 setting.
Malcolm King
A versatile and reliable timer for hobby projects
I wanted a way to turn on and off small hobby projects on regular intervals. I came across this kit and got hooked with the simplicity and size initially. Ultimately this is way more versatile than I anticipated, which is a good thing! It comes pre-assembled, and I only needed to put the acrylic case together. It was easy to do, but I did end up breaking a piece, although it was nothing major and it doesn’t affect functionality nor it affects the aesthetics of the kit. This timer is looks and feels very good, the buttons are clicky and the terminals feel very good. Although it claims to support 400W I wouldn’t use it for such high loads. The acrylic case is well done, although I think the tolerances are very tight, I had to force it a bit, and ended up breaking a piece. As a timer, once setup, it works as expected, although there are many modes and it can get confusing initially. It was rather hard to use initially, due to the multiple modes it supports. I just had to slow down things and read the instructions for each mode carefully and then I understood what I needed to do to make it work how I wanted. Mode 3.2 is what I was looking for, which is for setting an on time, off time and loops independently. The other modes use a trigger functionality that seems very interesting and I might use some of those for other projects.
Melissa Huotari Carlson
Great DC Timer Relay w/Trigger
This is a great little DC Timer Relay by PEMENOL. I wrote a quick Arduino sketch and loaded onto my ESP8266 Microcontroller with built in WiFi running on battery connected to the Relay Timer as a trigger also connected to a stepper motor powered through the relay. This was a quick proof of concept to test the relay being triggered through a web page running on the ESP8266 which when clicked would trigger the relay to power the stepper motor. See the video I uploaded. I hope this review helps those wanting a DC Relay that can be triggered by an Arduino at 5v or even an ESP8266 at about 3v.
Carol Johnson Turner
Fun little project - and versatile too!
I got this timer as a test for some of my electronic projects. The reviews stated it is versatile, so I got one to see, and it is. You can set the timer to count down in several different modes. The modes vary according to how you want the output to turn on/off, reset, and loop. I must admit the timer seemed complicated at first until I got the hang of it. Once I figured out the modes and how to set them, it was pretty easy. One thing to mention is that the two pins on the left side (labeled Sign and GND_T are the trigger pins. They require voltage to be applied to start the timer. The case is also nice. I show the pictures with paper still stuck and paper removed. Removing the paper requires a little bit of work, but it looks so shiny once it's all cleaned up. All the pieces fit as they should. Once completed it looks like it belongs in front of your project for all to see. Overall, it's a nice timer with lots of options. I see working for many applications, maybe even science projects because it also looks nice.
Annie Mace
Versatile module
Excellent, versatile timing module! Wanted module to control HVAC auxiliary fan, but soon discovered module has extreme versatility and can handle a wide array of electrical control timing requirements. Auto turbo cool down timer now comes to mind… Packaging with laser cut acrylic pieces is very nice and makes for a more secure/professional assembly. If building the module into a larger assembly/project you may want to relocate terminal blocks to back side of PCB to allow easier integration into a front panel… The only real limitation of this module is that output is derived from the (wide 5-36Vdc) source used to power the module. If AC load control is desired you’ll need appropriate relay (coil voltage matched to power source) to control AC loads. Note: Below ~6.7Vdc the LED display luminous intensity will diminish slightly (not a real issue), but the module is unit is fully functional between 5-36Vdc and can be triggered with inputs between 3-24V. Setup is very straightforward once you get the hang of it and parameters are stored in non-volatile memory. Instructions provided on web link are complete and well written. Totally recommend this module.
Ní Ghallachoir Ellí
Works great with mode 3.2
TLDR: Put it in mode 3.2 to get this to work This was a fun little kit to put together. The PCB came intact and the plexiglass housing needed to be assembled which some would see as tedious but I saw it as fun. Once assembled and powered the unit just sits there waiting for you to do something. I checked the instructions on the Amazon page and had trouble understanding them (bad translations). I saw a review that mentioned mode 3.2. Once I put the timer in mode 3.2 I was able to get it to run on a loop (on for 2 seconds, off for 10). This was exactly what I needed. I wish I knew what else it could do but I'm still giving it 5 stars because it does exactly what I needed it to do.
Ella Belle
Timer relay with advanced features
This timer worked great for me. You can use it as a normal relay timer, or you can input a signal and have more options that way. Check the manual on the Amazon page to see the different modes. It was really easy for me to set up after checking out the manual. Also I have to say that the laser cut enclosure is a great touch and completely surrounds the circuit board. And removing the protection film from the clear pieces was really satisfying as well. Nice circuit to have!
Patricia Pena
Gets An Uncommon Job Done
I'm using one of the timer functions to keep accessories powered up in a car for a couple of minutes after engine shutdown. It's doing that job admirably in an extreme (temperatures above 115 are almost normal this summer in Phoenix) environment.
Mary Wanjiku
Many mode of operations and works great!
The timer relay is well made and works great with 7 modes of operation. No magnetic/mechanical relay, uses solid state relay so no interference.
Audrey Andersen
Great for controlling LEDs
I have a few LED strings that I wanted to turn on and off on a timer and this is perfect for that. Pretty straight forward to connect, directions are helpful. I didn't end up needing the case, but it seems pretty solid.